Quieting A Pendulum Clock Every Night

[Vinnie] has a wonderful old clock from his grandmother; it’s an exquisite antique with a real mechanical movement and a charming set of bells that ring every hour. Unfortunately, those chimes are a bit of a disturbance to neighbors at 2 o’clock in the morning. Previously, [Vinnie] had been stopping the clock every evening, and hoped he would remember to start the pendulum in motion 12 hours later. This was a chore, so he decided to automate the process.

The build is simple and clever; a small stepper motor is mounted in the clock just underneath the pendulum. Every 12 hours, the stepper motor moves a lever and slowly stops the pendulum over the course of a dozen or so seconds, silencing the clock movement. Twelve hours later, the motor turns again setting the pendulum in motion.

The parts count for this build is very low – basically just an ATmega88, a Darlington array to drive the stepper, and a 32.768kHz crystal. We can think of a few friends and relatives with loud clocks in their house, so we might have to build a few of these to give away.

Take a look at the demo video after the break to see how [Vinnie] stops his grandmother’s clock every night.

Continue reading “Quieting A Pendulum Clock Every Night”

Make Your Own Atomic Clock

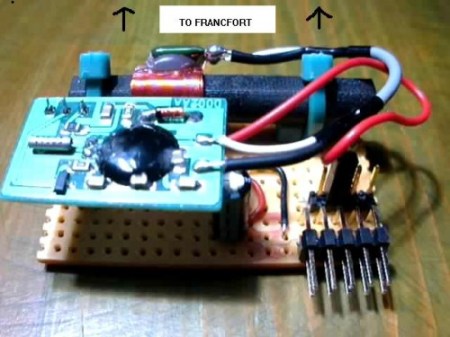
We see plenty of clock projects come through, but usually it is their visual or mechanical design that stands out. The DCF-77 LED PIC clock is fun because it is synchronized with the Atomic clock in Braunschweig Germany. The clock picks up the radio signal at 77.5 KHz known as DCF77, and that’s where it got its name.

The circuit looks surprisingly simple and usually costs less than $30 to build, depending on how you piece it together. You can download the schematics and code from the site, but you may have to do a little research about how to catch the signal from your location. The person who wrote this was located in Europe.

[found via HackedGadgets]

Rolling Digit Clock Is A Wonderful Piece Of Engineering

A long time ago and on a scrounging trip he barely remembers, [Victor] bought a quartet of digits from an old Dutch Railways clock. These antique displays used a strip of plastic coated cloth that rolls around itself with the help of a motor to display the digits 0 through 9. It’s been many years, but [Victor] finally got around to building a clock out of these single digit displays and we’re loving the results.

Because these displays were manufactured in a time when mechanical devices were king, [Victor] had to slightly modify each digit so they could display numbers with the help of a continuous rotation servo. The four servos are controlled by an Arduino – each digit changing one at a time to reduce current consumption – and a magnet and reed switch was added to each digit so the numbers could be repeatedly displayed.

Before [Victor] replaced the plastic servo gears with metal cogs, the clock was quite noisy. He’s since put each digit underneath a bell jar (actually a vase turned upside down), and we’ve got to say that [Victor] has a nice clock on his hands. Check out the videos of the clock changing digits to display the time after the break.

Continue reading “Rolling Digit Clock Is A Wonderful Piece Of Engineering”

Washing Machine Mechanical Timer Replaced With Microcontroller

After the electromechanical timer on [Paul Canello’s] washing machine broke for the third time he decided he needed to stop repairing it and find a more permanent fix. He decided to build his own microcontroller-based system for washing his clothes (translated). Caution: The image links on [Paul’s] page seem to be broken and will unleash a never-ending storm of empty pop-up windows if you click on them. We’ve embedded all of the images after the break to save you some hassle.

The controller on a washing machine is nothing more than a mechanical alarm clock. It starts the cycle, then moves through various modes based on the passage of time. [Paul] started his hack by observing how long the delay between cycles was meant to be, and recording which parts of the machine were switched on and off at each stage.

It turns out that when the mechanical knob is turned, it reroutes how water flows through the detergent chamber. Since that knob won’t be in the new system [Paul] came up with a way for the microcontroller to handle this by using a servo motor. The rest of the control involves relays to control the motor, and solenoid valves for the water. There are also pressure switches that give feedback for the level of the water in the machine. A PIC 16F872 serves as the new controller, with the help of a 7 segment display, a buzzer, and a pair of buttons as the user interface.

This is an older project, but after reading about the Arduino controlled dishwasher [Ramiro] sent us a link. Thanks! Continue reading “Washing Machine Mechanical Timer Replaced With Microcontroller”

LEGO Pendulum Clock

Put a case around it and it would be a grandfather clock but for now it’s a pendulum clock made from LEGO pieces. The video after the break shows a great overview of the build. You can see the workings at several different angles, as well as a clip that has been sped up to show the movement of the weights over time. One weight, made from dead AA batteries, drives the clock and the other weight switches the winding motor. That motor acts to automatically wind the clock when the drive weight reaches the end of its rope.

This is a nice departure from the majority of clock projects we see as it utilizes mechanical concepts instead of electronic. Most of [Pmroskelly’s] build details are shared as comments on the Picasa album found at the link above. There are also some other videos such as the one showing how the escapement works.

Continue reading “LEGO Pendulum Clock”

Atomic Pinball Clock

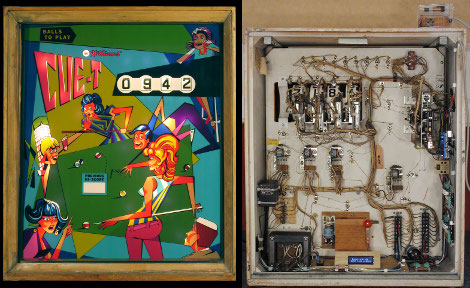
[Mark Gibson] sent us a load of details on his build, a WWVB atomic clock using a pinball machine marquee (PDF). This is the upright portion of an old machine that used electromechanical displays instead of digital electronics. It’s big, noisy, and seeing it running might make you a bit giddy. Luckily he included video that shows it working on both the outside and the inside.

It took a bit of probing to discover the connections for relays that control the display. From there he used optoisolation to drive them with an Arduino. With this hurdle behind him, [Mark] set out to add atomic clock accuracy. He picked up a WWVB module and added it to the mix.

Check out his build log in PDF form linked above. He went out of his way to explain how the original parts work, and the processes he used during prototyping. For more of those juicy details we’ve added a photo gallery and his video after the break.

Didn’t get enough pinball goodness from this project? Check out the this digital gas plasma display pulled and reused from a much more modern pinball machine. Oh, and there’s always Bill Paxton Pinball.

Continue reading “Atomic Pinball Clock”

Alarm Clock Learns New Trick, Opening Doors

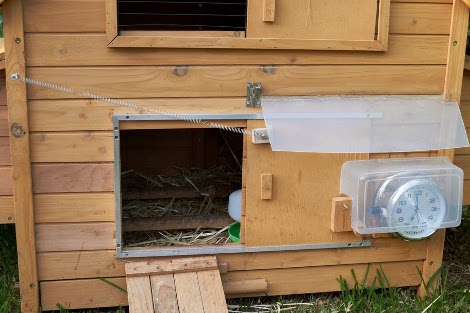
Waking up at 5:30 in the morning. [Mark Stead] didn’t like the idea either when his chickens started crying to be let out. One simple solution obviously is to eat the chickens build an automatic door opener. The mechanism starts out with an old style mechanical alarm clock, add a geared motor with some creative switch work to pull open the door, weather proof the entire thing, and done. [Mark] even modified the setup later to work with vertical doors. No MCU required for either.

Pair this with an automated feeder system, egg gathering and cooking setup, and you’re half way to having your breakfast ready for you when you wake up in the morning – around noon like the rest of us.

[Thanks MS3FGX]