Every filament-based 3D printer you’ll find today heats plastic with resistive heaters – either heater cartridges or big ‘ol power resistors. It’s efficient, but that will only get you so far. Given these heaters can suck down only so many Watts, they can only heat up so fast. That’s a problem, and if you’re trying to make a fast printer, it’s also a limitation.
Instead of dumping 12 or 24 VDC into a resistive heater, induction heaters passes high-frequency AC through a wire that’s inductively coupled to a core. It’s also very efficient, but it’s also very fast. No high-temperature insulation is required, and if it’s designed right, there’s less thermal mass. All great properties for fast heating of plastic.
A few years ago, [SB] over on the RepRap blog designed an induction heater for a Master’s project. The hot end was a normal brass nozzle attached to a mild steel sleeve. A laminated core was attached to the hot end, and an induction coil wrapped around the core. It worked, but there wasn’t any real progress for turning this into a proper nozzle and hot end. It was, after all, just a project.
Finally, after several years, people are squirting plastic out of an induction heated nozzle. [Z], or [Bulent Unalmis], posted a project to the RepRap forums where he is extruding plastic that has been heated with an induction heater. It’s a direct drive system, and mechanically, it’s a simpler system than the fancy hot ends we’re using now.
Electronically, it’s much more complex. While the electronics for a resistive heater are just a beefy power supply and a MOSFET, [Z] is using 160 kHz AC at 30 V. That’s a much more difficult circuit to stuff on a printer controller board.
This could be viewed as just a way of getting around the common 24V limitation of common controller boards; shove more power into a resistor, and it’s going to heat faster. This may not be the answer to hot ends that heat up quicker, but at the very least it’s a very neat project, and something we’d like to see more of.
You can see [Z]’s video demo of his inductive hot end below. Thanks [Matt] for the tip.
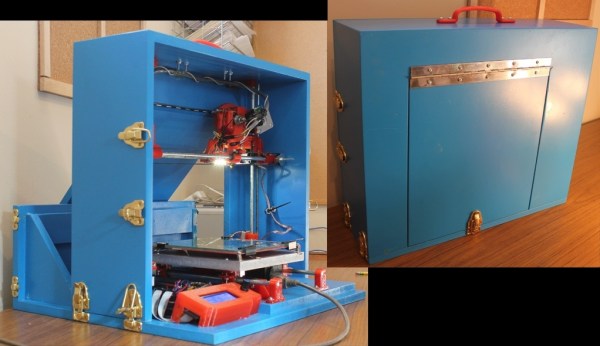
The great thing about RepRaps are that there are so many to choose from! No matter what features or design intent you could want, there is probably a RepRap for that. Even so, there has been a recent addition to the RepRap family. Creator [jlguil] calls it the Case-Rap, and for good reason, the frame of the printer folds up into a suitcase.
The Case-Rap is inspired by the Mendel90 which tries to improve on the original Mendel by replacing the threaded rods for a more rigid sheet material frame with bracing to keep the X, Y and Z axes perpendicular to each other. The Case-Rap goes a little further with the design to have the frame also perform double duty as a travel case.
Check out the video after the break, the printer is actually built in 2 complete separate assemblies. The X and Z axes are mounted in a 4-sided wooded frame. The Y axis and the electronics are mounted on a 2-sided wooden frame. When the frame pieces are latched together in one orientation, they conceal the printer inside a suitcase-sized box. The latch positions were thoughtfully placed so the frame pieces could also be latched together in ‘printer mode’. Setting up and breaking down the printer takes all of 30 seconds.
You may think a super portable printer has to be small… but you’d be wrong. The Case-Rap has a commendable 8x8x8 inch print area. According to [jlguil], the total DIY cost comes in around 350$ CAD, which is not too bad for a 3D printer, and pretty good for one that is unique, portable and capable.
Right now there are two emails in my inbox inviting me to 3D printer conventions. If you’re not familiar with how these cons go, here’s a quick recap: a bunch of 3D printer manufacturers set up their booths the day before, put a printer behind an acrylic enclosure, start a very complex print, and come back the next day. This printer finally completes the print sometime Sunday afternoon, a bunch of people walk by the booths, and the entire venue is filled with enough morose faces as to be comparable to one of the higher circles of hell.
The Midwest RepRap Festival is not this con. It is, to the best of my knowledge, the only 3D printing convention that isn’t a trade show. It’s a blast, it’s March 20th through the 22nd, and we’re going to be there.
This will be our second expedition to the MRRF. Last year we saw 3D printed resin molds, and a strange Core XZ printer from [Nicholas Seward], the mind that brought you the odd Reprap Wally and Simpson. The most interesting man in the universe was there with a Smoothieboard. There were talks on 3D Bioprinting by [Jordan Miller] from Rice University, and everyone ate 3D printed waffles. If you’re looking for the possibilities 3D printing offers, this is the con to go to. If you’re looking for people to sell you stuff, look elsewhere.
This event is organized by the folks at SeeMeCNC, and it will be held on their home turf of Goshen, Indiana. Yes, you will be passing Amish buggies on the way to the event. Even though the MRRF is being held in the middle of nowhere, it was absolutely shocking how many people turned up last year and how good the con was. To put this in perspective, I’m driving nine hours to MRRF, and going to Maker Faire NYC takes me four hours. If I had to choose one 3D printing event to go to, this would be the one. That’s not just because I’m told there will be a t-shirt cannon at MRRF.
The event is free and open to everybody. You can just show up, although it would be a good idea to register. You’ll see the World’s Largest 3D Printed Trash Can. Yes, I’m serious. Call Guinness.
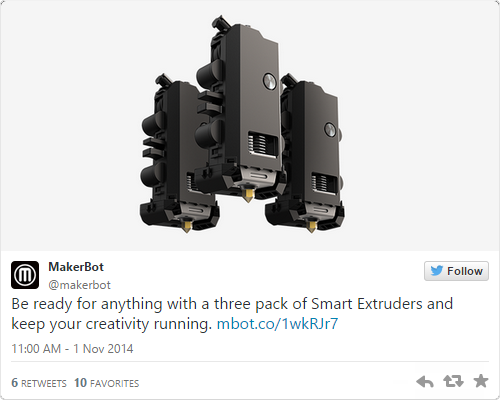
A direct link to Makerbot’s 3-pack of Smart Extruders is very hard to find
It’s been a little over a year since Makerbot introduced their new line of printers, and since then there have been grumblings about the quality of the Smart Extruder that each one of these printers comes with. While there is no 3D printer extruder that will not eventually clog, wear down, or otherwise break, there are reports of the Makerbot Smart Extruder failing in only hundreds or even tens of hours of use. Considering that a single large print can take a dozen or so hours to complete, you can easily see the why the Smart Extruder is so despised and why even the availability of a three-pack of Smart Extruders is a joke in the 3D printing community.
Of course a cheap shot at Makerbot that plays right into your preconceived ideas and prejudices is far too easy. We’re here to solve problems, not just state them, so here’s what we’re working with: to quantify the long-term reliability of 3D printers we need a way to measure the mean time before failure of extruders. This is already a solved problem; it’s just not implemented.
On aircraft and some very expensive engines that power things like buildings and ships, there’s one gauge, tucked away in the control panel, that keeps track of how long the engine has been running. It’s called a hobbs meter, and the idea behind it is extremely simple – when there is power going to the Hobbs meter, it counts out hours on a small clockwork display. The resolution of the display is only tenths of an hour, usually, but that’s good enough for scheduling maintenance and to be mentioned in NTSB accident reports.
Spend enough time with a 3D printer, and you’ll quickly realize the ‘estimated print time’ is merely a ballpark, and with failed prints the ‘total print time for this object’ isn’t exactly a perfect measure of how many hours you’ve been using your extruder. Only by directly measuring how many hours are logged on a hot end or how many kilometers of filament have been sent through an extruder will you ever get an accurate idea of how long an extruder has been running, and how reliable a printer is.
Hobbs meters are available from Mouser, but you’ll be overpaying there. The better option is from a vendor in a different niche; $30 for a meter that can connect directly to the extruder heater. If enough people add this and keep proper logs, there’s a slight chance of improving the state of 3D printers with real data and not the prejudices of people trying to justify their own designs and purchases.
But perhaps that’s too hard; adding a $30 item to a printer’s BOM just for the sake of data is a bit much. Luckily, there’s an even simpler solution that won’t cost a dime. Just measure the time a heater has been on in the firmware, or save the total length of extruded filament in a microcontroller’s EEPROM. Every printer firmware out there, from Marlin to Repetier to Sprinter has in it a way to calculate both the length of time a heater has been on or how much filament has been pushed through a nozzle.
However, this is 3D printing we’re dealing with. An organized community is not a luxury we currently enjoy, and for this to work several things are needed. The first is somewhere to upload failure statistics. This would be a web site, naturally, with the ability to input the printer make, extruder and hot end model, and the time since last clogged nozzle. The website itself is just a database, some JavaScript, a bit of CSS, and some hosting costs; not hard until you consider tens of thousands of operators would have to know about this website and contribute.
Secondly, if we’re not going with mechanical Hobbs meters there would need to be a ‘total time heater on’ or ‘total length of extruded filament’ variable in the various firmwares. There would hopefully be standardized Gcodes or Mcodes to read and reset this variable.
Will this happen? Of course not. Organization isn’t a strong suit of the RepRap project, and any company that implements Hobbs meter functionality will probably lock that up in proprietary obfuscation. However, Makerbot isn’t dumb, and given they’re selling three-packs of extruders, I would bet they have some data on the MTBF of their extruders. A community-based measurement of the most common cause of broken printers is certainly possible, but like all problems it’s one of organization, not technology.
3D Printering is a semi-weekly column that digs deep into all things related to 3D Printing. If you have questions or ideas for future installments please sending us your thoughts.
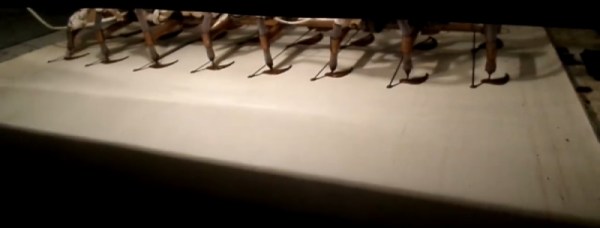
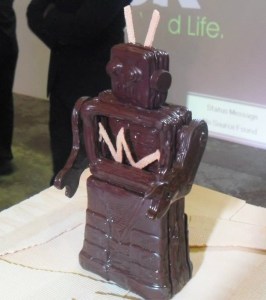
Valentine’s Day is about a month away, long enough for everyone to butcher upgrade their 3D printers to squirt out chocolate. Food printing was a hot item at this year’s CES, but it is hardly new. Before many of you were born [Hans] left his job at the Council for Scientific and Industrial Research to produce chocolate out of his garage in South Africa. This one prints 8 at a time!
Many years before he was extruding lawnmowers from raw pellets, [Hans] built the 8-tentacled Choctopus. He gets away with using only one chocolate pump – from some experience, by far the most challenging component – by simply splitting the ooze pipe with three tiers of T intersections. The whole design is actually patented and revolutionary for 19 years ago but to our readers probably unremarkable.
There is a business lesson here too. Once upon a time the Choctopus was a 3D printer but economic constraints have led to him downgrading to 2D. Any 3D requirements are served from an alternate RepRap. The purpose of an 8-armed printer is to mass produce, but for the price, most clients were only interested in a one-off. The products that pay the bills are the much more affordable 2d extrusions in bulk.
Any of our readers looking to impress their date make lots of money next month, consider this the kick in your pants to get started.
Check out these videos of the Choctopus churning out delicious delicatessens.
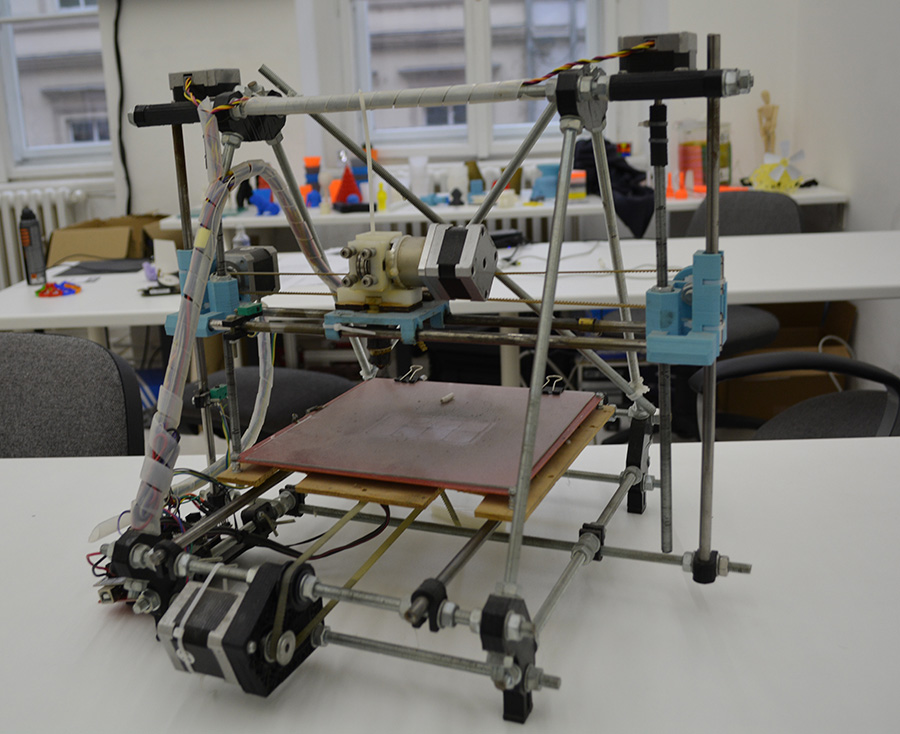
Prices of 3D Printers have certainly been falling quite a bit over the last few years. Even so, it is still, at a minimum, a few hundred dollars to get going in the hobby. [mikelllc] thought it would be a fun challenge to see if he can build a functional 3D printer for under $100.
To stay under his budget, [mikelllc] took a reasonable route and decided to use as many recycled parts as he could. In every DVD and floppy drive, there is a stepper motor, lead screw and carriage that is used to move the read/write head of the drive. These assemblies will be used to drive the 3 axes of the printer. Two DVD drives and one floppy drive were dissembled to access the needed components.
Luckily [mikelllc] has access to a laser cutter. He made the frame from 5mm acrylic sheet stock. All of the pieces have slots and tabs to ease assembly and keep everything straight and square. The motors and frames from the DVD and floppy drives are mounted to the acrylic frame pieces in strategically pre-planned holes. The Y axis is responsible for moving the print bed back and forth. It is mounted on screws so that it can be adjusted to ensure a level bed.
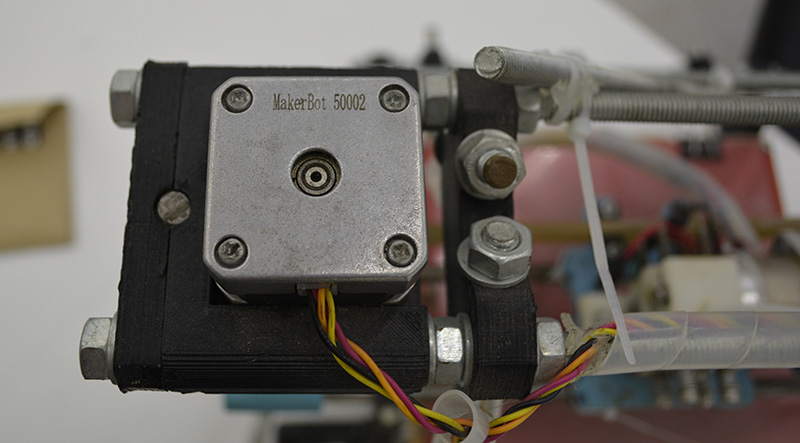
A little DVD drive stepper motor just isn’t powerful enough to be used as an extruder motor so a standard NEMA17 motor was purchased for this task. The motor is part of a MK7/MK8 style direct drive extruder that is made from mostly 3D printed parts. The extruder is mounted on the frame and a bowden tube guides the filament to the hot end mounted to the printer’s moving carriage. Remotely mounting the extruder motor keeps it’s mass off of the axes, which in this case may be too heavy for the small, scavenged drive stepper motors.
The electronics are standard RepRap type and the same with for the hotend. The recycled motors work well with the RepRap electronics. After all that hard work, the printable area is a mere 37mm x 37mm x 18mm, but that’s not the point of this project! [mikelllc] met his goal of building a super cheap printer from recycled parts. He has also made the extruder and laser cut frame files available for download so anyone can follow in his footsteps. If you’re digging this e-waste 3D Printer but want a larger print volume, check out this printer.
The Hackaday European tour continues, this time in Prague with Josef Průša (Google translate), core developer in the RepRap project, feature at all the Maker Faires and cons, and creator of his namesake, the Prusa Mendel and i3 printers.
[Prusa]’s involvement with the RepRap project started with a RepRap Mendel, the second iteration of RepRap hardware, but the first popular and easy to build version. [Jo] found the Mendel rather difficult to build, so he loaded OpenSCAD and started to design his own version of the hardware. This version became the de facto standard RepRap for a few years, with many inspired by and derivative printers making their way to hackerspaces and workshops around the world.
The first Prusa printer, derived from the RepRap Mendel.
A few years ago, [Prusa] was one of the first to make a complete break with the traditional ‘threaded rod and nut’ construction of RepRaps with the introduction of the Prusa i3. This was the first model that had a metal plate as the frame, another feature that would be seen in dozens of other models. It’s not something that was without controversy, either; using a metal plate for the frame doesn’t allow for as much self-replication, something that’s a core value of the RepRap project. That didn’t matter to the community; the Prusa i3 or a similar design is the third most popular printer on 3Dhubs.
The first Prusa printer showing off its Makerbot heritage
What’s the future of the Prusa name? There is an i4 in the works, and I’m pretty sure that’s all I can tell you. Someone already bought the Prusai4 domain, so there may be a name change.
In the interview below, [Prusa] goes over his involvement with the RepRap project, his business, what he considers to be the latest advances in 3D printing for the past year, what the worst things about the 3D printing scene is (it’s Kickstarter), the state of the RepRap project, and thoughts on SLS, DLP, and SLA printing technologies. Video below.


 Many years before he was
 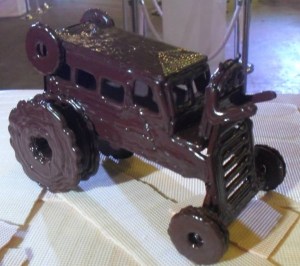 There is a business lesson here too. Once upon a time the Choctopus was a 3D printer but economic constraints have led to him downgrading to 2D. Any 3D requirements are served from an alternate RepRap. The purpose of an 8-armed printer is to mass produce, but for the price, most clients were only interested in a one-off. The products that pay the bills are the much more affordable 2d extrusions in bulk.
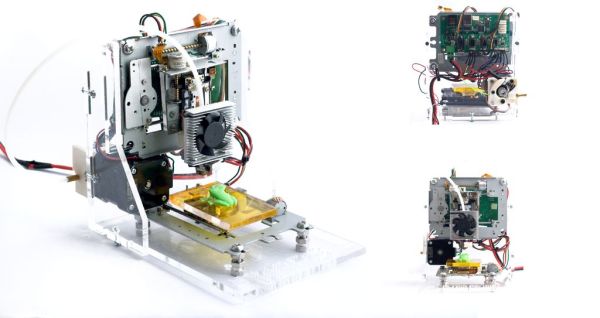
 Luckily [mikelllc] has access to a laser cutter. He made the frame from 5mm acrylic sheet stock. All of the pieces have slots and tabs to ease assembly and keep everything straight and square. The motors and frames from the DVD and floppy drives are mounted to the acrylic frame pieces in strategically pre-planned holes. The Y axis is responsible for moving the print bed back and forth. It is mounted on screws so that it can be adjusted to ensure a level bed.