Is A Diode A Switch?

Many hardware people around these parts will be familiar with devices used as switches, using at least three-terminals to effect this, an input, an output and a gate. Typical devices that spring to mind are bipolar transistors, triacs and and ye olde triode valve. Can you use a diode to switch a signal even if it has only two terminals? Of course you can, and it’s a tried and trusted technique very common in test equipment and circuits that handle RF signals. (Video, embedded below.)

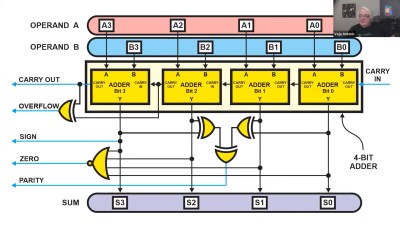
The trick is that diodes block current in one direction but allow it to flow in the other, denoted by the deliberately obvious symbol. So your DC signals can’t swim upstream, but the same isn’t true for AC. Signals can be passed “the wrong way” through a diode by inducing small fluctuations in the current. Put another way, if you bias the diode into conduction, changes in the downstream voltage level result in changes in the current flowing through the diode, and the (smaller) AC signal gets through. But if you take away the bias, by turning off the DC bias voltage source, the diode switches back to non-conducting, blocking the signal. And that makes a diode a DC controlled switch for AC signals.

While [IMSAI Guy] demonstrates this with a signal diode, as he explains, one would typically use a PIN diode, which has an extra intrinsic (undoped) region between the P and the N, allowing the device to fully turn off, reducing leakage significantly.

Of course, we’ve covered diodes many times from different angles, there is always something to learn. Checkout how high voltage diodes are constructed, diodes detecting ionising radiation, and finally this great series about our new favourite two-terminal device.

See, the humble diode can be fun after all!

Continue reading “Is A Diode A Switch?”

Klein Hidden Bolt and Tool

Tricky Screw Heads Have Disappearing Slots

Perhaps you’ve seen them, demonstrations of a machined piece of metal that upon further inspection is actually two pieces machined so perfectly that they appear as one. With extremely tight tolerances, it’s not possible to determine where one piece of metal ends and another begins — that is, until the secret is revealed. Inspired by such pieces of art, [Andrew Klein] sought to put this high level of machine work to practical use. And so it was that his as-yet-unnamed Screw With No Slot came to be.

Klein Hidden Bolt depressed by brass rod
A brass rod pushes down to reveal the keyed center section.

The screw’s disc-like appearance looks as if it’s a metal trim piece to cover a bolt hole. But in the video below [Andrew] shows us the trick, pushing a brass rod into the middle of the disc to reveal the hidden three-point slot. The center of the disk is actually a separate bit of finely machined metal that is spring loaded to stay flush. A specially designed wrench keys into the rounded concave triangle shape cut into the face.

The wrench is made with brass to avoid marring the precision surface. It uses three magnets to hold tight to the screw’s 410 magnetic stainless steel. [Andrew] didn’t spill the beans on how this was done, but we haven’t seen any process other than electrical discharge machining (EDM) that can achieve this level of mating precision. If that topic is new to you, we recommend checking out [Ben Krasnow’s] lab experiments on the topic.

We can’t help but be taken in by the beauty of the fastener, and it immediately sent our imaginations into a National Treasure induced dream-like state. [Andrew Klein] has yet to name this fastener, and he’s soliciting ideas for names in the video below the break. If you have such an idea, you can comment on his video. He’s also exploring the viability of the as-yet-named fastener as a commercial product for high end furniture builders.

This is not the first time we’ve featured [Andrew Klein]’s work. His previous featured projects include a custom sawblade for perfectly foldable joints and an unveiling of the magnetic magic behind switchable permanent magnets. Be sure to submit the neat hacks, builds, and inspiring projects that you come across to our Tip Line!

Continue reading “Tricky Screw Heads Have Disappearing Slots”

A sandbox for ergonomic keyboard makers.

Dactyl Chimera Leaves The Learning Out Of The Curve

Have you been wanting to build your own keyboard, ergonomic or otherwise, but are hesitant to spend all that time and filament on something that may not be a good fit for your hands? Glad as we are that the dactyl is open-source, to get in there and really mess around with it requires intimate knowledge of either OpenSCAD or Clojure.

Well, not anymore. [WolfIcefang]’s dactyl chimera is an ergo sandbox, a test bench for column curvature, stagger, and height that should keep you from having to iterate all day and night. It was designed in FreeCAD and has three parts — the rack, the tenting foot, and the arches. The rack acts like a bottom plate and has slots for holding the columns (arches) in place. Underneath that is the tenting foot, which changes the lateral inclination. Thirdly are the arches, the business part where the switches go.

[WolfIcefang] says it’s sturdy but not portable, and for some reason feels the need to apologize for the looks. We think it’s beautiful, but then again are easily captivated by such practicality. It’s not quite a keyboard yet, as [WolfIcefang] has neither wired it up nor burned in any firmware. This is still in the early stages, and [WolfIcefang] wants to open it up to collaborators. Plans for the future include interchangeable thumb clusters and a complete build guide.

Even if you aren’t that fluent in OpenSCAD, you’ll have fun messing around on the keycap modeling playground.

Via r/ErgoMechKeyboards

Capacitive Touch Controller For FPGAs

Most projects that interface with the real world need some sort of input device. Obviously this article is being written from a standardized “human interface device” but when the computers become smaller the problem can get more complicated. We can’t hook up a USB keyboard to every microcontroller since we often only need a few buttons, but even buttons can be a little bit too cumbersome for some applications. For something even simpler, we would like to turn your attention to capacitive touch controllers.

Granted, these devices are really only simpler from a hardware perspective. Rather than a switch that can be prone to failure either when its moving parts break or its contacts become corroded, a capacitive touch button only needs a certain conductive area on something like a PCB, along with a few passive components, to work. The real difficulty is in the software, so this project aims to make it simpler to bring these sort of devices to any FPGA that needs some sort of interface like this. It can operate in stand-alone mode or in a custom user interface, and was written to be platform-independent in VHDL without the need for any dependencies or macros.

The project’s page goes into a great amount of detail on how capacitive touch sensors like these work in general, and describes the operation of this specific code as well. Everything is open source, so it’s ready to be put to work right away. If you need capacitive touch capabilities on something like a microcontroller, though, take a look at this tiny Atmel-powered musical instrument instead.

Bring That Old Hi-Fi Into The 2020s

It’s a distressing moment for some of us, when a formerly prized piece of electronic equipment reaches a point of obsolescence that we consider jettisoning it. [Jon Robinson] ran into this dilemma by finding the Kenwood Hi-Fi amplifier his 17-year-old self had spent his savings on. It was a very good amp back in the day, but over two decades later, it’s no longer an object of desire in a world of soundbars and streaming music boxes. After a earlier upgrade involving an Arduino to auto-power it he’s now given it an ESP32 and an i2S codec which performs the task of digital audio streaming as well as a better job than the Arduino of controlling the power.

Inside the case is a piece of stripboard with the ESP and codec modules, but there was still the problem of seamlessly integrating it with the amp’s distinctly analogue-era controls. The output from the codec is wired into an audio input – quaintly labelled for a DAT player – and a simple cam on the input selector switch operates a microswitch to select the ESP32.

If you’re dipping your toe in decent audio then an old amp from decades past can make an excellent purchase, but you might wish to educate yourself through our Know Audio series.

This Arduino Terminal Does All The Characters

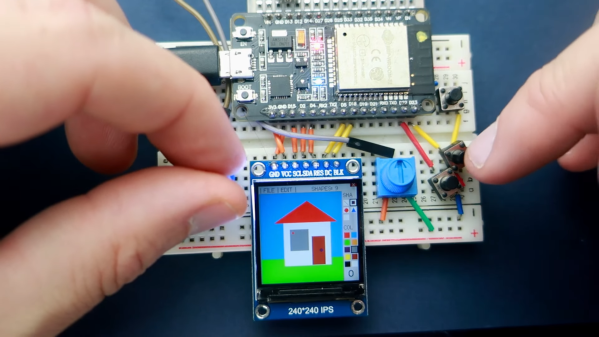
The job of a dumb terminal was originally to be a continuation of that performed by a paper teletype, to send text from its keyboard and display any it receives on its screen. But as the demands of computer systems extended beyond what mere ASCII could offer, their capabilities were extended with extra characters and graphical extensions whose descendants we see in today’s Unicode character sets and thus even in all those emojis on your mobile phone. Thus a fully-featured terminal has a host of semigraphics characters from which surprisingly non-textual output can be created. It’s something [Michael Rule] has done some work on, with his ILI9341TTY, a USB serial terminal monitor using an Arduino Uno and an ILI9341 LCD module that supports as many of the extended characters as possible.

A graph, entirely in Unicode characters.

It’s fair to say that most of us who regularly use a terminal don’t go far beyond the ASCII, as it’s likely that a modern terminal will sit in a window over a desktop GUI. So even if you have little use for a hardware terminal monitor there’s still plenty of interest to be found in those rarely-seen character sets. Our favourite is probably the Symbols for Legacy Computing, an array of semigraphics characters that may be familiar to readers who have used an 8-bit home computer or two. He includes a graph example using these characters coloured with ANSI escape codes, and it’s certainly not what you expect from a terminal.

If microcontroller terminals capture your interest, this isn’t the first we’ve brought you.

Line of electromechanical water valves dispensing a pattern of water droplets

Gravity-Defying Water Drop Display Shows Potential

[3DPrintedLife aka Andrew DeGonge] saw that advert for gatorade that shows some slick stop-motion animation using a so-called ‘liquid printer’ and wondered how they built the machine and got it to work so well. The answer, it would seem, involves a lot of hard work and experimentation.

Conceptually it’s not hard to grasp. A water reservoir sits at the top, which gravity-feeds into a a series of electromechanical valves below, which feed into nozzles. From there, the timing of the valve and water pressure dictate the droplet size. The droplets fall under the influence of gravity, to be collected at the bottom. From that point it’s a ‘simple’ matter of timing droplets with respect to a lighting strobe or camera shutter and hey-presto! instant animation.

As will become evident from the video, it’s just not as easy as that. After an initial wobble when [Andrew] realised that cheap “air-only” solenoids actually are for air-only when they rusted up, he took a slight detour to design and 3D print his own valve body. Using a resin printer to produce fine detailed prints, enabled the production of small internal passages including an ‘air spring’ which is just a small chamber of air. After a lot of testing, proved to be a step in the right direction. Whether this could have been achieved with an FDM printer, is open to speculation, but we suspect the superior fine detail capabilities of modern resin printers are a big help here.

In a nice twist, [Andrew] ripped open and dissolved a fluorescent marker pen, and used that in place of plain water, so when illuminated with suitably triggered UV LED strips, discernable animation was achieved, with an eerie green glow which we think looks pretty neat. All he needs to do now is upgrade the hardware to make a 3D array with more resolution, and he can start approaching the capability of the thing that inspired him. Work on some custom electronics to drive it has started, so this is one to watch in the coming months!

We’ve seen many water-based display device before, like this one that projects directly onto a thin stream of water, and this strangely satisfying hack using paraffin and water, but a full 3D Open Source display device seems elusive so far.

All project details can be found on the associated GitHub.

Continue reading “Gravity-Defying Water Drop Display Shows Potential”