FTDI Drivers Break Fake Chips, Again

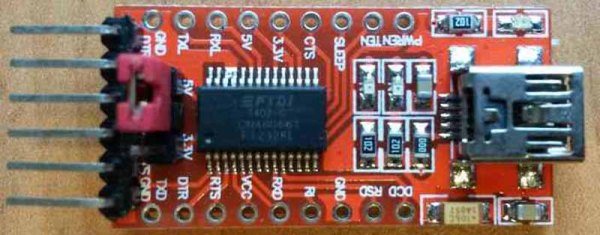
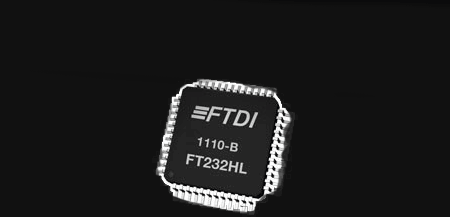
Just over a year ago, FTDI, manufacturers of the most popular USB to serial conversion chip on the market, released an update to their drivers that bricked FTDI clones. Copies of FTDI chips abound in the world of cheap consumer electronics, and if you’ve bought an Arduino for $3 from a random online seller from China, you probably have one of these fake chips somewhere in your personal stash of electronics.

After a year, we have the latest update to FTDI gate. Instead of bricking fake chips, the latest FTDI drivers will inject garbage data into a circuit. Connecting a fake FTDI serial chip to a computer running the latest Windows driver will output “NON GENUINE DEVICE FOUND!”, an undocumented functionality that may break some products.

FTDI gate mk. 1 merely bricked fake and clone chips, rendering them inoperable. Because fakes and clones of these chips are extremely common in the supply chain, and because it’s very difficult to both tell them apart and ensure you’re getting genuine chips, this driver update had the possibility to break any device using one of these chips. Cooler heads eventually prevailed, FTDI backed down from their ‘intentional bricking’ stance, and Microsoft removed the driver responsible with a Windows update. Still, the potential for medical and industrial devices to fail because of a random driver update was very real.

The newest functionality to the FTDI driver released through a Windows update merely injects unwanted but predictable data into the serial stream. Having a device spit out “NON GENUINE DEVICE FOUND!” won’t necessarily break a device, but it is an undocumented feature that could cause some devices to behave oddly. Because no one really knows if they have genuine FTDI chips or not – this undocumented feature could cause problems in everything from industrial equipment to medical devices, and of course in Arduinos whose only purpose is to blink a LED.

Right now, the only option to avoid this undocumented feature is to either use Linux or turn off Windows Update. Since the latter isn’t really a great idea, be prepared constantly roll back the FTDI driver to a known good version.

Unbricking A Counterfeit FTDI Chip

If you haven’t been paying attention, FTDI, makers of one of the most popular USB to UART chips out there, really screwed up last October. They released a driver to Microsoft that would brick unauthorized clones of their chip by setting the USB PID pair to zero. This renders the chip unusable by any computer. That Windows driver has been fixed by now, but there’s probably still a good number of bricked FTDI chips out there. [Tony G] figured out how to fix it, and it only requires a few lines in the console of a proper OS.

The bricking Windows driver worked by setting the USB PID on fake chips to 0000. Luckily, there are ways to reprogram these chips. [Mark Lord] released a set of tools that will reset the USB PID. This unbricks the chip, fixing whatever device it’s attached to. It’s also a great reminder to either update or roll back your Windows drivers.

FTDI Screws Up, Backs Down

A few days ago we learned chip maker FTDI was doing some rather shady things with a new driver released on Windows Update. The new driver worked perfectly for real FTDI chips, but for counterfeit chips – and there are a lot of them – the USB PID was set to 0, rendering them inoperable with any computer. Now, a few days later, we know exactly what happened, and FTDI is backing down; the driver has been removed from Windows Update, and an updated driver will be released next week. A PC won’t be able to communicate with a counterfeit chip with the new driver, but at least it won’t soft-brick the chip.

Microsoft has since released a statement and rolled back two versions of the FTDI driver to prevent counterfeit chips from being bricked. The affected versions of the FTDI driver are 2.11.0 and 2.12.0, released on August 26, 2014. The latest version of the driver that does not have this chip bricking functionality is 2.10.0.0, released on January 27th. If you’re affected by the latest driver, rolling back the driver through the Device Manager to 2.10.0.0 will prevent counterfeit chips from being bricked. You might want to find a copy of the 2.10.0 driver; this will likely be the last version of the FTDI driver to work with counterfeit chips.

Thanks to the efforts of [marcan] over on the EEVblog forums, we know exactly how the earlier FTDI driver worked to brick counterfeit devices:

ftdi_evil

[marcan] disassembled the FTDI driver and found the source of the brick and some clever coding. The coding exploits  differences found in the silicon of counterfeit chips compared to the legit ones. In the small snippet of code decompiled by [marcan], the FTDI driver does nothing for legit chips, but writes 0 and value to make the EEPROM checksum match to counterfeit chips. It’s an extremely clever bit of code, but also clear evidence FTDI is intentionally bricking counterfeit devices.

A new FTDI driver, presumably one that will tell you a chip is fake without bricking it, will be released next week. While not an ideal outcome for everyone, at least the problem of drivers intentionally bricking devices is behind us.

Watch That Windows Update: FTDI Drivers Are Killing Fake Chips

The FTDI FT232 chip is found in thousands of electronic baubles, from Arduinos to test equipment, and more than a few bits of consumer electronics. It’s a simple chip, converting USB to a serial port, but very useful and probably one of the most cloned pieces of silicon on Earth. Thanks to a recent Windows update, all those fake FTDI chips are at risk of being bricked. This isn’t a case where fake FTDI chips won’t work if plugged into a machine running the newest FTDI driver; the latest driver bricks the fake chips, rendering them inoperable with any computer.

Reports of problems with FTDI chips surfaced early this month, with an explanation of the behavior showing up in an EEVblog forum thread. The new driver for these chips from FTDI, delivered through a recent Windows update, reprograms the USB PID to 0, something Windows, Linux, and OS X don’t like. This renders the chip inaccessible from any OS, effectively bricking any device that happens to have one of these fake FTDI serial chips.

Because the FTDI USB to UART chip is so incredibly common,  the market is flooded with clones and counterfeits. it’s very hard to tell the difference between the real and fake versions by looking at the package, but a look at the silicon reveals vast differences. The new driver for the FT232 exploits these differences, reprogramming it so it won’t work with existing drivers. It’s a bold strategy to cut down on silicon counterfeiters on the part of FTDI. A reasonable company would go after the manufacturers of fake chips, not the consumers who are most likely unaware they have a fake chip.

The workaround for this driver update is to download the FT232 config tool from the FTDI website on a WinXP or Linux box, change the PID of the fake chip, and never using the new driver on a modern Windows system. There will surely be an automated tool to fix these chips automatically, but until then, take a good look at what Windows Update is installing – it’s very hard to tell if your devices have a fake FTDI chip by just looking at them.

Galvanic Isolated FTDI Board Saves Your USB Ports

Isolated FTDI circuitg

We work with some dangerous circuits in the pursuit of cool hacks. High voltage, high current, all demand some respect. We can protect our bodies easily enough, but what about that fancy new laptop or Macbook? [David] is here to help with his isolated versatile FTDI circuit.

Our computers are often wired directly into the circuits we’re hacking on. In days past that might have been a parallel or serial port. Today it’s almost always USB, specifically serial over USB. USB has some safety features built-in, such as current limiting. However, it isn’t too hard to blow up a USB port, or even a motherboard with high voltage. Galvanic isolation is a method of removing any electrical connection between two circuits. Connections can still be made through optical, magnetic, or capacitive methods, just to name a few. One of the simplest methods of galvanic isolation is the humble optocoupler.

Isolating a high-speed USB connection can get somewhat complex. [David] wisely chose to isolate things on the serial side of the FTDI USB to serial converter. He started with SparkFun’s open source FTDI Basic Breakout. Galvanic isolation is through either an Analog Devices ADuM 1402 or ADuM 5402. The 1402 needs a bit of power on the isolated side, while the 5402 includes an isolated DC/DC converter to provide up to 60mA.

[David] didn’t just stop at galvanic isolation. He also added ESD protection, over current protection, and multiple options which can be selected when the board is built. Nice work [David]! Now we don’t have to worry about our laptop frying when we’re blowing up wires.

Make A Simple O-scope With A FTDI Board And A Couple Of ADC’s

[RandomTask] has posted a nice tutorial on how to use a FTDI serial to usb converter, and a couple analog to digital converters to make a simple software oscilloscope. Using a “Universal Serial to USB converter” and one of many FTDI break out boards, he first reprograms the chip using FTDI’s programming software to put the device into a FIFO (first in first out) mode.

From there a pair of ADC0820 8 bit digital to analog converters are wired up, and input is fed to a couple 555’s for testing. It should be noted that there is no input protection, so things like voltages above 5 volts, or negative voltages are a big no-no with this setup. It still could be very handy while working with micro controllers or other digital circuits.

Data is then sent to the computer and displayed using a VB.net program, which has some basic features like scale and triggering, but also contains a couple bonuses like Calc Freq and Calc V delta calculation.

Many people have these little serial to usb converters, and might be in need of a simple scope. If you’re one of them, then you can cobble this together pretty darn quickly, and cheaply.

Using An Arduino Or Seeeduino For Its FTDI Chip

We think of the Arduino as a rapid prototyping tool but we never thought of it as an FTDI breakout board before. [Ihsan Kehribar] wrote a quick post to show how it’s done. You’ll find an FTDI chip on Arduino boards that have a USB connector. It’s used to handle the USB communications on one side, and TTL serial communications on the other. The serial pins from the chip are mapped to the UART on the AVR chip, and in turn they appear on the pin headers for easy connections. Just load up a really simple sketch(available from Ihsan’s post) to make sure the processor doesn’t get in the way and you’ve got yourself an FTDI breakout board. If you happen to have a Seeeduino there’s even more functionality as the board has a selector switch that allows you to choose between 5V and 3.3V levels.

This doesn’t hold true to the newest generation of Arduino, as those board have replaced the FTDI chip with an ATmega8U2. That’s basically and ATmega8 with native USB handling… fancy.

[Thanks Marcus]