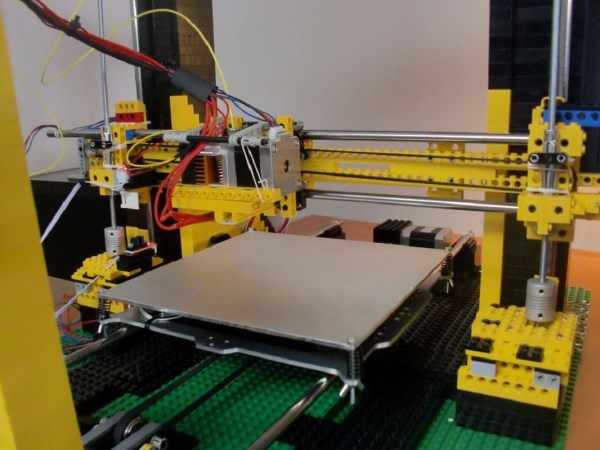
[Gosse Adema] made his very first instructable by detailing his Lego 3D printer build. It’s Prusa i3 based, and originally started out as an A4 plotter with repurposed steppers out of an old HP printer. After upgrading to some NEMA 17 steppers, it became a full-blown 3D printer.
It turns out that NEMA 17 stepper mounting holes align perfectly with Lego, making it super easy to mount them. Check out this Lego ‘datasheet’ for some great details on measurements.
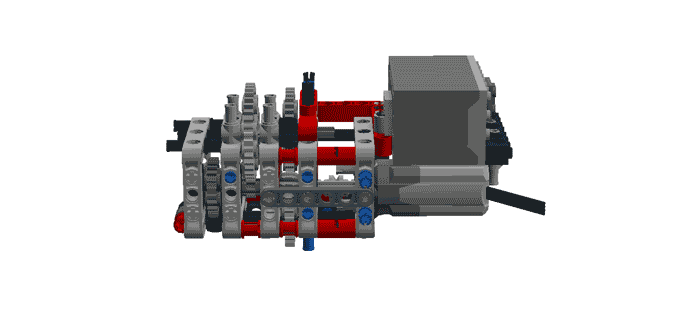
The brains of the printer are occupied by Marlin running atop a Atmega 2560, and Pronterface for the PC software. He tops it off with a Geeeteck built MK8 extruder boasting a 0.3 mm nozzle that accepts 1.75 mm filament.
As with almost any DIY 3D printer build, his first prints didn’t turn out so well. After adjusting the nozzle and filament size in the software, he started to get some good results. Be sure to check out the video below to see this Lego 3D printer in action.
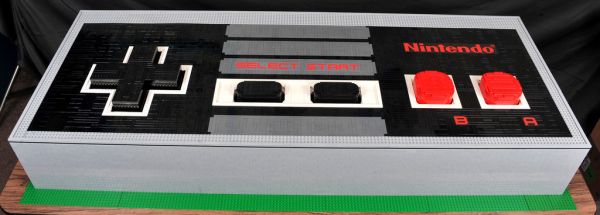
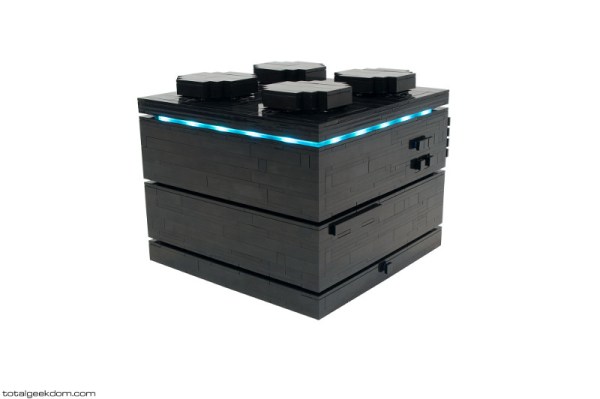
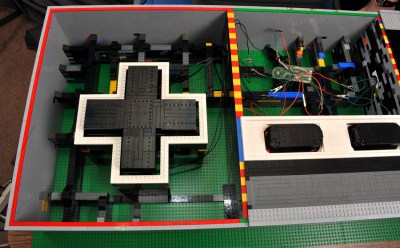 The four main sides of the controller case are standard stacked grey LEGO bricks. The inside of the case is mostly hollow, only with some supporting structures for the walls and buttons. The top is made from 4 individual LEGO panels that can be quickly and easily removed to access the interior components. The large LEGO buttons slide up and down inside a frame and are supported in the ‘up’ position care of some shock absorbers from a Technic Lego set. The shocks create a spring-loaded button that, when pressed down, makes contact with a momentary switch from Radio Shack. Each momentary switch is wired to a stock NES controller buried inside the large replica. The stock controller cord is then connected to an NES-to-USB adapter so the final product works with an NES Emulator on a PC.
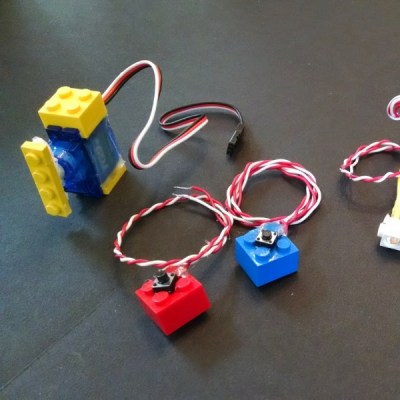 The core of the project is the
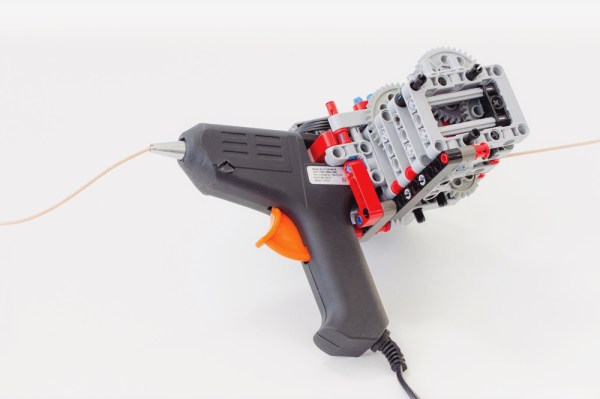
 Using standard LEGO parts he was able to build an attachment for the hot glue gun to feed the 3mm diameter biodegradable filament through the nozzle. He’s uploaded the


