Lego Technic Mechanical Seven Segment Display

TeemingColdDiplodocus

Here’s a rather mesmerizing piece of Lego genius, displayed as a .GIF for your enjoyment. It’s a 7-segment display that is completely mechanical!

Built by [aeh5040], this beauty features 7 separate linkages that control each display segment. It’s powered off of a single motor which rotates a cylinder covered in small protrusions, similar to how music boxes work. As the cylinder rotates, the protrusions knock the main drive gears back and forth, flipping each segment between the ON and OFF states through a series of axle joints and bevel gears.

It makes rather satisfying sounds too!

Continue reading “Lego Technic Mechanical Seven Segment Display”

view of front and back

Hands-On DEFCON 22 Badge

It took a measly 2-hours in line to score myself entry to DEFCON and this nifty badge. I spent the rest of the afternoon running into people, and I took in the RFIDler talk. But now I’m back in my room with a USB cord to see what might be done with this badge.

First the hardware; I need a magnifying glass but I’ll tell you what I can. Tere are huge images available after the break.

  • Parallax P8X32A-Q44
  • Crystal marked A050D4C
  • Looks like an EEPROM to the upper right of the processor? (412W8 K411)
  • Something interesting to the left. It’s a 4-pin package with a shiny black top that has a slightly smaller iridesent square to it. Light sensor?
  • Tiny dfn8 package next to that has numbers (3336 412)
  • Bottom left there is an FTDI chip (can’t read numbers)
  • The DEFCON letters are capacitive touch. They affect the four LEDs above the central letters.

I fired up minicom and played around with the settings. When I hit on 57600 8N1 I get “COME AND PLAY A GAME WITH ME”.

Not sure where I’m going from here. I don’t have a programmer with me so not sure how I can make a firmware dump. If you have suggestions please let me know in the comments!

Continue reading “Hands-On DEFCON 22 Badge”

Easy To Build Solar Pool Heater Saves Money And Keeps You From Freezing

For those cool summer days it’s sometimes nice to have a heated pool — but usually pretty expensive too. Looking for a simpler solution [Martin] came up with his own solar pool heater for under $100!

He’s copied the basic design of a solar pool heater but managed to do it using fairly cheap parts from the hardware store. It consists of three 100′ lengths of 1/2″ drip irrigation hose, and the way he’s connected them is rather ingenious. Using a half inch piece of copper pipe and a blow torch, he was able to squeeze the pipe into one hose end and then the other for a permanent seamless connection. He then coiled the resulting hose into a large circle by interweaving string back and forth to keep its shape.

A 12V utility pump coupled with a timer allows water to sit in the hose under the sun for one hour, at which point it cycles the system for 10 minutes, pumping the warm water into the pool, and refilling itself with cool water from the bottom of the pool. This one is only made for a small above ground pool, but the design could easily be doubled or even tripled for larger pools. You could also throw in a PID temperature controller or even an Arduino to make it even better… but it sounds like it works quite well by itself with a timer.

Combine this with a compost-based hot water system for indoors and you’ll really be cutting the expense associated with your hot water needs!

Nerds Helping Sea Turtles

Sea Turtle Nest Monitoring Device

Life as a sea turtle can be rough. Not only are turtles trying to survive predators, destruction of habitat, fishing nets, and pollution, but only about 1% of hatchlings survive to face those challenges in the first place. Enter [Samuel Wantman] and a new volunteer hacker group called Nerds Without Borders, with their first order of business of creating an egg-shaped monitoring device for sea turtle nests.

Sea turtles are protected under the Endangered Species Act, which goes to great lengths to protect certain species from human activity. The ultimate goal of the project is to help people and sea turtles better coexist under this law by more accurately predicting hatching times. A suite of sensors and a cell network antenna are placed in a plastic “egg” that can be buried in a nest after a sea turtle lays the real eggs. The sensors detect vibrations within the eggs as the embryos grow, which is an indication that the tiny turtles are about to break free of their eggs and head for the open ocean!

Click past the break for more on this project.

Continue reading “Nerds Helping Sea Turtles”

Dots And Dashes… On A Roll!

morse code device

Morse code was once a staple of the communications industry, but with advancing technology it has become relegated almost exclusively to movies and a niche group of ham radio operators. [Jan] has created a device which might not put a stop to this trend, but will at least educate children on the basics of how Morse code works by visually displaying Morse code as it’s generated.

The setup is fairly simple. An old momentary switch (which could easily be used in an actual Morse code setup) activates two pieces of circuitry. The first is a 555 timer circuit that creates an audible tone when the switch is pressed so the user can hear exactly what an operator would hear when decoding a real Morse code message.

The second piece of circuitry is where the real genius lies: a continuously spinning roll of glow-in-the-dark tape is placed in front of a white LED. When the switch is pressed, the LED turns on, which produces dots and dashes on the roll of tape as it passes by. This eliminates the need for rolls of paper or a more complicated moving pen/pencil setup to draw on the paper which might also be less child-proof.

While [Jan] built this as a toy, the children who used it thoroughly enjoyed it! They even decoded some Morse code messages and used the device to practice on it. After a while they’ll easily be able to master the Morse code trainer!

Parallax Propeller 1 Goes Open Source

OpenPropellerProjectOpenSourceProp1Banner

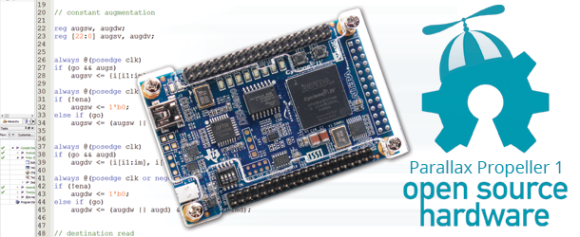
Parallax has embraced open source hardware by releasing the source code to its Propeller 1 processor (P8X32A). Designed by [Chip Gracey] and released in 2006, the 32-bit octal core Propeller has built up a loyal fan base. Many of those fans have created development tools for the Propeller, from libraries to language ports. [Ken, Chip], and the entire Parallax team have decided to pay it forward by releasing the entire source to the Propeller.

The source code is in Verilog and released under GNU General Public License v3.0. Parallax has done much more than drop 8-year-old files out in the wild.  All the configuration files necessary to implement the design on an Altera Cyclone IV using either of two different target boards have also been included. The DE0-Nano is the low-cost option. The Altera DE2-115 dev board is more expensive, but it also can run the upcoming Propeller 2 design.

The release also includes sources for the mask ROM used for booting, running cogs, and the SPIN interpreter. [Chip] originally released this code in  2008. The files contain references to PNut, the Propeller’s original code name.

We’re excited to see Parallax taking this step, and can’t wait to see what sort of modifications the community comes up with. Not an Altera fan? No problem – just grab the source code, your favorite FPGA tools, and go for it! Starved for memory? Just add some more. 8 cogs not enough? Bump it up to 16.  The only limits are the your imagination and the resources of your target device.

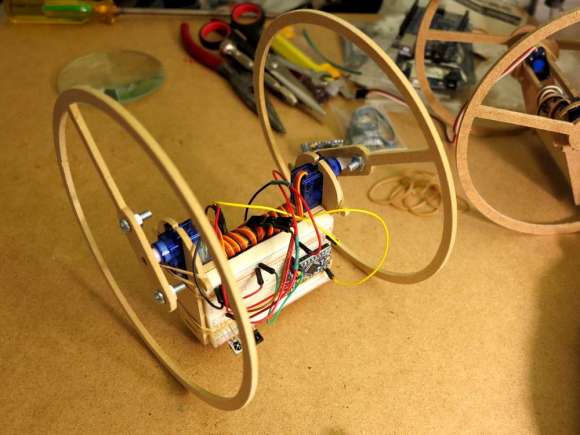
Interested in hacking on a real Propeller? If you’re in Las Vegas, you’re in luck. A Propeller is included on each of the nearly 14,000 badges going to DEFCON 22 attendees. While you’re there, keep an eye out for Mike and The Hackaday Hat!

Rolly Bot Puts A New Spin On Independent Wheel Control

rolly bot

All of [Darcy]’s friends were making wheeled robots, so naturally, he had to make one too. His friends complicated theirs with h-bridges and casters for independent wheel maneuvering, but [Darcy] wanted something simpler. A couple of 9g servos later, the Rolly Bot was born.

Rolly Bot is self-balancing because of its low center of gravity. Should it hit a wall, the body will flip over, driving it back in the other direction. The BOM comes to a whopping $10, and that includes continuous rotation servos. It does not include the remote control capability he added later, or the cost of the CNC you would need to completely replicate this build. He even made a stand so he could test the wheels during programming.

[Darcy]’s code is on his site along with some pictures of another version someone else built. Watch Rolly Bot roll around after the jump.

How would you make this build even simpler? Tell us in the comments.

Continue reading “Rolly Bot Puts A New Spin On Independent Wheel Control”