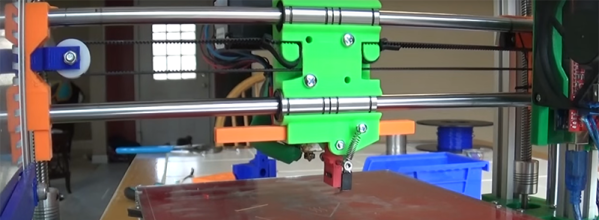
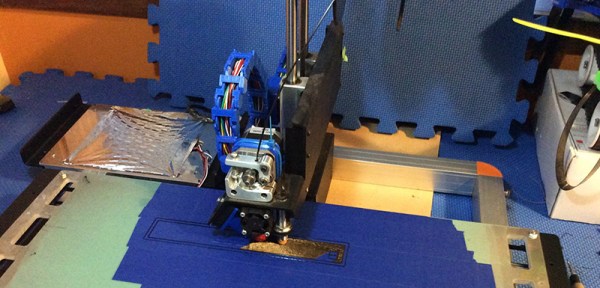
Turn Your Laser Cutter Into An SLS 3D Printer

Filament style 3D printers are great, but typically are rather size limited. Laser sintering printers offer huge print beds, but also come with quarter million dollar price tags. What are we supposed to do? Well, thanks to OpenSLS, it might just be possible to turn your laser cutter into your very own SLS 3D printer.

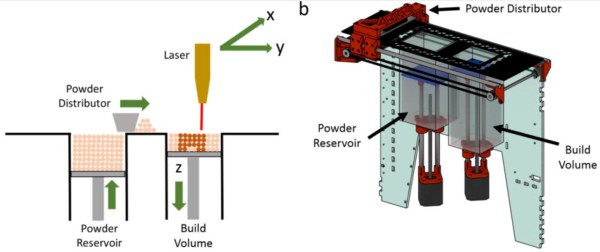
We’ve covered OpenSLS a few times before, but it looks like it’s finally becoming a more polished (and usable) solution. A research article was just recently published on the Open-Source Selective Laser Sintering (OpenSLS0 of Nylon and Biocompatible Polycaprolactone (PDF) that goes over the design and construction of a powder handling module that drops right into a laser cutter.

The team has created the hardware to turn a laser cutter with a bed size of 60cm x 90cm into an SLS printer. The beauty? The majority of the hardware is laser cut which means you already have the means to convert your laser cutter into a 3D printer.

The design files are available on their GitHub. Hardware will likely cost you around $2000, which is peanuts compared to the commercial laser sintering printers. There is tons of info in their article — too much for us to cover in a single post. If you end up building one, please let us know!

Rethinking Automated Bed Leveling For 3D Printers

Automatic bed leveling is the next killer feature that will be found on all commercial filament printers. It’s a problem that has been solved a few dozen times already; there are just so many ways you can go about it. The Printrbot uses an inductive sensor to determine the position of the metal bed in relation to the nozzle. The Lulzbot Mini touches the nozzle itself to four contacts on the corner of the bed. There are even a few projects that will mechanically level the bed with the help of a system of cams and springs. It’s a difficult problem, and none of these solutions are perfect. [mjrice] has been thinking about the problem, and he hit upon a solution that is simple, elegant, and can be replicated on a 3D printer. It’s the RepRap solution to 3D printing, and it looks cool, to boot.

Instead of using the nozzle as a contact, getting an inductive sensor, or fabricating a baroque system of gears and cams, [mjrice] is doing this the old-fashioned way: a simple microswitch, the same type of switch you would find on the limit switches of any RepRap. Having a switch at the same Z position as a nozzle is an iffy idea, so [mjrice] made this switch retract into the extruder during printing, without using any motors, servos, or other electromechanical contrivances.

The key to this setup is a simple spring and a rack gear. When this rack gear is hit from the left side, it moves an arm and places the switch down on the bed. Hit the rack from the right side, and the switch folds up into the extruder. Combine this with a bit of G-code at the beginning of the print, and the switch will move down, figure out the actual height of the bed, and flip up out of the way. Beautiful, elegant, and the algorithms for bed leveling are already in most major printer firmwares.

You can check out the video of the mechanism below. It’s a great little device, and since it’s on a RepRap first, it’s not going to show up in a proprietary 3D printer next.

Continue reading “Rethinking Automated Bed Leveling For 3D Printers”

Kicking The Tires Before You Buy: 3d Printers

So you’re looking to buy your first 3D printer, and your index finger is quivering over that 300 US Dollar printer on Amazon.com. Stop! You’re about to have a bad time. 3D printing has come a long way, but most 3D printers are designed through witchcraft, legends, and tall tales rather than any rigorous engineering process. I would say most 3D printer designs are either just plain bad, or designed by a team of Chinese engineers applying all their ingenuity to cost cutting. There are a few that are well designed, and there is a comparatively higher price tag attached.

I’ll start by going through some of the myths and legends that show up in 3D printers. After that I’ll go through some of the common, mostly gimmick, features that typically hinder your printer’s ability, rather than adding any useful function. Next I’ll go onto the things that will actually make your printer better. Finally, I’ll add some special consideration if you’re a beginner buying your first printer.

Continue reading “Kicking The Tires Before You Buy: 3d Printers”

Super Sizing The Printrbot Metal Simple

The Printrbot Simple Metal is a good 3D printer, with a few qualifications. More accurately, the Printrbot Simple Metal is a good first 3D printer. It’s robust, takes a beating, can produce high-quality prints, and is a great introduction to 3D printing for just $600. There are limitations to the Printbot Simple Metal, the most important is the relatively small 150mm cubed build volume.

[ken.do] wanted to print large parts, specifically scale aircraft wings and panels. While the Printrbot can’t handle these things normally, the design of the printer does lend itself to increasing the size of the build volume to 500mm long and 500mm high.

Increasing the build height on the Printrbot is as simple as adding two longer smooth rods and a single threaded rod to the Z axis. Increasing the X axis is a bit trickier: it requires a very flat sheet that doesn’t warp or bend over 500 mm, even when it’s being supported in different places. [ken.do] is engineering stiffness into a build plate here. The solution to a huge bed is a two kilogram aluminum bed supported by heavier rails and riding on a massive printed bushing block. Does it work? Sure does.

If you want to print tall objects, the current crop of 3D printers has you covered: just get a delta, and you’re limited only by the length of the extrusion used in the body. Creating big objects in all three dimensions is a marginally solved problem – just get a big printer. Big printers have drawbacks, notably the incredible power requirements for a huge heated build plate.

The ability to print long objects is a problem that’s usually not addressed with either commercial 3D printers or RepRaps. We’re glad to see someone has finally realized the limitations of the current crop of 3D printers and has come up with a way to turn a very good first printer into something that solves a problem not covered by other 3D printers.

Hackaday Links: January 24, 2016

The RepRap wiki was spammed this week. Everything is fine now, but I feel I should call attention to the fact that the RepRap wiki needs some people to contribute, organize, and maintain everything. The wikis for obscure anime shows are better than the RepRap wiki, so if you’re looking to contribute to an important open source project, there ‘ya go.

The 200cc, 5.5HP, 4-stroke OHV Honda GX200 engine is found in a whole lot of tools, and is a fantastic power plant to build a go-kart around. It also costs about $350. There are clones of this engine available direct from China for about $100. Here’s how you add a turbo to one of these clone engines.

Freescale makes some pretty cool sensors and [Juan Ignacio Cerrudo] figured they needed breakout boards. He has some boards for a low-power three-axis accelerometer, an accelerometer and magnetometer, and a pressure sensor.

The Tektronix TDS744A is an older but still extremely capable 500MHz, 2Gsps, 4-channel scope. You can upgrade it to the 1GHz TDS784A by desoldering a few resistors. Very cool if you’re looking for a cheap-ish 1GHz scope.

[TheBackyardScientist] hung out with some cub scouts a few weekends ago and launched a high altitude balloon over Florida. The payload included a game camera, APRS tracker, GoPro, and a few other bits and bobs. The balloon reached 106,000 feet and landed only a few miles from Cape Canaveral.

Big RC planes – UAVs especially – are a pain to launch. Flying wings above a certain size are just dangerous to launch by hand, and landing gear is heavy and for the most part unnecessary. What’s the next best solution? A trebuchet, of course. It mounts on a car and is able to give a UAV a little bit of altitude and some speed. A pretty good idea that could be easily implemented with some load-bearing PVC pipe.

Everybody likes the Game of Life, so here’s one built with a 6502. It’s built around a Western Design Center 65c816 board we’ve seen before, nine MAX7219 LED controllers mapped to the VIA, and nine 8×8 LED matrix displays. Here’s a video of it in action.

About a month ago, a search of AliExpress turned up Apple’s A8 CPU. I bought one. Here’s what I got. It’s a stupidly small pitch BGA, and I don’t have a datasheet. What am I going to do with it? Make a non-functioning board with a few ports, resistors, no traces, and the A8 chip planted square in the middle.

Hacklet 90: Schlieren Videos And Jigsaw Puzzle Robots

Happy new year, and welcome to the first Hacklet of 2016! The Hacklet is one of my favorite columns to write, as I get to talk about the great projects people are working on at Hackaday.io. Generally these articles follow a theme, but this being a new year, I’m going to try something new. As Hackaday’s community editor, I keep an eye on the new and updated projects feeds over on Hackaday.io. Every single week I see projects that surprise, impress, and inspire me. This week, I’m going to highlight a couple that I think are just freaking awesome.
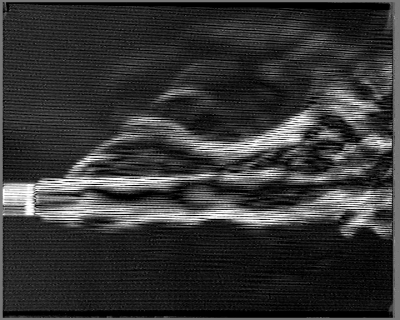
torch[Jana Marie] created the Schlieren-Videography project. Schlieren photography is used to image changing densities in fluids and this includes capturing density changes in air. Super and Hypersonic wind tunnels often use this technique to show airflow around a test model. Outside of the wind tunnel, Schlieren is great for showing density changes due to heat or different gasses. That’s exactly what [Jana] is doing in this project.

There are several ways to create Schlieren images, everything from lasers, to diffraction gratings, to razor blades can be used. [Jana] is using a simple moiré pattern and a couple of video tricks to capture Schlieren video. A high density moiré pattern will appear to flicker as density changes bend the light from the moiré stripes. [Jana] simply takes a reference image, then subtracts that image from the live video. The result of the subtraction is the Schlieren images you see above. [Jana] did more than explain the technique she’s used to create the videos, she’s also uploaded a processing sketch which performs the video subtraction magic.
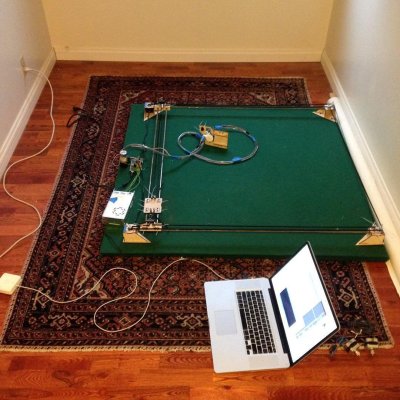
jigsolve[Dan Royer] has a more domestic problem – his family loves starting jigsaw puzzles, but never seems to finish them. He’s decided to invite around 3 billion of his closest friends in the form of JigSolve, an internet connected jigsaw puzzle robot. JigSolve’s Cartesian platform  is a CoreXY based design. [Dan] used CoreXY as a guideline, but designed and built the hardware himself. The electronic hardware side borrows from RepRap 3D printers. An Arduino Mega2560 and RAMPS board control two NEMA 17 stepper motors. The Arduino is running firmware from Makelangelo, [Dan’s] own open source art robot.

The internet connected portion of the project comes in the form of a Java based IRC bot and a connection to the Freenode IRC network. The internet connected masses will have to see what they are working on, so a Logitech webcam will stream video to the ‘net.

The hardest part of JigSolve thus far has been the nozzle. Much like an SMT pick and place machine, the nozzle needs to pick up parts with a vacuum, then rotate them to the desired orientation. [Dan] is looking at different kinds of silicon, and he’s asking for suggestions. Stop over on the project page and offer him a hand!

That’s it for this week’s Hacklet. As always, see you next week. Same hack time, same hack channel, bringing you the best of Hackaday.io!

The 3D Printers Of CES

CES, the Consumer Electronics Show, is in full swing. That means the Hackaday tip line is filled to the brim with uninteresting press releases, and notices that companies from the world over will be at CES.

3D printing has fallen off the radar of people who worship shiny new gadgets of late, and this is simply a function of 3D printing falling into the trough of disillusionment. The hype train of 3D printing is stuck on a siding, people are bored, but this is the time that will shape what 3D printing will become for the next ten years. What fascinating news from the 3D printing industry comes to us from CES?

Continue reading “The 3D Printers Of CES”