Ask Hackaday: What Was Your First Electronics Win?

Back in high school, I joined the stage crew — because of course I did. As student theater groups go, it was pretty active, and with two shows to produce each year, there was always a lot of work to do. I gravitated to the lighting crew, which was a natural fit for me. Besides the electrical part of the job, there was also a lot of monkeying around on scaffolding and rickety ladders to hang the lights, which was great fun for the young and immortal. Plus there was the lighting console to run during performances, a job I eventually took over for my last two years.

Unfortunately, the lighting system was a bit pathetic. The console was mounted in the stage right wings, rather than out in the front of the house where a sensible person would put it. And despite being only about ten years old, the dimmers were already starting to fail. The board had about 20 channels, but you could always count on one of the channels failing, sometimes during a show, requiring some heroics to repatch the lights into one of the dimmers we always left as a spare, just for the purpose.

Continue reading “Ask Hackaday: What Was Your First Electronics Win?”

Electronic Dice Is Introduction To Microcontroller Programming

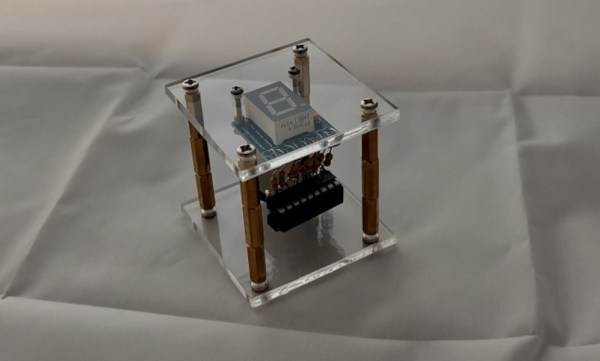
By now most of us are familiar with the Arduino platform. It’s an inexpensive and fairly easy way into the world of microcontrollers. For plenty of projects, there’s no need to go beyond that unless you have a desire to learn more of the inner workings of microcontrollers in general. [Cristiano] was interested in expanding some of his knowledge, so he decided to build this electronic dice using a PIC microcontroller instead of the Arduino platform he was more familiar with.

As a result, this project is set up as a how-to for others looking to dive further into the world of microcontrollers that don’t have the same hand-holding setup as the Arduino. To take care of the need for a random number for the dice, the PIC’s random number generator is used but with the added randomness of a seed from an internal timer. The timer is started when a mercury tilt switch signals the device that it has been rolled over, and after some computation a single digit number is displayed on a seven-segment display.

While it might seem simple on the surface, the project comes with an in-depth guide on programming the PIC family of microcontrollers, and has a polish not normally seen on beginner projects, including the use of the mercury tilt switch which gives it a retro vibe. For some other tips on how to build projects like this, take a look at this guide on how to build power supplies for your projects as well.

Continue reading “Electronic Dice Is Introduction To Microcontroller Programming”

Softly To Sleep, My Raspberry Pi

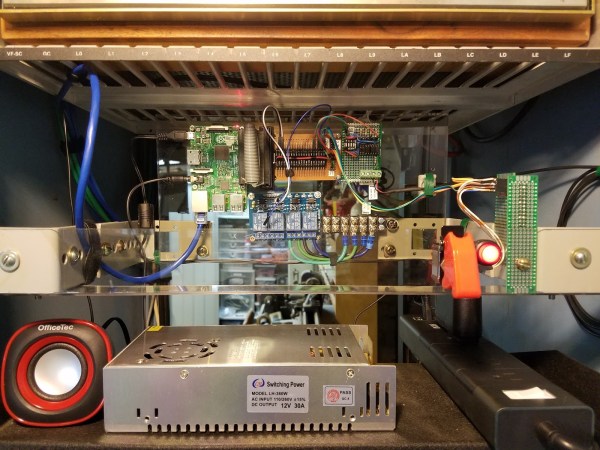
For all their capacity, shutting down a Raspberry Pi can be a bothersome routine depending on how you have it set up — historically and abrupt cut to the power risks corrupting the SD card. [madlab5] had to make a few changes to a Pi running in headless mode, requiring them to access it externally to shut it down to prevent any damage from pulling the plug. So, why not take the opportunity to whip up a soft shut-down switch?

This is a great beginner project to get one accustomed to working with a Pi. With this in mind, [madlab5] went through two revisions of this idea: the simple way, and the fun way. For the simple way just press the button and the Pi activates a script which shuts it down in thirty seconds. Job done. But, realizing there may be a few circumstances where they’d need more functionality, [madlab5] decided to take a second swing at this.

[madlab5]’s fun way involves a button with a built-in LED and a speaker to blare an announcement that the Pi will self destruct shut down after a short time. Setting the switch up this way takes a little more doing, but you get to add a little more character to your Pi with a custom shutdown report, as well as the option to cancel an accidental button-press.

For any newbies out there, [madlab5] is kind enough to provide their code and diagrams in their blog post. If remotes are more your thing, we have also featured a similar beginner project to shut down your Pi.

[via /r/Raspberry_Pi_Projects]

First Look At ABC: Basic Connections

[Alberto Piganti], aka [pighixxx] has been making circuit diagram art for a few years now, and has just come out with a book that’s available on Kickstarter. He sent us a copy to review, and we spent an hour or so with a refreshing beverage and a binder full of beautiful circuit diagrams. It doesn’t get better than that!

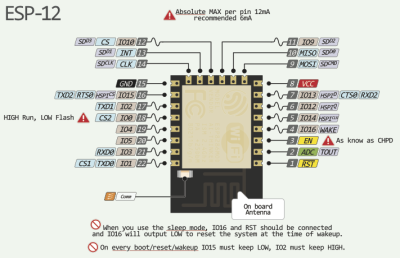
[pighixxx] started out making very pretty and functional pinout diagrams for a number of microcontrollers, and then branched out to modules and development boards like the Arduino and ESP8266. They’re great, and we’ll admit to having a printout of his SMD ATMega328 and the ESP-12 on our wall. His graphical style has been widely copied, which truly is the sincerest form of flattery.

But after pinouts, what’s next? Fully elaborated circuit diagrams, done in the same style, of course. “ABC: Basic Connections” started out life as a compendium of frequently used sub-circuits in Arduino projects. But you can take “Arduino” with a grain of salt — these are all useful for generic microcontroller-based projects. So whether you want to drive a 12 V solenoid from a low-voltage microcontroller, drive many LEDs with shift registers, or decode a rotary encoder, there is a circuit snippet here for you. Continue reading “First Look At ABC: Basic Connections”

A Heart For His Girlfriend

[Decino] made a nice LED animated blinking heart box for his girlfriend. That’s a nice gesture, but more to the point here, it’s a nice entrée into the world of custom hardware. The project isn’t anything more than a home-etched PCB, a custom 3D-printed case, a mess of LEDs and current-limiting resistors, a shift register, and a microcontroller. (OK, we’re admittedly forgetting the Fifth Element.) The board is even single-sided with pretty wide traces. In short, it’s a great first project that ties together all of the basics without any parts left over. Oh, and did we mention Valentine’s day?

Once you’ve got these basics down, though, the world is your oyster. Building almost anything you need is just a matter of refining the process and practice. And if you’ve never played around with shift registers, a mega-blinker project like this is a great way to learn hands-on.

Not everything we write up on Hackaday has to be neural nets and JTAG ports. Sometimes a good beginner project that hits the fundamentals with no extra fat is just the ticket. What’s your favorite intro project?

Simple Clock Is Great Stepper Motor Project

You’d think that we’ve posted every possible clock here at Hackaday. It turns out that we haven’t. But we have seen enough that we’ve started to categorize clock builds in our minds. There are the accuracy clocks which strive to get every microsecond just right, the bizzaro clocks that aim for most unique mechanism, and then there are “hello world” clocks that make a great introduction to building stuff.

Today, we’re looking at a nice “hello world” clock. [electronics for everyone]’s build uses a stepper motor and a large labelled wheel that rotates relative to a fixed pointer. Roll the wheel, and the time changes. It looks tidy, it’s cyclical by design, and it’s a no-stress way to get your feet wet driving stepper motors. And it comes with a video, embedded below.

Continue reading “Simple Clock Is Great Stepper Motor Project”

Thinking Of You: IoT Style

Do you have loved ones who live far away? Or do you just want an interesting starter ESP8266 project to get your feet wet? If the answer to either of these questions is “yes”, we’ve got just the project for you. [Craig Lindley] built a “thinking of you” button-and-LED display device that helps people keep in touch, in a very simple way.

We like the minimalism of the design. One party presses their button, electrons flow, WiFis WiFi, data travels through a set of tubes, and an LED far away glows a pre-arranged color. The other side can signal back to say “hi” as well. It’s a cute item to have on your desk, or wherever you spend the most time. If you’re new to all of this, you can hardly beat the circuit for its simplicity.

Yeah, you could totally just send the other person a text message or an e-mail. But then you don’t get an excuse to play around with NodeMCU, and it just lacks the personal hacker touch. The code is available in a zip file here, and if you want to stay in touch with someone other than [Craig]’s sisters, you’ll probably want to customize it a bit.