It’s a fact of life when starting a computer, that booting into whatever operating system you use will take a while. Mine takes somewhere around 30 seconds, and yours probably does too. There has always been the promise of something faster just around the corner, but somehow the OS just keeps getting a little bigger. Perhaps the only computer with a disk based operating system I have ever owned which bucked this trend was a Commodore Amiga, and that machine’s booting speed was achieved by keeping most of its OS in a ROM. The subject of today’s Daily Drivers takes the idea of a long boot time and shreds it, leaving an experience more akin to that Amiga of old. It’s called KolibriOS, it’s small enough to run from a floppy disk if you want it to, it’s lightweight, and fast as lightning. It achieves this feat by being written entirely in assembly language, and it exists as a free fork of the earlier MenuetOS which moved to a proprietary licence in its 64 bit version. I downloaded the ISO file, and gave it a spin.
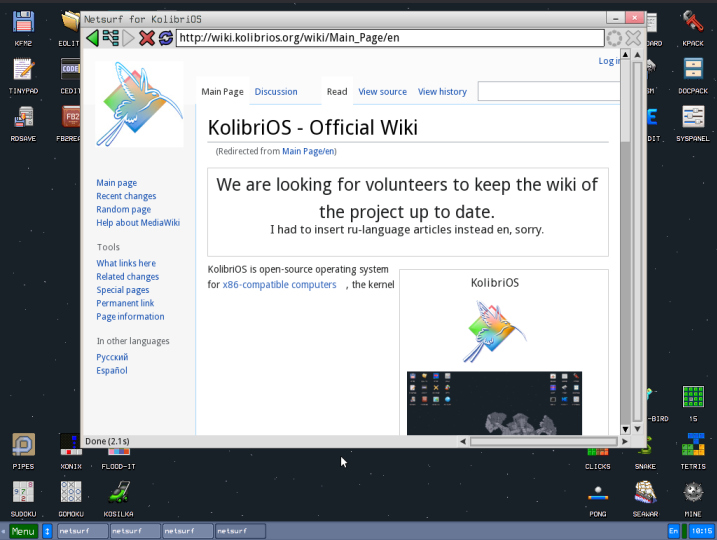
The minimum system requirements for KolibriOS are meagre, 1Mb of disk space, 8Mb of RAM, and a 586-class 32-bit processor. On a 2020s ThinkPad it boots in the proverbial blink of an eye, and drops immediately into a GUI desktop. It has the slightly pixelated look of a 1990s machine, there’s none of the anti-aliasing we’re used to today going on there. Installed software ranges from a set of games, emulators, graphics editors and viewers, internet software including the Webview and Netsurf web browsers, and assembly software development.
The immediate impression is of a mature and useful operating system, without any crashes or blue screens, and with applications that load on a dime. Unfortunately though, despite all the competence I can’t call it a Daily Driver by my definition of being able to write for Hackaday, because the web browser doesn’t support https. Immediately the majority of the modern Internet is off-limits, including this site. This changes the parameters of my review and I can no longer proceed as I normally would, but it doesn’t end it. Something this polished deserves a while to play around. Continue reading “Jenny’s Daily Drivers: KolibriOS 0.7.7”