Tools Of The Trade — Injection Molding

Having finished the Tools of the Trade series on circuit board assembly, let’s look at some of the common methods for doing enclosures. First, and possibly the most common, is injection molding. This is the process of taking hot plastic, squirting it through a small hole and into a cavity, letting it cool, and then removing the hardened plastic formed in the shape of the cavity.

The machine itself has three major parts; the hopper, the screw, and the mold. The hopper is where the plastic pellets are dumped in. These pellets are tiny flecks of plastic, and if the product is to be colored there will be colorant pellets added at some ratio. The hopper will also usually have a dehumidifier attached to it to remove as much water from the pellets as possible. Water screws up the process because it vaporizes and creates little air bubbles.

Next the plastic flecks go into one end of the screw. The screw’s job is to turn slowly, forcing the plastic into ever smaller channels as it goes through a heating element, mixing the melted plastic with the colorant and getting consistent coloring, temperature, and ever increasing pressure. By the time the plastic is coming out the other end of the screw, and with the assistance of a hydraulic jack, it can be at hundreds of tons of pressure.

Finally, the plastic enters the mold, where it flows through channels into the empty cavity, and allowed to sit briefly to cool.  The mold then separates and ejector pins push the part out of the cavity.

Continue reading “Tools Of The Trade — Injection Molding”

Probably The Simplest Electronic Temperature Controlled Soldering Iron

We’re all used to temperature controlled soldering irons, and most of us will have one in some form or other as our soldering tool of choice. In many cases our irons will be microprocessor controlled, with thermocouples, LCD displays, and other technological magic to make the perfect soldering tool.

All this technology is very impressive, but how simply can a temperature controlled iron be made? If you’re of an older generation you might point to irons with bimetallic or magnetic temperature regulation of course, so let’s rephrase the question. How simply can an electronic temperature controlled soldering iron be made? [Bestonic lab] might just have the answer, because he’s posted a YouTube video showing an extremely simple temperature controlled iron. It’s not the most elegant of solutions, but it does the job demanded of it, and all for a very low parts count.

He’s taken a ceramic housing from a redundant fuse holder, and mounted it on a metal frame to make a basic soldering iron holder into which the tip of his unregulated iron fits. To the ceramic he’s fitted a thermistor, which sits in the gate bias circuit of a MOSFET. The MOSFET in turn operates a relay which supplies mains power to the iron.

Temperature regulation comes as the iron heats the ceramic to the point at which the thermistor changes the MOSFET and relay state, at which point (with the iron power cut) it cools until the MOSFET flips again and restarts the process. You may have spotted a flaw in that it requires the iron to be in the holder to work, though we suspect in practice the thermal inertia of the ceramic will be enough for regulation to be reasonably maintained so long as the iron is returned to its holder between joints. Nobody is claiming that this temperature controlled iron is on a par with its expensive commercial cousins, instead it represents a very neat hack to conjure a useful tool from very few components. And we like that. Take a look at the full video below the break.

Continue reading “Probably The Simplest Electronic Temperature Controlled Soldering Iron”

VR Feels More Real With Leap Motion And This Rotation Sensor

You could have said this at any time in the last couple of decades: the world of virtual reality peripherals does not yet feel as though it has fulfilled its potential. From the Amiga-powered Virtuality headsets and nausea-inducing Nintendo Virtual Boy of the 1990s to today’s crop of advanced headsets and peripherals, there has always been a sense that we’re not quite there yet. Moments at which the shortcomings of the hardware intrude into the virtual world may be less frequent with the latest products, but still the goal of virtual world immersion seems elusive at times.

One of the more interesting peripherals on the market today is the Leap Motion controller. This is a USB device containing infra-red illumination and cameras which provide enough resolution for its software to accurately calculate the position of a user’s hands and fingers in three-dimensional space. This ability to track finger movement gives it the function of a controller for really complex interactions with and manipulations of objects in virtual worlds.

Even the Leap Motion has its shortcomings though, moments at which it ceases to be able to track. Rotating your hand, as you might for instance when aiming a virtual in-game weapon, confuses it. This led [Florian Maurer] to seek his own solution, and he’s come up with a hand peripheral containing a rotation sensor.

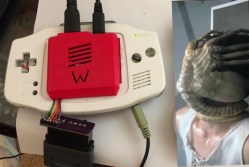
Inspired by a movie prop from the film Ender’s Game, it is a 3D-printed device that clips onto the palm of his hand between thumb and index finger. It contains both an Arduino Pro Micro and a bno055 rotation sensor, plus a couple of buttons for in-game actions such as triggers. It solves the problem with the Leap Motion’s rotation detection, and does not impede hand movement so much that he can’t also use his keyboard and mouse while wearing it. Sadly he does not yet seem to have posted any code, but he does treat us to a video demonstration which we’ve posted below the break.

Continue reading “VR Feels More Real With Leap Motion And This Rotation Sensor”

Beyond The Prize: Eye Driving Wheelchairs

For this year’s Hackaday Prize, we opened up five challenges for hackers and tinkerers to create the greatest hardware in five categories. We asked citizen scientists to build something to expand the frontiers of knowledge. We asked automation experts to build something more useful than the Internet of chocolate chip cookies. In the Assistive Technologies portion of the prize, we asked our community of engineers to build something that would open the world up to all of us.

While this year’s Assistive Technologies challenge brought out some great projects, there is one project from last year that must be mentioned. The Eyedrivomatic is a project to turn any electric wheelchair into a gaze-controlled robotic wheelchair, opening up the world to a population who has never had this level of accessibility at a price this low.

eyedriveomatic-hardwareThe Eyedrivomatac was the winner of last year’s Hackaday Prize, and given the scope of the project, it’s not hard to see why. The Eyedriveomatic is the solution to the problem of mobility for quadriplegics. It does this surprisingly simply by adding a servo-powered robot onto the joystick of an electric wheelchair, with everything controlled by eye gaze technology. While other systems similar to this exist, it’s the cost of the Eyedrivomatic system that makes it special. The robotic half of the project can be easily manufactured on any 3D printer, all the associated hardware can be bought for just a few dollars, and the software stack is completely open source. The entire system is interchangeable between different models of electric wheelchairs without any modifications, too.

Since winning last year’s Hackaday Prize, Patrick, Steve, and David of the Eyedrivomatic project received the grand prize of $196,883, and are now working towards starting their own production run of their revolutionary device. Right now, there’s a small cottage industry of eye gaze controlled wheelchairs cropping up, and the Eyedrivomatic team is busy building and assembling systems for electric wheelchair users across the globe.

The Eyedrivomatic is the best the Hackaday Prize has to offer. At its heart, it’s an extremely simple device — just a few 3D printed parts, a few servos, an Arduino, and some open source software. The impact the Eyedrivomatic has on its users can’t be understated. It is a liberating technology, one of the greatest projects we’ve seen, and we’ve very proud to have the Eyedrivomatic as a Hackaday Prize champion.

Continue reading “Beyond The Prize: Eye Driving Wheelchairs”

Forget Lithium Battery Technology, Just Boil A Potato

These researchers are taking this development so seriously we can’t help but be suspicious that, perhaps, they are all deeply embroiled in a bet to see who could get funding for and complete research in the most absurd technological advancement.

Most of us have had a science teacher desperately try to alleviate the drudgery of standardized test centric science education by dramatically putting a copper nail and a zinc nail into a potato or lemon. “Behold, we can measure a voltage with this voltmeter. If you get asked what a voltmeter is on a test, here is a definition none of you have enough experimental basis to understand,” the teacher would say as their dreams of being a true educator were crushed a little more.

Continue reading “Forget Lithium Battery Technology, Just Boil A Potato”

3D Printer Tragedy Claims A Life

Thankfully it’s rare that we report on something as tragic as the death of a 17-year old, but the fact that the proximate cause was a 3D printer makes it all the worse and important for us to discuss.

The BBC report tells of a recently concluded coroner’s inquest into the December death of a young man in a fire at his family’s magic shop in Lincolnshire. The building was gutted by the fire, and the victim died of smoke inhalation. The inquest found that he had been working with a 3D printer in the shop and using hairspray to prepare the bed, a tip he apparently picked up from forums and blogs.

Unfortunately for this young man and his family, the online material didn’t mention that hairspray propellant contains volatile hydrocarbons like propane, cyclopropane, n-butane and isobutane — all highly flammable. Apparently the victim used enough hairspray in a small enough space to create an explosive mixture of fuel and air. Neighbors reported a gigantic fireball that consumed the shop, which took 50 firefighters to control.

While the inquest doesn’t directly blame the 3D printer as the source of ignition — which could just as easily have been a spark from a light switch, or a pilot light on a water heater — it does mention that the hot end can reach 300C. And the fact remains that were it not for the 3D printer and the online tips, it’s unlikely that a 17-year old boy would be using enough hairspray in an enclosed space to create what amounted to a bomb.

By all accounts, the victim was a bright and thoughtful kid, and for this to have happened is an unmitigated tragedy for his family and friends. This young man probably had a bright future and stood to contribute to the hacker community but for a brief lapse of judgment. Before anyone starts slinging around the blame in the comments section, think about it — how many time haves you done something like this and gotten away with it? This kid got badly unlucky and paid the ultimate price. Maybe we should make his death worth something by looking at what we do that skates a little too close to the thin edge of the ice.

Continue reading “3D Printer Tragedy Claims A Life”

Variable Thickness Slicing For 3D Printers

With proper tuning, any 3D printer can create exceptionally detailed physical replicas of digital files. The time it takes for a printer to print an object at very high detail is another matter entirely. The lower the layer height, the more layers must be printed, and the longer a print takes to print.

Thanks to [Steve Kranz] at Autodesk’s Integrated Additive Manufacturing Team, there’s now a solution to the problem of very long, very high-quality prints. It’s called VariSlice, and it slices 3D in a way that’s only high quality where it needs to be.

The basic idea behind VariSlice is to print vertical walls at a maximum layer height, while very shallow angles – the top of a sphere, for example – are printed at a very low layer height. That’s simple and obvious; you will never need to print a vertical wall at ten micron resolution, and fine details will always look terrible with a high layer height.

The trick, as in everything with 3D printing, is the implementation. In the Instructable for VariSlice, it appears that the algorithm considers the entire layer of an object at a time, taking the maximum slope over the entire perimeter and refining the layer height if it’s necessary. There’s no weird stair stepping, overlapping layers of different thicknesses, or interleaving here. It’s doing automatically what you’d normally have to do manually.

Nevertheless, the VariSlice algorithm is now one of Autodesk’s open source efforts, just like the Ember resin printer used in the example below. The application for this algorithm in filament-based printers is obvious, though. The speed increase for the same level of quality is variable, but the time it takes to print some very specific objects can be up to ten times faster. Whether or not this algorithm can be integrated into Cura or Slic3r is another matter entirely, but we can only hope so.

Continue reading “Variable Thickness Slicing For 3D Printers”