3D Printing A Capable RC Car

You can buy all sorts of RC cars off the shelf, but doing so won’t teach you a whole lot. Alternatively, you could follow [TRDB]’s example, and design your own from scratch.

The Lizard, as it is known, is a fun little RC car. It’s got a vaguely Formula 1-inspired aesthetic, and looks fetching with the aid of two-tone 3D printed parts. It’s designed for speed and handling, with a rear-wheel-drive layout and sprung suspension at all four corners to soak up the bumps. The majority of the vehicle is 3D printed in PETG, including the body and the gearbox and differential. However, some suspension components are made in TPU for greater flexibility and resistance to impact. [TRDB] specified commercial off-the-shelf wheels to provide good grip that couldn’t easily be achieved with 3D-printed tires. An ESP32 is responsible for receiving commands from [TRDB’s] custom RC controller running the same microcontroller. It sends commands to the speed controller that runs the Lizard’s brushed DC motor from a 3S lithium-polymer battery.

The final product looks sleek and handles well. It also achieved a GPS-verified top speed of 48 km/h as per [TRDB’s] testing. We’ve seen some other great DIY RC cars over the years, too, like this example that focuses on performance fundamentals. Video after the break.

Continue reading “3D Printing A Capable RC Car”

Ender 3 Pro Gets A Second Job As A Stator Winder

Sometimes, you find yourself in need of a coil. You could sit around winding thousands of turns of copper wire yourself, but that would be remarkably tedious. Thus, instead, you might follow the example of [OJengineering] and choose to get a machine to do it for you.

This build first popped up on on Reddit, with [OJengineering] explaining that they had repurposed an Ender 3 Pro 3D printer to wind a stator for them. The reasoning was sound—a replacement stator for their motorcycle cost $1000 in their local area, so rewinding their own would be much cheaper. The idea was straightforward enough—the 3D printer was a capable motion control platform that really just needed to be retooled to drag wire around instead of squirting hot plastic. In a later update, they explained that they had created a Python program that spits out appropriate stator winding G-code from user-entered parameters. This G-code commands the 3D printer’s head to make rectangle winds around the stator core while moving up and down to appropriately distribute the wire. The device can be seen in action in a video on YouTube.

It’s a hacky build, but one that does nevertheless get the winding done. That’s the thing about 3D printers—they’re really just simple motion systems that can do whatever you tell them. You just need a way to generate the right G-code to do the job.

We’ve featured some other nifty coil winders before, too. Video after the break.

Continue reading “Ender 3 Pro Gets A Second Job As A Stator Winder”

Illustrated Kristina with an IBM Model M keyboard floating between her hands.

Keebin’ With Kristina: The One With The H.R. Giger Keyboard

I had to bust out Brain Salad Surgery to write this one, folks. It was that, or put on some Ministry or something. Just look at all the industrial-ness dripping from [heinn_dev]’s creation.

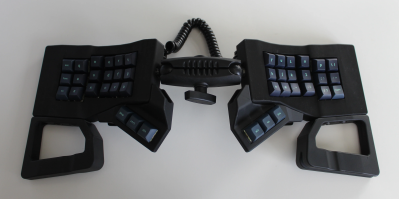
An incredibly industrial-looking split keyboard. Like, almost H.R. Geiger-esque.
Image by [heinn_dev] via reddit
Apparently [heinn_dev] wasn’t completely satisfied with his Chocofi case, and instead of requesting a full refund, just went ahead and made a prettier one. It took a lot of printing and even more sanding, but here we are. And it looks fantastic.

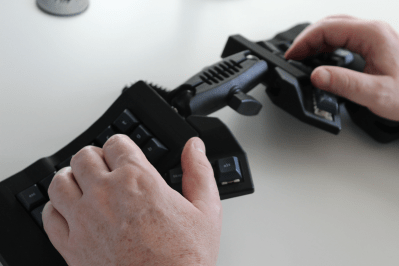
The only downside, if you can call it one, is that adjusting the tenting is a slow operatiJKon. But then again that’s one of those things that you usually set and forget.

Oh, and those keycaps are printed, too. As one commenter said, those homing nipples look painful, but I think it’s part of the charm. I just hope that hand grime doesn’t end up clogging the holes under the palm area. Clean your keyboards, people. Continue reading “Keebin’ With Kristina: The One With The H.R. Giger Keyboard”

What Use Is An Original Raspberry Pi?

Almost uniquely among consumer grade computer manufacturers, the Raspberry Pi folks still support their earliest boards. We’re guessing that’s in part due to the much more recent Pi Zero using the same 32-bit system-on-chip, but it’s still impressive that a 13-year-old single board computer still has manufacturer OS support. With so many of these early boards out there, is there much you can do with them in 2025? [Jeff Geerling] gives it a try.

His test Pi is unusual in itself, the 2013 blue special edition that RS gave away in a social media promotion. Sadly we didn’t win one back in the day and neither did he, so he picked it up in an online auction. We’re treated to some very slow desktop exploration, but it’s clear that this is not where the strengths of a Pi 1 lie. It was reckoned at the time to be roughly equivalent to a Pentium II or Pentium III in PC terms, so that shouldn’t be a surprise. Instead he concludes that it’s better as a headless machine, though he notes how projects are starting to abandon 32 bit builds. The full video is below the break.

We asked the same question not so long ago, and the Hackaday Pi 1 now quietly analyses news content on its two-watt power budget. It’s still a useful little Linux box for your script-based projects even if it will never win any speed prizes.

Continue reading “What Use Is An Original Raspberry Pi?”

The Potential Big Boom In Every Dust Cloud

To the average person, walking into a flour- or sawmill and seeing dust swirling around is unlikely to evoke much of a response, but those in the know are quite likely to bolt for the nearest exit at this harrowing sight. For as harmless as a fine cloud of flour, sawdust or even coffee creamer may appear, each of these have the potential for a massive conflagration and even an earth-shattering detonation.

As for the ‘why’, the answer can be found in for example the working principle behind an internal combustion engine. While a puddle of gasoline is definitely flammable, the only thing that actually burns is the evaporated gaseous form above the liquid, ergo it’s a relatively slow process; in order to make petrol combust, it needs to be mixed in the right air-fuel ratio. If this mixture is then exposed to a spark, the fuel will nearly instantly burn, causing a detonation due to the sudden release of energy.

Similarly, flour, sawdust, and many other substances in powder form will burn gradually if a certain transition interface is maintained. A bucket of sawdust burns slowly, but if you create a sawdust cloud, it might just blow up the room.

This raises the questions of how to recognize this danger and what to do about it.

Continue reading “The Potential Big Boom In Every Dust Cloud”

Depositing Metal On Glass With Fiber Laser

Fiber lasers aren’t nearly as common as their diode and CO2 cousins, but if you’re lucky enough to have one in your garage or local makerspace, this technique for depositing thin films of metals in [Breaking Taps] video, embedded below, might be worth checking out. 

It’s a very simple hack: a metal shim or foil is sandwiched between two pieces of glass, and the laser is focused on the metal. Etching the foil blasts off enough metal to deposit a thin film of it onto the glass.  From electron microscopy, [Breaking Taps] reveals that what’s happening is that microscopic molten metal droplets are splashing up to the ̶m̶e̶t̶a̶l̶  glass, rather than this being any kind of plasma process like sputtering. He found this technique worked best with silver of all the materials tested, and there were a few. While copper worked, it was not terribly conductive — he suggests electroplating a thicker layer onto the (probably rather oxidized) copper before trying to solder, but demonstrates soldering to it regardless, which seems to work. 

This might be a neat way to make artistic glass-substrate PCBs. More testing will be needed to see if this would be worth the effort over just gluing copper foil to glass, as has been done before. [Breaking Taps] suspects, and we agree, that his process would work better under an inert atmosphere, and we’d like to see it tried.

One thing to note is that, regardless of atmosphere, alloys are a bit iffy with this technique, as the ‘blast little drops off’ process can cause them to demix on the glass surface. He also reasons that ‘printing’ a large area of metal onto the glass, and then etching it off would be a more reliable technique than trying to deposit complex patterns directly to the glass in one go. Either way, though, it’s worth a try if you have a fiber laser. 

Don’t have a fiber laser? Maybe you could build one. 

Continue reading “Depositing Metal On Glass With Fiber Laser”

This BB Shooter Has A Spring, But Not For What You Think

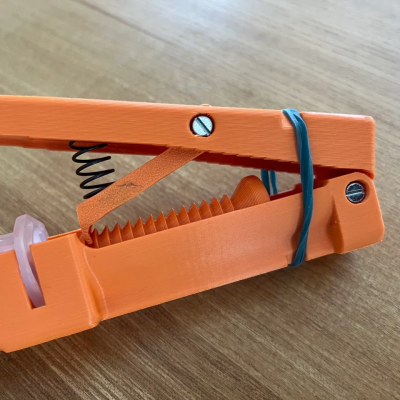
[It’s on my MIND] designed a clever BB blaster featuring a four-bar linkage that prints in a single piece and requires no additional hardware. The interesting part is how it turns a trigger pull into launching a 6 mm plastic BB. There is a spring, but it only acts as a trigger return and plays no part in launching the projectile. So how does it work?

There’s a spring in this BB launcher, but it’s not used like you might expect.

The usual way something like this functions is with the trigger pulling back a striker of some kind, and putting it under tension in the process (usually with the help of a spring) then releasing it. As the striker flies forward, it smacks into a BB and launches it. We’ve seen print-in-place shooters that work this way, but that is not what is happening here.

With [It’s on my MIND]’s BB launcher, the trigger is a four-bar linkage that transforms a rearward pull of the trigger into a forward push of the striker against a BB that is gravity fed from a hopper. The tension comes from the BB’s forward motion being arrested by a physical detent as the striker pushes from behind. Once that tension passes a threshold, the BB pops past the detent and goes flying. Thanks to the mechanical advantage of the four-bar linkage, the trigger finger doesn’t need to do much work. The spring? It’s just there to reset the trigger by pushing it forward again after firing.

It’s a clever design that doesn’t require any additional hardware, and even prints in a single piece. Watch it in action in the video, embedded just below.

Continue reading “This BB Shooter Has A Spring, But Not For What You Think”