[SethBling] really likes Minecraft. How can you tell? A quick look at his YouTube channel should convince you, especially the one where he built a full-blown BASIC interpreter in Minecraft. It is not going to win any speed races, as you might expect, but it does work.
For novelty and wow factor, this is amazing. As a practical matter, it is hard to imagine the real value since there are plenty of ways a new programmer could get access to BASIC. Still, you have to admire the sheer audacity of making the attempt. One Hackaday poster (who shall remain nameless) once won a case of beer by betting someone he or she could write a BASIC compiler in BASIC, so we aren’t sticklers for practicality.
Work on HaDge – the Hackaday con badge, continues in bits and spurts, and we’ve had some good progress in recent weeks. HaDge will be one conference badge to use at all conferences, capable of communicating between badges.
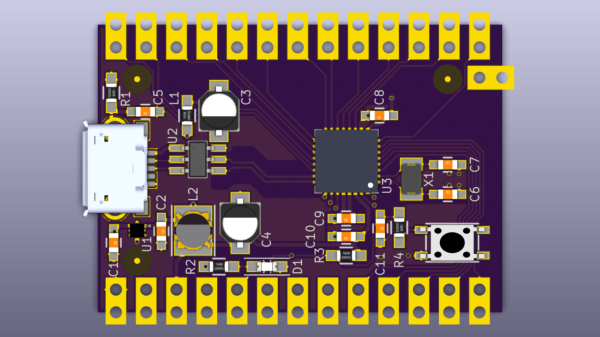
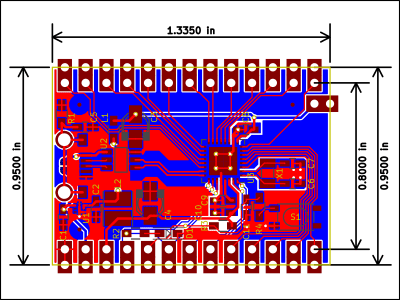
Picking up from where we left off last time, we had agreed to base it around the Atmel D21, a 32-bit ARM Cortex M0+ processor. To get some prototype boards built to help with software development, we decided to finish designing the HACK before tackling HaDge. HACK is a project that [Michele Perla] started that we have sort of assimilated to act as the prototyping platform for HaDge. We wanted a compact micro-controller board and hence opted for the SAM D21E – a 32 pin package with 26 IO’s.
[Michele Perla] had earlier designed HACK based on the larger 32 pin SAM D21G and used Eagle to draw the schematic and layout. Using the Eagle to KiCad script, he quickly converted the project and got on to making the board layout. I took up the rear guard, and worked on making his schematic (pdf) “pretty” and building up a schematic library of symbols. While [Michele] finished off the board layout, I worked on collecting STEP models for the various footprints we would be using, most of which I could get via 3dcontentcentral.com. The few I couldn’t were built from scratch using FreeCAD. The STEP models were converted to VRML using FreeCAD. Using [Maurice]’s KiCad Stepup script, we were able to obtain a complete STEP model of the HACK board.
HACK is now ready to go for board fabrication and assembly. We plan to get about 20 boards made and hand them out to developers for working on the software. The GitHub repository has all the current files for those who’d like to take a look – it includes the KiCad source files, PDFs, gerbers, data sheets and images. The board will be breadboard compatible and also have castellated pads to allow it to be soldered directly as a module. Let us know via group messaging on the HACK project page if you’d like to get involved with either the software or hardware development of HaDge.
In a forthcoming post, we’ll put out ideas on how we plan to take forward HaDge now that HACK is complete. Stay tuned.
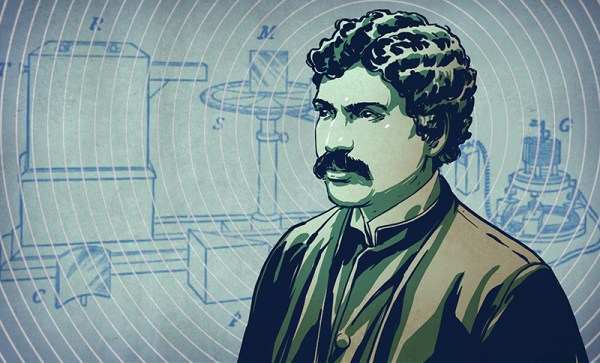
The early days of electricity appear to have been a cutthroat time. While academics were busy uncovering the mysteries of electromagnetism, bands of entrepreneurs were waiting to pounce on the pure science and engineer solutions to problems that didn’t even exist yet, but could no doubt turn into profitable ventures. We’ve all heard of the epic battles between Edison and Tesla and Westinghouse, and even with the benefit of more than a century of hindsight it’s hard to tell who did what to whom. But another conflict was brewing at the turn of 19th century, this time between an Indian polymath and an Italian nobleman, and it would determine who got credit for laying the foundations for the key technology of the 20th century – radio.
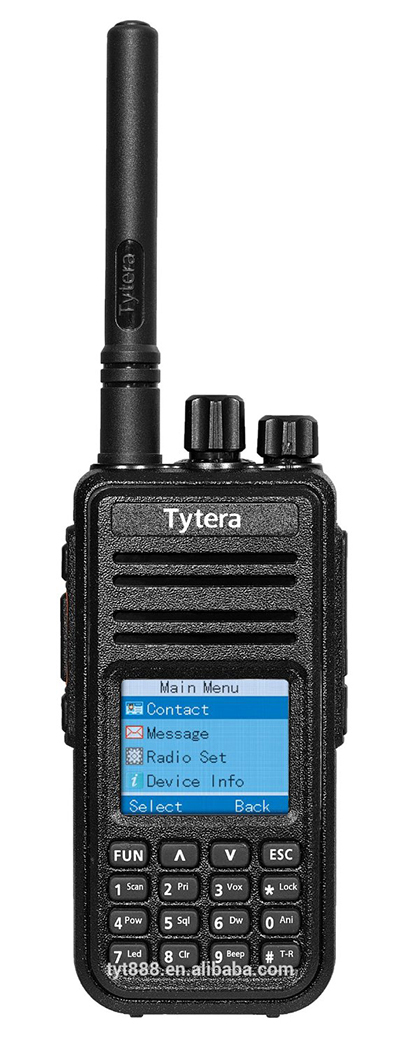
Every once in a great while, a piece of radio gear catches the attention of a prolific hardware guru and is reverse engineered. A few years ago, it was the RTL-SDR, and since then, software defined radios became the next big thing. Last weekend at Shmoocon, [Travis Goodspeed] presented his reverse engineering of the Tytera MD380 digital handheld radio. The hack has since been published in PoC||GTFO 0x10 (56MB PDF, mirrored) with all the gory details that turn a $140 radio into the first hardware scanner for digital mobile radio.
The Tytera MD-380 digital radio
The Tytera MD380 is a fairly basic radio with two main chips: an STM32F405 with a megabyte of Flash and 192k of RAM, and an HR C5000 baseband. The STM32 has both JTAG and a ROM bootloader, but both of these are protected by the Readout Device Protection (RDP). Getting around the RDP is the very definition of a jailbreak, and thanks to a few forgetful or lazy Chinese engineers, it is most certainly possible.
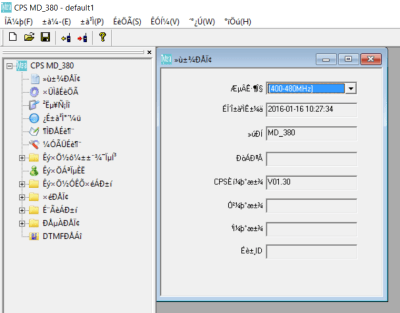
The STM32 in the radio implements a USB Device Firmware Upgrade (DFU), probably because of some example code from ST. Dumping the memory from the standard DFU protocol just repeated the same binary string, but with a little bit of coaxing and investigating the terrible Windows-only official client application, [Travis] was able to find non-standard DFU commands, write a custom DFU client, and read and write the ‘codeplug’, an SPI Flash chip that stores radio settings, frequencies, and talk groups.
Further efforts to dump all the firmware on the radio were a success, and with that began the actual reverse engineering of the radio. It runs an ARM port of MicroC/OS-II, a real-time embedded operating system. This OS is very well documented, with slightly more effort new functions and patches can be written.
In Digital Mobile Radio, audio is sent through either a public talk group or a private contact. The radio is usually set to only one talk group, and so it’s not really possible to listen in on other talk groups without changing settings. A patch for promiscuous mode – a mode that puts all talk groups through the speaker – is just setting one JNE in the firmware to a NOP.
The Tytera MD-380 ships with a terrible Windows app used for programming the radio
With the help of [DD4CR] and [W7PCH], the entire radio has been reverse engineered with rewritten firmware that works with the official tools, the first attempts of scratch-built firmware built around FreeRTOS, and the beginnings of a very active development community for a $140 radio. [Travis] is looking for people who can add support for P25, D-Star, System Fusion, a proper scanner, or the ability to send and receive DMR frames over USB. All these things are possible, making this one of the most exciting radio hacks in recent memory.
Before [Travis] presented this hack at the Shmoocon fire talks, intuition guided me to look up this radio on Amazon. It was $140 with Prime, and the top vendor had 18 in stock. Immediately after the talk – 20 minutes later – the same vendor had 14 in stock. [Travis] sold four radios to members of the audience, and there weren’t that many people in attendance. Two hours later, the same vendor had four in stock. If you’re looking for the best hardware hack of the con, this is the one.
This week I was approached with a question. Why don’t passenger aircraft have emergency parachutes? Whole plane emergency parachutes are available for light aircraft, and have been used to great effect in many light aircraft engine failures and accidents.
But the truth is that while parachutes may be effective for light aircraft, they don’t scale. There are a series of great answers on Quora which run the numbers of the size a parachute would need to be for a full size passenger jet. I recommend reading the full thread, but suffice it to say a ballpark estimate would require a million square feet (92903 square meters) of material. This clearly isn’t very feasible, and the added weight and complexity would no doubt bring its own risks.
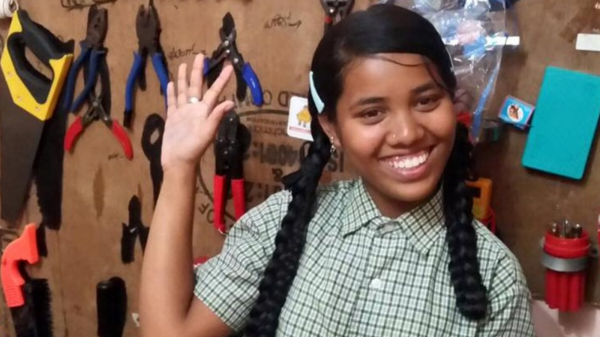
This is an Education hack, and it’s pretty awesome. [Abhijit Sinha] received an Engineering degree and took up a run-of-the mill IT job in Bangalore, considered India’s IT hub. 7 months down the line on Dec 31st, he gave notice to the company and quit his “boring” job. He ended up in Banjarpalya, a village just 30 kms out of Bangalore. But it could well have been 30 years back in time. The people there had never come across computers, and there wasn’t much sign of other modern technology. So he set up Project DEFY – Design Education for You.
He bought a few refurbished laptops, took a room, and put kids and computers together. Except, these kids just knew a smattering of English. They went to the village school, run by the government and staffed by teachers whose training was basic, at best. He told the kids there are games in those boxes for them to play, but they’d have to figure it out on their own, without help from him. Pretty soon, all of them were playing games like they were pros. That’s when [Abhijit] stepped in and told them that they’d created a base line for having fun. Everything else they did from now on had to be more fun than what they had just done. If they were interested, he would show them how.
He had a gaggle of kids waiting to hear him with rapt attention. He showed them how to look online for information. He showed them how they could learn how to build fun projects by looking up websites like Instructables, and then use locally available materials and their own ingenuity to build and modify. Once a project was done, he showed them how to post details about what they had done and learnt so others around the world could learn from them. The kids took to all this like fish to water. They couldn’t wait to get through 5 hours of school each day, and then head over to their makerspace to spend hours tinkering. Check out their Instructable channel – and see if you can give them some guidance and advice.
A year onwards, on Dec 31st again, [Abhijit] gathered the kids, and several adults who had joined in during the year, telling them he had news. He had figured they were independent enough to run the space on their own now, without any help from him. He would still get them the 500 odd Dollars they needed each month to keep it operational. Other than that, they were on their own. He’s been monitoring their progress, and from the looks of it, the hack seems to have worked. More power to [Abhijit] and others like him around the world who are trying to bring the spirit of making to those who probably stand to benefit from it the most. Check out the videos below where they show off their work.
PS : Here’s the latest update from [Abhijit] : “Got back to the Banjarapalya Makerspace after quite a while, and this is what they show me – they built a little plane. Of course it crash lands, and needs a better programming, but I am super impressed that they are ready to fly.
Anyone who wants to help them technically? Financially? With parts and components ?”
This is weird science. Researchers at Lawrence Berkeley National Laboratory have taken some normal bacteria and made them photosynthetic by adding cadmium sulfide nanoparticles. Cadmium sulfide is what makes the garden-variety photoresistor work. That’s strange enough. But the bacteria did the heavy lifting — they coated themselves in the inorganic cadmium — which means that they can continue to grow and reproduce without much further intervention.
Bacteria are used as workhorses in a lot of chemical reactions these days, and everybody’s trying to teach them new tricks. But fooling them into taking on inorganic light absorbing materials and becoming photosynthetic is pretty cool. As far as we understand, the researchers found a chemical pathway into which the electrons produced by the CdS would fit, and the bacteria took care of the rest. They still make acetic acid, which is their normal behavior, but now they produce much more when exposed to light.
Or if you’d rather make electricity, instead of acetic acid, from your bacteria be our guest. In place of CdS, however, you’ll need a fish. Biology is weird.

 draw the schematic and layout. Using the