Aviation Week and Space Technology, the industry’s leading magazine, has been publishing “pilot reports,” on new aircraft for decades. Its pilot report on an aircraft called Centaur was the first in which the pilot doing the test never touched the controls. Centaur is an optionally-piloted aircraft, or OPA.
The reporter conducted the test while sitting in the back seat of the small, twin engine aircraft. Up front sat a person acting as the safety pilot, his arms calmly resting on his lap. Sitting beside him, in what is ordinarily the co-pilot’s seat, was an engineered series of linkages, actuators, and servos. The safety pilot pulled a lever to engage the mechanisms, and they began moving the pilot’s control stick and pressing the rudder pedals. The actuators are double and redundant; if one set fails another will immediately take over. The safety pilot can disengage the mechanism with a single pull of the lever if something goes wrong; unless something goes wrong he does not touch the controls.
In the back seat, the “operator,” commanded the plane through a laptop, using an interface identical to that of the ground control station for an unmanned vehicle. Through the screen, he could change altitude, fly to waypoints, takeoff or land. Pushing the “launch” button began an autonomous takeoff. The computer held the brakes, pushed the throttles forward, checked the engines and instruments, and released the brakes for the takeoff roll. The plane accelerated, took to the air, and began to climb out on a semi-autonomous flight.
Continue reading “Toward The Optionally Piloted Aircraft” →

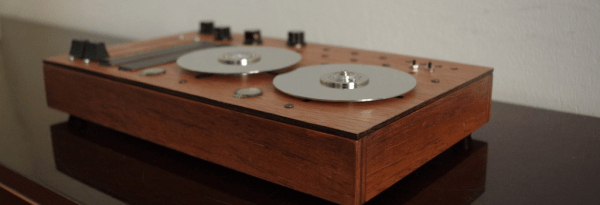
 From what we can see, the box has two potentiometer sliders, two touch-sensitive potentiometers, two force sensitive resistors, a slew of knobs, and a whole bunch of (capacitive?) touch points. In short, a ton of continuous controllers of all sizes and shapes in an aesthetic case. But stealing the show, and giving the device its name, are two platters from old hard drives that serve as jog wheels.
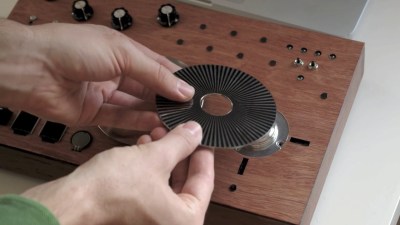


