“Its hard to find people that actually WANT to mow their lawn.” A more true statement has never been made. [Kurt’s] project turns an old lawn mower into a remote control lawn mower.
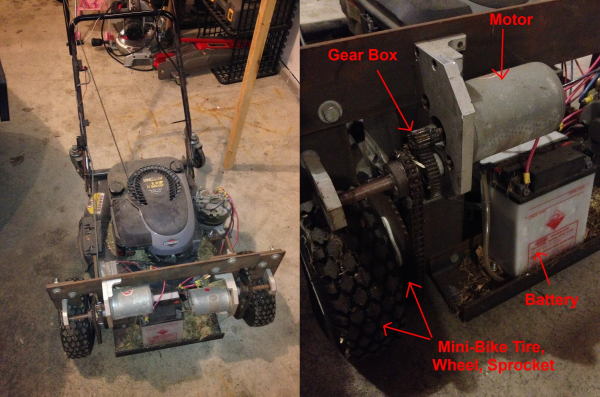
The first step of this build is to replace the front drive wheels with mini-bike tires which have built-in gear tooth sprockets. The rear wheels were then replaced with large caster wheels. The 12-24V DC motors and gear boxes used come from National Power Chair. While we have seen more complicated RC lawn mowers before, this project is a great way to get started. All that [Kurt] wanted was to make lawn mowing more fun, we believe that he has succeeded. This thing is very mobile and can turn on a dime. Check out the demo video after the break.
What’s next? Add a GPS, a Raspberry Pi, and a few other odds and ends. Tie it together with some clever programming and you will have your own autonomous lawn mower. Have you already created a completely autonomous lawn mower? Let us know!
Continue reading “Remote Controlled Lawn Mower Lets You Sit Back And Enjoy The Show”