Lewis Latimer Drafted The Future Of Electric Light

These days, we have LED light bulbs that will last a decade. But it wasn’t so long ago that incandescent lamps were all we had, and they burned out after several months. Thomas Edison’s early light bulbs used bamboo filaments that burned out very quickly. An inventor and draftsman named Lewis Latimer improved Edison’s filament by encasing it in cardboard, earning himself a patent the process.

Lewis had a hard early life, but he succeeded in spite of the odds and his lack of formal education. He was a respected draftsman who earned several patents and worked directly with Alexander Graham Bell and Thomas Edison. Although Lewis didn’t invent the light bulb, he definitely made it better and longer-lasting. Continue reading “Lewis Latimer Drafted The Future Of Electric Light”

The Secret Of Twinkling Christmas Lights

With the holidays over, many of us are braving the elements to take down all those holiday lights. LED lights have largely taken over the market, but in some places, you can still get classic incandescent bulbs. There are some effects that LEDs can’t quite mimic yet. One of those is the magic of “twinkling” light sets, which [Alec Watson] explains in a Technology Connections video. Everyone has seen bulbs that flash, and strings that dim. But the twinkle effect until recently has been hard to describe.

Typical flashing bulbs use a bimetallic strip. As the filament of the bulb heats up, the strip bends, opening the circuit. Then the strip cools and closes the circuit again. Twinkling lights do exactly the opposite. The bimetallic strip shorts the bulb out rather than open the circuit. Twinkling sets also use a lot of bimetallic strip bulbs – typically every fifth bulb has a strip. The result of the bulbs being shorted out is that all be the bulbs in set see a higher voltage. This makes the entire strip shimmer in time with the flashing. That’s where the twinkling magic comes from.

It occurs to us that the voltage on the strip would be a great source of random seeds. Sure, you’d have to replace bulbs now and again, but how many people can say they get their random numbers from a set of Christmas lights?

If you’re curious how incandescent Christmas lights can blow and not take out the whole strip, check out this article about anti-fuses.

Continue reading “The Secret Of Twinkling Christmas Lights”

Xerox Alto CRTs Needed A Tiny Lightbulb To Function

In the real world, components don’t work like we imagine they do. Wires have resistance, resistors have inductance, and capacitors have resistance. However, some designers like to take advantage of those imperfections, something our old friend [Ken Shirriff] noted when he was restoring the CRT of a Xerox Alto.

[Ken] tried to connect a Xerox monitor to the Alto and — since it was almost as old as the Alto — he wasn’t surprised that it didn’t work. What did surprise him, though, is that when he turned the monitor off, a perfect picture appeared for just a split second as the unit powered off. What could that mean?

Keep in mind this is a CRT device. So a perfect picture means you have vertical and horizontal sweep all at the right frequency. It also means you have high voltage and drive on the electron guns. If you are too young to remember all that, [Ken] covers the details in his post.

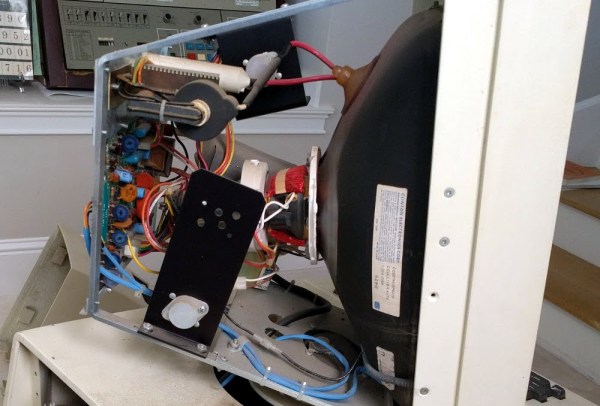
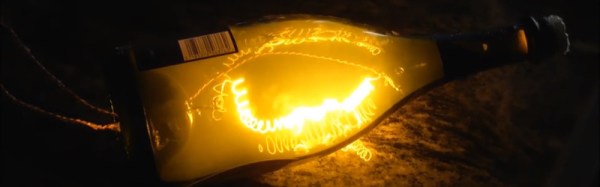
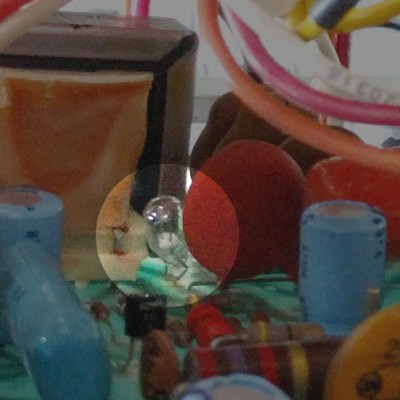
He found that the CRT grid voltage wasn’t present during operation. The voltage derived from the high voltage supply but, mysteriously, the high voltage was fine. There was a small lightbulb in the grid voltage circuit. A 28V device about like a flashlight bulb. It measured open and that turned out to be due to a broken lead. Repairing the broken lead to the bulb put the monitor back in operation.

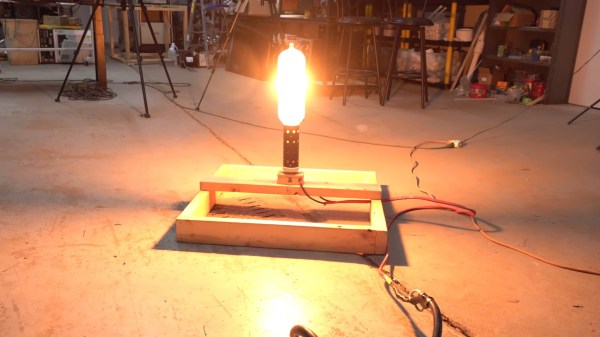
On paper, a light bulb lights up when you put current through it. In real life, it is a bit more complicated. An incandescent filament starts off as almost a dead short and draws a lot of current for a very brief time. As the current flows, the filament gets hot and the resistance goes up. That reduces the current draw. This effect — known as inrush current — is the scourge of designers trying to turn on light bulbs with transistors or other electronic switches.

However, the unknown Xerox power supply designer used that effect as a current limiter. The short 600V pulses would hardly notice the light bulb but if too much current or time elapsed, the resistance of the bulb would rise preventing too much current from flowing for too long. With the bulb open, the negative brightness grid provided an impassible barrier to the electrons. Apparently, the brightness grid lost power a bit earlier than the rest of the circuit and with it out of the way — or perhaps, partially out of the way — the picture was fine until the rest of the circuit also lost power.

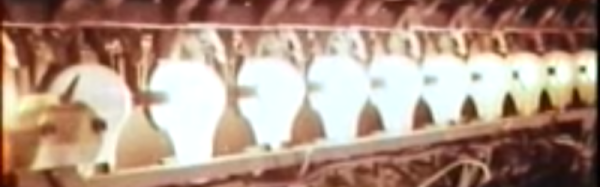
We looked at [Ken’s] efforts on this machine earlier this year. Light bulbs, by the way, aren’t the only thing that changes resistance in response to some stimulus. You might enjoy the 1972 commercial from Xerox touting the Alto’s ability to do advanced tasks like e-mail and printing.

Continue reading “Xerox Alto CRTs Needed A Tiny Lightbulb To Function”

How Many Inventors Does It Take To Invent A Light Bulb

Many credit the invention of the incandescent light bulb with Edison or Swan but its development actually took place over two centuries and by the time Edison and Swan got involved, the tech was down to the details. Those details, however, meant the difference between a laboratory curiosity that lasted minutes before burning out, and something that could be sold to consumers and last for months. Here then is the story of how the incandescent light bulb was invented.

Continue reading “How Many Inventors Does It Take To Invent A Light Bulb”

The Champagne Of Light Bulbs

We’re all used to making our own lighting projects. Triac dimmers, LEDs, Neopixels, EL wire, there is a huge array of lighting components and technologies at our fingertips. But how many of us have made our own lighting rather than buying off-the-shelf? [Confined Maker] set out to do just that by creating an incandescent light bulb from scratch, and since he’s obviously a hacker with a bit of class he did it in an empty Dom Perignon champagne bottle.

It might seem a daunting project, but as he shows us in the video below the break, it turns out to be surprisingly straightforward with no exotic tooling required. He starts by winding a fine coil of thin tungsten wire round a dowel to act as his filament, before bringing a pair of enameled copper wires through holes drilled in the base of the bottle and out of the neck. The ends of these wires are then spliced to his filament and secured with conductive epoxy before the whole assembly is carefully slid back into the bottle. The holes are caulked with silicone, and the bottle is then carefully charged with argon. Argon is heavier-than-air, so he can do this on the bench with nothing more than a bicycle tube inflator and a drinking straw. The bottle is then sealed with a cork and more silicone, and his bulb is ready.

The first power-up with 120V mains power sees a puff of smoke inside the bottle as a coating on the tungsten is vapourised, but after that the bulb does its job well. He’s concerned about his epoxy melting, and the filament has moved to one side of the bottle so he’s not sure about the lifetime he can expect, but to make a working light bulb with such basic equipment is still an impressive accomplishment. His video below the break is eleven and a half minutes long, but well worth watching every minute.

Continue reading “The Champagne Of Light Bulbs”

Retrotechtacular: 100 Watts 120 Volts

If you read our recent feature about the Tal-y-Llyn Railway, the world’s first preserved line, you may have taken a while to watch the short film about the railway in the early 1950s. It was the work of an American film maker, [Carson “Kit” Davidson].

His other work includes some films that might be of interest to Hackaday readers, including one filmed in 1977: “100 Watts 120 Volts”. In it, he follows the manufacture of Duro-Test 100-watt light bulbs through all the stages of their assembly as neck, filament and envelope are brought together in strangely beautiful twentieth century production machinery.

Continue reading “Retrotechtacular: 100 Watts 120 Volts”

Retro Chaser Sign Lights Up Your Life

lighted-sign

[Gnsart] builds props often used in the film industry. He’s created an amazing retro Vegas style light chaser sign. The sign was started as a job a few years ago. While [Gnsart] could handle the physical assembly, the cost of a mechanical light chaser pushed the project over budget. The sign project was cancelled back then, but he never forgot it.

Fast forward to a few weeks ago. [Gnsart] happened upon the Arduino community. He realized that with an Arduino Uno and a commonly available relay board, he could finally build the sign. He started with some leftover cedar fence pickets. The pickets were glued up and then cut into an arrow shape. The holes for the lights were then laid out and drilled with a paddle bit. [Gnsart] wanted the wood to look a bit aged, so he created an ebonizing stain. 0000 steel wool, submerged and allowed to rust in vinegar for a few days, created a liquid which was perfect for the task. The solution is brushed on and removed just like stain, resulting in an aged wood. We’ve seen this technique used before with tea, stain, and other materials to achieve the desired effect.

[Gnsart] then built his edging. 22 gauge steel sheet metal was bent to fit the outline in a bending brake. The steel sheet was stapled to the wood, then spot welded to create one continuous piece. Finally, the light sockets were installed and wired up to the Arduino. [Gnsart] first experimented with mechanical relays, and while we love the sound, we’re not sure how long they’d last. He wisely decided to go with solid state relays for the final implementation. The result speaks for itself. LEDs are great – but there is just something about the warm glow of low-wattage incandescent lights.

Continue reading “Retro Chaser Sign Lights Up Your Life”