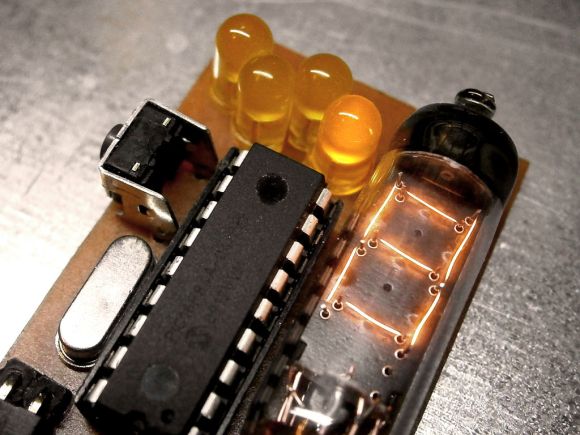
The above may look like a Nixie tube, but it’s a Numitron: the Nixie’s lower-voltage friend, and part of [pinomelean’s] single-digit Numitron clock. If you’re unfamiliar with Numitrons, we suggest you take a look at our post from a few years ago, which includes a helpful tutorial to catch you up to speed.
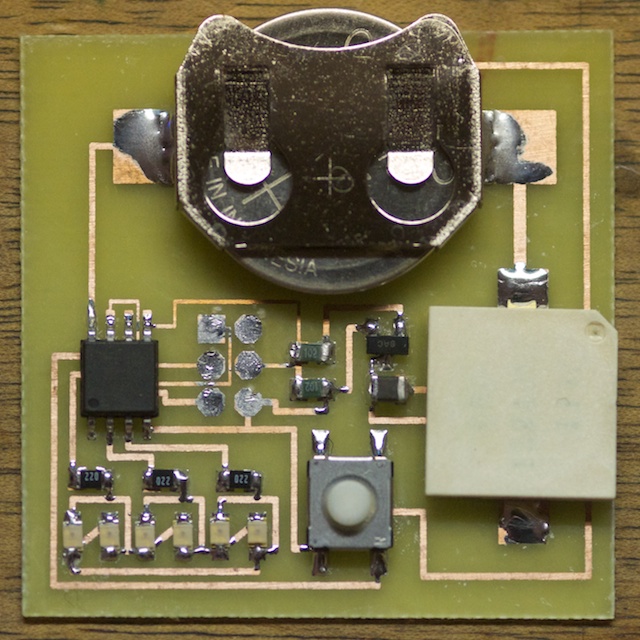
[pinomelean] built this little device to capture a steampunk-ish look on the cheap for a clock small enough to fit on a wrist. The build uses a PIC16F84A uC and a 4MHz crystal on a custom PCB. A small button on the side lets the wearer set the time. Similar to the Vibrating Timepiece from last month, the Numitron clock isn’t perfect, though it is more accurate: gaining only one minute every 3 days.
Check out the video after the break to see it being set and keeping track of the time. It may take a moment to understand how to read the clock, though. Each of the four LEDs indicates where the number in the Numitron tube belongs. The LEDs light in sequence from left to right, displaying the clock one digit at a time.

 Do you want to use your time more productively but are tomato-averse? [Robin]’s