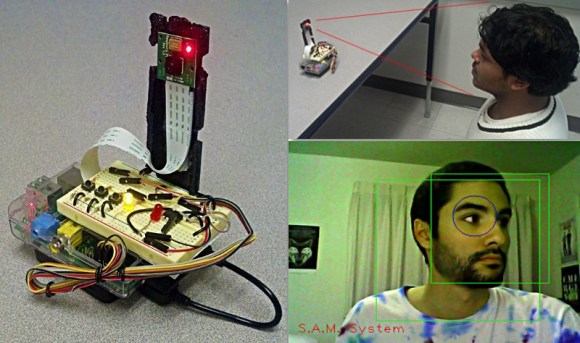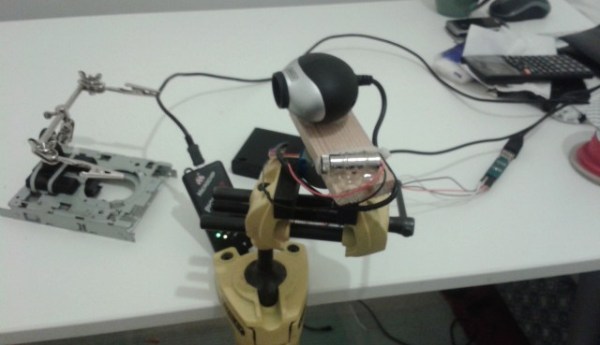
[Shane Ormonde] recently learned how to measure distance using just a webcam, a laser, and everyone’s favorite math — trigonometry. Since then he’s thrown the device onto a stepper motor, and now has a clever 2D room mapping machine.
He learned how to create the webcam laser range finder from [Todd Danko], a project we featured 7 years ago! It’s a pretty simple concept. The camera and laser are placed parallel to each other at a known distance, axis-to-axis. On the computer, a python script (using the OpenCV library) searches the image for the brightest point (the laser). The closer the brightest point is to the center of the image, the farther the object. Counting pixels from the center of the image to the laser point allows you to calculate an angle, which can then be used to calculate the distance to the object — of course, this needs to be calibrated to be at all accurate. [Shane] does a great job explaining all of this in one of his past posts, building the webcam laser rangefinder.
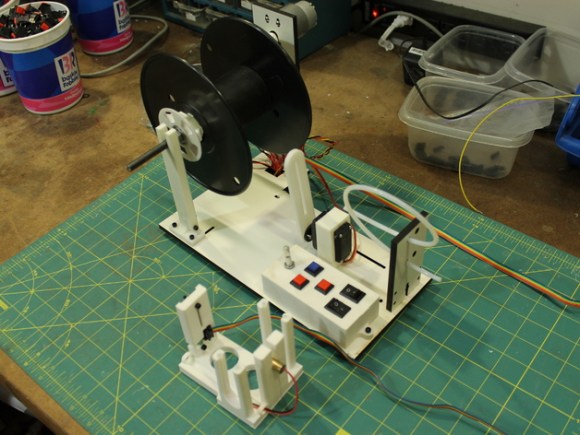
From there it was just a matter of slapping the rangefinder onto a stepper motor, driving it with a small PIC, and running the calculations on the fly! His results are fairly impressive.
Continue reading “2D Room Mapping With A Laser And A Webcam”