Slick Six-Voice Synth For AVRs

He started off making an AVR synthesized guitar, but [Erix] ended up with much more: a complete six-voice AVR wavetable synthesis song machine that’ll run on an ATMega328 — for instance, on an Arduino Uno.

If you’re an AVR coder, or interested in direct-digital synthesis or PWM audio output, you should have a look at his code (zip file). If you’d just like to use the chip to make some tunes, have a gander at the video below the break.

Continue reading “Slick Six-Voice Synth For AVRs”

Showing An AVR Programmer Who’s Boss

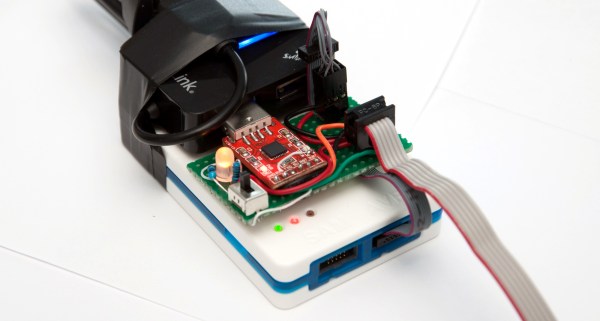
[Bogdan] makes a good point. When you use a dev board you get programming, debugging, power sourcing, and usually a UART. When you go to the trouble of hooking up a programmer why don’t you get the same thing? Astutely, he points out that all you usually get with programmers is programming. So he set out to add features to the hardware he uses to program XMEGA.

The first part of the trick hinges on his use of PDI programming. This is slightly different from ISP programming. Both use a six-pin connector cable but with PDI two of these pins are unused. He took this opportunity to reroute the chip’s TX and RX pins through the cable, which now gives him an avenue to use a UART-to-USB adapter without adding any cables to his target board. Rather than add a second USB cable he rolled a USB hub into the mix. An LM1117 regulates the 5V USB rail down to 3.3V as a source for the target board.

The programmer being used is an Atmel ICE. As you might imagine he didn’t want to make permanent alterations to it. His modifications are all handled externally, with one IDC cable connecting the programmer to his added circuitry and another headed off to the target board. For now he’s jumpering RX/TX to the programming header but plans to route the signals on future PCBs.

High Voltage AVR Programmer

The most common way of programming AVR microcontrollers is the In System Programming port. That little six-pin header with MOSIs and MISOs coming out of it will program every AVR you’ll ever come across. The ISP does have a downside – fuses. Set your fuses wrong, and without a High Voltage Serial Programmer, your chip is bricked. [Dilshan] designed his own HVSP that’s less expensive than the Atmel STK500 and has a nice GUI app.

Instead of following in the footsteps of the USBtinyISP, [Dilshan] is using a PIC18F as the main microcontroller in the programmer. This chip was chosen because of its built-in USB functionality. Because the High Voltage part of a HVSP operates at 12V, actually providing that voltage needed to be taken into consideration. For this, [Dilshan] is using standard 78xx regulators with an 18V input.

The app to control this programmer does everything you would expect, including all the usual AVRdude commands. A great build, and just what we need to reset the fuses on a few dozen chips we have sitting around.

The Dan64: A Minimal Hardware AVR Microcomputer

[Juan] sent us his writeup of a microcomputer he built using an Arduino UNO (AVR ATmega328p) and some off-board SRAM. This one’s truly minimalistic.

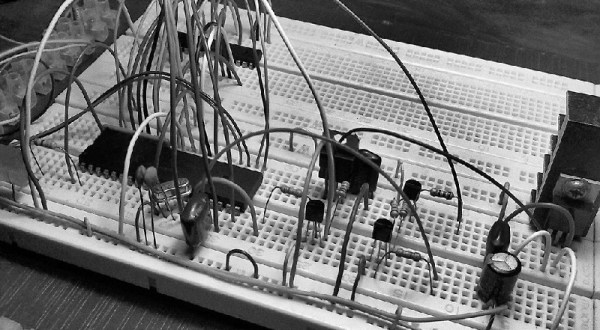
Have a look at the schematics (PDF). There’s an Arduino, the SPI SRAM, some transistors for TV video output, and a PS/2 connector for the keyboard. That’s it, really. It’s easily built on a breadboard in a few minutes if you have the parts on hand. Flash the Dan64 operating system and virtual machine into the AVR and you’re good to go.

Now we’ve seen a few 6502-based retro computers around here lately that use a 6502 paired with a microcontroller for the interfacing, but they’ve all been bulky three-chip affairs. [Juan] wins the minimalism prize by using a 6502 virtual machine implemented in the AVR to reduce the parts count down to two chips for the whole shooting match.

Using a 6502 virtual machine was a crucial choice in the design, because there are 6502 cross compilers that will let you compile and debug code for the microcomputer on your macrocomputer and then load it into the micro to run. This makes developing for the micro less painful.

How does it load programs you ask? The old-fashioned way of course, using audio files. Although rather than using the Kansas City Standard as in days of yore, he encodes the data in short and long pulses of square waves. This might be less reliable, but it sure saves on external hardware.

Continue reading “The Dan64: A Minimal Hardware AVR Microcomputer”

AVR Hardware Timer Tricked Into One-Shot

[Josh] has written up two posts that those of you who use AVRs might find handy. The first post documents a C library that implements a jitter-free one-shot timer. The second post explains how it works. We think it’s such a good idea that we’re going to spoil it for you, but go ahead and read his links and check out his code.

A one-shot is a pulse generator that runs once and only once. You trigger it, it produces the desired pulse, and that’s all she wrote. Why is this handy? Many external ICs that you’ll interface with have minimum durations for signal pulses that must be respected. You could program the AVR to toggle a pin high and then sit around and wait until it’s time to toggle the pin low again, but this wastes valuable CPU time, isn’t going to be very precise, and is susceptible to timing discrepancies if interrupt routines fire in the mean time.

You’d think that you could use the hardware timers for this, but it’s not straightforward. Normally, the timers are free-running; the counter that’s keeping track of time rolls over the top and starts over again. But we just want one pulse.

[Josh]’s very clever idea abuses the timer/counter’s TOP and MATCH values in “Fast PWM” mode. Essentially you trick the counter into never matching by setting TOP below MATCH. This means that the counter spins in its loop between zero and TOP forever, doing nothing.

To break it out of its loop and enable the one-shot, you manually set the counter to a value above TOP and let it go. As it counts up, it’ll eventually hit MATCH, turn on your pin, and then keep counting. When it rolls over the top (255 + 1 = 0 for the 8-bit AVRs), your pin will be correctly turned off again and then the counter re-enters its loop. The one-shot won’t fire until you manually set the counter higher than TOP again.

So there you have it, a one-shot depending only on the hardware timer/counter module and thus immune to jitter and consuming no CPU time at all. Our hats off to you, [Josh]. Clever hack.

Transferring Audio To An AVR At 12kbps

Back in the bad ‘ol days of computing, hard drives cost as much as a car, and floppy drives were incredibly expensive. The solution to this data storage problem offered by all the manufacturers was simple – an audio cassette. It’s an elegant solution to a storage problem, and something that has applications today.

[Jari] was working on a wearable message badge with an 8-pin ATTiny. To get data onto this device, he looked at his options and couldn’t find anything good; USB needs two pins and the firmware takes up 1/4 of the Flash, UART isn’t available on every computer, and Bluetooth and WiFi are expensive and complicated. This left using audio to send digital data as the simplest solution.

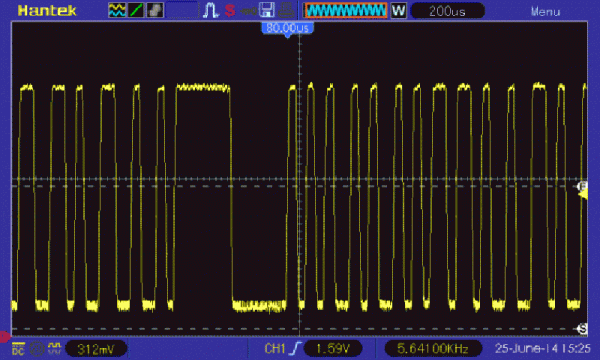
[Jari] went through a ton of Wikipedia articles to figure out the best modulation scheme for transferring data with audio. What he came up with is very simple: just a square wave that’s changed by turning a pin off and on. When the audio is three samples long without crossing zero, the data is 0. When it’s five samples long without crossing zero, the data is 1. There’s a 17-sample long sync pulse, and with a small circuit that acts as a zero crossing detector, [Jari] had a simple circuit that would transfer data easily and cheaply.

All the code for this extremely cheap modem is available on GitHub.

AVR Programmer

Inexpensive AVR Programmer Made From Five Components

If you want to program an AVR chip as inexpensively as possible, then [Ian’s] solution might just be for you. He built an AVR programmer using only four components. This design is based on the vusbtiny AVR programmer design, with a few components left out.

[Ian’s] design leaves out two of the resistors and two diodes, leaving just four components. These include a 1.5k resistor, a small capacitor, a USB connector, a six pin header, and an ATtiny45. He admits that this may not be exactly up to USB spec, but it does work.

This is one of those projects that is really an exercise in “will it work?” more than anything else. The fact that you need to first program an AVR chip means that this wouldn’t be useful in a pinch, because you would already have to have a working programmer. Nonetheless, it’s always fun to see what can be done with as little as possible.