It’s a stretch to call this one a hack, but USB thumb drives are around us constantly and we always assumed that the boards inside were machine populated (like with a pick and place machine). [Bunnie] tells us otherwise. He recently had the chance to tour a factory where USB flash drives are made.
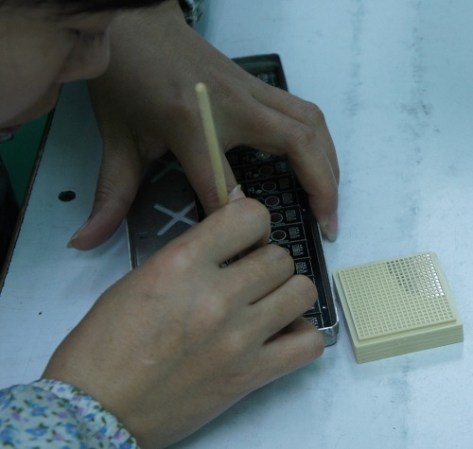
The image above shows a worker populating a set of boards with the flash memory dies. The waffle-grid to the right holds the dies. Each is a tiny glint of a component. The worker is not in a clean room, and is using a bamboo tool to pick up the pieces. [Bunnie] explains that he’s seen the tools before but doesn’t fully comprehend how they work. He figures that the hand-cut manipulator has just the right amount of grab to pick up the die, but will also release it when it touches down on the dot of glue applied to the landing zone on the board.
If you’re into this sort of thing you should check out the PCB factory tour we saw a couple of years back. The article link is dead but the embedded tour video still works.
[Thanks pl]