3D Printering: Hobbs Meters And 3D Printer Reliability

A direct link to Makerbot's  3-pack of Smart Extruders is very hard to find
A direct link to Makerbot’s 3-pack of Smart Extruders is very hard to find

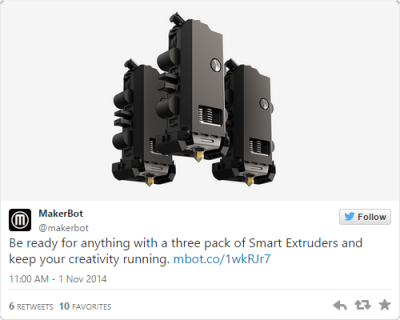
It’s been a little over a year since Makerbot introduced their new line of printers, and since then there have been grumblings about the quality of the Smart Extruder that each one of these printers comes with. While there is no 3D printer extruder that will not eventually clog, wear down, or otherwise break, there are reports of the Makerbot Smart Extruder failing in only hundreds or even tens of hours of use. Considering that a single large print can take a dozen or so hours to complete, you can easily see the why the Smart Extruder is so despised and why even the availability of a three-pack of Smart Extruders is a joke in the 3D printing community.

Of course a cheap shot at Makerbot that plays right into your preconceived ideas and prejudices is far too easy. We’re here to solve problems, not just state them, so here’s what we’re working with: to quantify the long-term reliability of 3D printers we need a way to measure the mean time before failure of extruders. This is already a solved problem; it’s just not implemented.

On aircraft and some very expensive engines that power things like buildings and ships, there’s one gauge, tucked away in the control panel, that keeps track of how long the engine has been running. It’s called a hobbs meter, and the idea behind it is extremely simple – when there is power going to the Hobbs meter, it counts out hours on a small clockwork display. The resolution of the display is only tenths of an hour, usually, but that’s good enough for scheduling maintenance and to be mentioned in NTSB accident reports.

Spend enough time with a 3D printer, and you’ll quickly realize the ‘estimated print time’ is merely a ballpark, and with failed prints the ‘total print time for this object’ isn’t exactly a perfect measure of how many hours you’ve been using your extruder. Only by directly measuring how many hours are logged on a hot end or how many kilometers of filament have been sent through an extruder will you ever get an accurate idea of how long an extruder has been running, and how reliable a printer is.

Hobbs meters are available from Mouser, but you’ll be overpaying there. The better option is from a vendor in a different niche; $30 for a meter that can connect directly to the extruder heater. If enough people add this and keep proper logs, there’s a slight chance of improving the state of 3D printers with real data and not the prejudices of people trying to justify their own designs and purchases.

But perhaps that’s too hard; adding a $30 item to a printer’s BOM just for the sake of data is a bit much. Luckily, there’s an even simpler solution that won’t cost a dime. Just measure the time a heater has been on in the firmware, or save the total length of extruded filament in a microcontroller’s EEPROM. Every printer firmware out there, from Marlin to Repetier to Sprinter has in it a way to calculate both the length of time a heater has been on or how much filament has been pushed through a nozzle.

However, this is 3D printing we’re dealing with. An organized community is not a luxury we currently enjoy, and for this to work several things are needed. The first is somewhere to upload failure statistics. This would be a web site, naturally, with the ability to input the printer make, extruder and hot end model, and the time since last clogged nozzle. The website itself is just a database, some JavaScript, a bit of CSS, and some hosting costs; not hard until you consider tens of thousands of operators would have to know about this website and contribute.

Secondly, if we’re not going with mechanical Hobbs meters there would need to be a ‘total time heater on’ or ‘total length of extruded filament’ variable in the various firmwares. There would hopefully be standardized Gcodes or Mcodes to read and reset this variable.

Will this happen? Of course not. Organization isn’t a strong suit of the RepRap project, and any company that implements Hobbs meter functionality will probably lock that up in proprietary obfuscation. However, Makerbot isn’t dumb, and given they’re selling three-packs of extruders, I would bet they have some data on the MTBF of their extruders. A community-based measurement of the most common cause of broken printers is certainly possible, but like all problems it’s one of organization, not technology.


3D Printering is a semi-weekly column that digs deep into all things related to 3D Printing. If you have questions or ideas for future installments please sending us your thoughts.

3D Printering: Custom RC Camera Mount Takes To The Sky

3DP-Main2

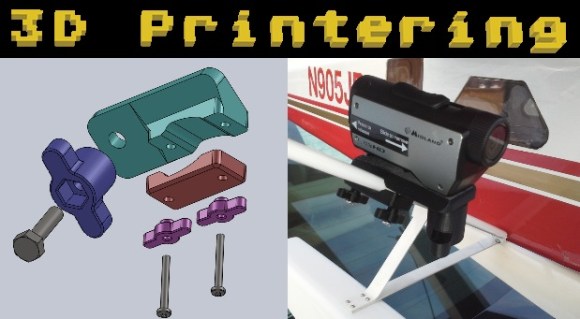
3D Printers are only good for printing trinkets and doodads, right?  Not really. Although, I do print the occasional useless object, most of my prints are used for projects I’m working on or to meet a need that I have. These needs are the project’s design requirements and I’d like to share the process and techniques I use when creating a functional 3D object.

My pal [Toshi] has RC Airplanes and flies often. I have an Action Camera that I never use. Why not combine the two and have some fun? The only thing standing in our way was a method to mount the camera to the airplane. 3D printing makes it easy. If you have a popular vehicle or application, there may be something already available on a 3D model repository like Thingiverse. Our situation was fairly unique I decided to design and print my own mount.

Continue reading “3D Printering: Custom RC Camera Mount Takes To The Sky”

3D Printering: Making A Thing With Solidworks, Part II

printering1

Last week we started to Make a Thing  in Solidworks.  We got as far as sketching and extruding the base. This week we’ll make the back portion. We’ll use some of the same techniques in Part I and a few new features such as 3D filleting and the Hole Wizard.

As you know, this is not the first ‘Making a Thing’ tutorial. In case you missed them, the softwares previously covered in the 3D Printering series are:

engineeringdrawingblack1

Continue reading “3D Printering: Making A Thing With Solidworks, Part II”

3D Printering: Making A Thing With Solidworks, Part I

printering1

Brian has graciously allowed me to hop on the 3D Printering bandwagon to write a brief intro to the wonderful world of Solidworks. We’ll be making the same ‘thing’ as done in the previous ‘Making a Thing’ tutorials:

engineeringdrawingblack1

Admittedly, most Hackaday readers probably don’t have Solidworks as it is a very expensive program. The main reason we are posting this tutorial is so that you can understand the work flow and compare it to some of the free/open packages out there.

Continue reading “3D Printering: Making A Thing With Solidworks, Part I”

3D Printering: Making A Thing In FreeCAD, Part II

printering

It’s time once again for another installment of a Making A Thing tutorial, where I design the same part, over and over again, in multiple 3D design software packages.

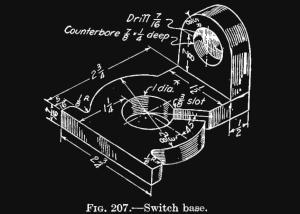
Last week we took a look at FreeCAD, a free, open source parametric modeller. It’s an amazingly powerful tool, and not it’s finally time to complete our model of a strange object ripped from the pages of an 80-year-old drafting textbook.

Here’s some links to previous Making A Thing tutorials, doe:

Read on for the second part of our FreeCAD tutorial

Continue reading “3D Printering: Making A Thing In FreeCAD, Part II”

3D Printering: Making A Thing In FreeCAD, Part I

printering

I’ve been writing these tutorials on making an object in popular 3D modeling programs for a while now, and each week I’ve put out a call for what software I should do next. There is one constant in all those comment threads: FreeCAD. I don’t know if these suggestions reflect the popularity or difficulty of FreeCAD nevermind, it’s totally the difficulty.

FreeCAD is an amazing tool that, if used correctly, can be used to make just about any part, and do it in a manufacturing context. If you need a bauble that’s three times the size of the original, FreeCAD’s parametric modeling makes it easy to scale it up. If you’re designing a thumbscrew and want the head larger while keeping the threads the same, FreeCAD is for you. Basically, you can think of this as a graphical extension of the Thingiverse Customizer. Very powerful, very cool, and unlike a lot of CAD packages out there, free.

Our in-house, overpaid SEO expert (he’s really just a monkey someone trained to use a bullwhip) demands I link to the previous ‘Making a Thing’ tutorials:

The tutorial for FreeCAD continues below.

Continue reading “3D Printering: Making A Thing In FreeCAD, Part I”

3D Printering: Making A Thing In Autodesk 123D

printering

In the continuing battle against 3D printers used exclusively for fabricating plastic octopodes and useless trinkets, here’s yet another installment of a Making A Thing tutorial. If you’ve ever wanted to make one single object in multiple 3D design softwares, this is for you.

Previously, we’ve built a ‘thing’ in a few different 3D modeling programs, including:

See that ‘Read more…’ link below? You might want to click that.

Continue reading “3D Printering: Making A Thing In Autodesk 123D”