Arduino Compatible Home Automation For Smart Phone Or Voice Control

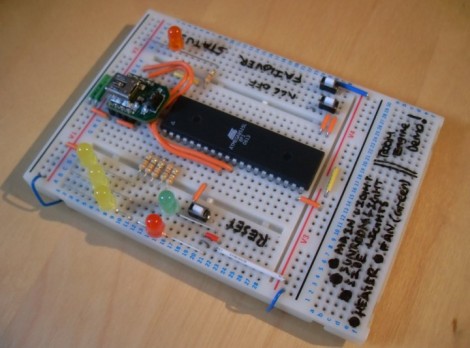
[Joseph] wrote in to share this home automation system he’s working on as a college project. He calls it the Room Engine and the house-side of the hardware is built on top of the circuit you see here. This is the most basic part of the REBoard, which is meant to connect to a computer uses RS232 or USB, and in turn use a set of relays to switch mains voltage devices.

You can follow the bread crumb on his webpage to get a broader video of the system. The interface is designed to use two parts. One is a voice recognition system that is supported by the computer. The other is an iOS interface that includes login credentials and a button-based control system. The video after the break shows off the smart phone portion of the controller. We think he’s done a good job of integrating a few appliances without the need for commercial products such as X10 modules.

If you’re just interested in switching a few things without cord’s reach of each other this can get it done, and offers scheduling functionality. It would also be pretty easy to set this up with a WiFi module and do away with the PC.

Continue reading “Arduino Compatible Home Automation For Smart Phone Or Voice Control”

Arduino Weather-station To Internet Bridge

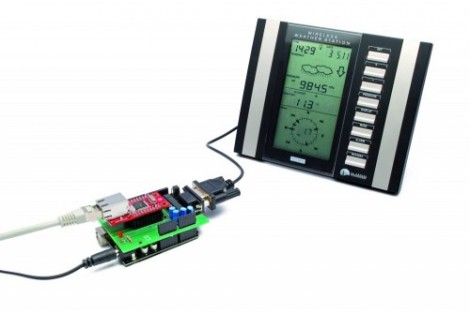
Here’s a project that looks to eliminate the PC necessary for pushing weather station data to the Internet. When you think about it, getting data from your own weather sensing hardware to a site like Weather Underground doesn’t require very much processing at all. The largest chunk of the puzzle is a window to the Internet, and that can be easily accomplished with a microcontroller rather than an always-on computer.

In this case, [Boris Landoni] is using an Arduino along with an RS232 shield and an Ethernet shield. The weather station, a La Crosse WS23xx series, already has an RS232 serial port for grabbing the data. The shield is necessary to step the voltage down to levels that will play nicely with Arduino. It also gives you a D-Sub connector for easy hook up. From there he hit up the documentation for Weather Undeground API, writing code to build the necessary string which is pushed over the Ethernet connection at regular intervals.

If your weather station only offers a USB port you’re not out of luck. Using an embedded platform with USB host functionality you can achieve the same results as we see here.

Bobuino: Arduino Based On ATmega1284 + Goodies

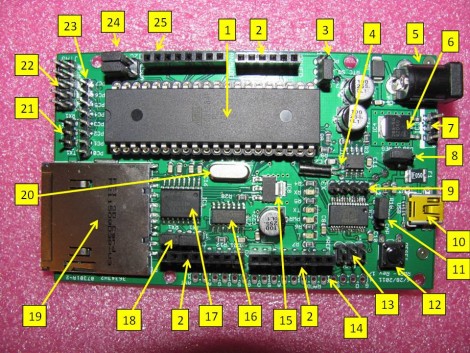
[Erik] wrote in letting us know that he just completed development of the Bobuino, a Arduino based on an ATmega1284. That chip is nice and beefy, most notably for having 16 KB of SRAM but it also boasts 4 KB of EEPROM, and 128 KB of program memory.

But the upgraded chip isn’t the only thing that it brings to the table. It’s easy to spot the on-board SD card slot in the image above. Also of note is the battery-backed DS1307 real time clock with a jumper that will route the square wave output to one of two pins on the microcontroller.

This design is compatible with standard Arduino shields thanks to the familiar pair of pin sockets, and can still be programmed via the USB socket. Since the AVR chip has more IO than normal there’s also pin headers to break out the PORTC pins, for a JTAG connector, and for an RS232 port.

Arduino And Open Sound Control Without An Ethernet Shield

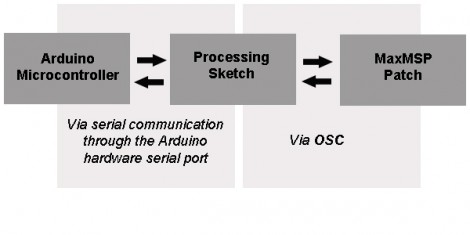
Open Sound Control (OSC) is a communications protocol that can be seen as a modern alternative to MIDI. It’s specifically designed to play nicely with network communication systems. The problem with using it along with Arduino-based gadgets is that you then need to use something like an Ethernet shield to provide the network connection. [Liam Lacey] decided to use Processing as a go-between for OSC and the Arduino in lieu of the Ethernet Shield. One of the major benefits of this method is that it gives you some flexibility when it comes to how the Arduino communicates. Since a USB connected Arduino can be addressed by the Processing sketch in the same way as an AVR chip connected via an RS232 serial port, [Liam’s] method will allow you to prototype on an Arduino board, but transition to your own non-USB hardware for the finished project. The one big drawback to this method is the need to have a computer connected to your controller, but we’d bet you’d need one to run MAXmsp anyway.

PIC Based Frequency Counter

Here’s a PIC based frequency counter that outputs the count via an RS232 serial connection. [Oakkar7] tipped us off about it after seeing the AVR based counter we featured yesterday. This project is a bit older and a bit dirtier.

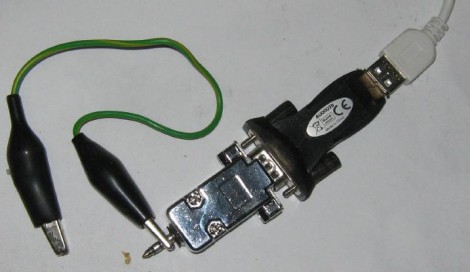
Inside the metal DB9 housing you’ll find just seven parts. The most important is a PIC 16F628 which handles both the counting and the serial communications. We’re not quite sure how it’s managing to talk to that USB-to-Serial converter without some type of level conversion. Since this microcontroller is not a dedicated counter chip a little bit of trimming must be done to bring the accuracy into spec. There’s also some physical trimming involved. In order to get everything to fit into the small enclosure the circuit was free-formed without a PCB or protoboard and the case of the DIP chip had to be ground down just a bit. As for the readout, a simple script can grab the data and display it in a terminal.

[via Piclist]

Bitbang IR Remote

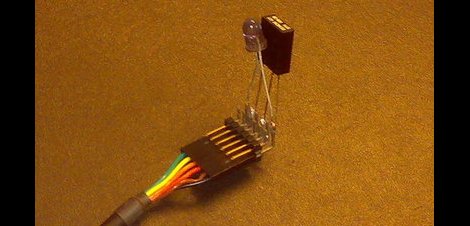
[Albert] has made a few PC IR transmitters and receivers using the traditional connection of RS232 serial, and that is fine, but as we are all aware, not every computer has serial ports standard. Searching though normal USB <> RS232 dongles didn’t meet his requirements. Deciding on making it himself, he whipped up this FTDI bit-bang IR receiver / transmitter.

While FTDI makes a range of chips most (if not all) support a bit-bang mode where you can manually control the IC’s pins. The FTDI chip handles the timing, and when paired up with libFTDI makes it pretty painless to control. The software is a work in progress, but [Albert] already has a driver that connects to LIRC, which lets you control a wide array of remote devices and a test program for carrier generation.

Schematics, source, and a few pages of good information are available on his site.

Cheap And Easy SMS Via GSM For Your MCU

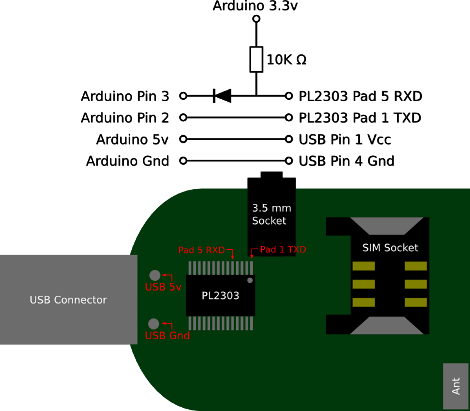
Non acronym version of the title: send and receive text messages via cell phone communication towers using an Arduino or other microcontroller. “We’ve been doing that for years!” you cry, well yes, technically. But [Fincham] lays it outs simply; commercial offerings are expensive and finding a cell phone that uses RS232 now a days is getting difficult, so a new way of doing the same old is necessary. The good news is USB GSM modems are readily available, cheap, and only require a few interface pins to get them talking with an Arduino. In fact, the image above is all you need.