The Integral Molten Salt Reactor And The Benefits Of Having A Liquid Fission Reactor

Although to most the term ‘fission reactor’ brings to mind something close to the commonly operated light-water reactors (LWRs) which operate using plain water (H2O) as coolant and with sluggish, thermal neutrons, there are a dizzying number of other designs possible. Some of these have been in use for decades, like Canada’s heavy water (D2O) reactors (CANDU), while others are only now beginning to take their first step towards commercialization.

These include helium-cooled, high-temperature reactors like China’s HTR-PM, but also a relatively uncommon type developed by Terrestrial Energy, called the Integral Molten Salt Reactor (IMSR). This Canadian company recently passed phase 2 of the Canadian Nuclear Safety Commission’s (CNSC) pre-licensing vendor review. What makes the IMSR so interesting is that as the name suggests, it uses molten salts: both for coolant and the low-enriched uranium fuel, while also breeding fuel from fertile isotopes that would leave an LWR as part of its spent fuel.

So why would you want your fuel to be fluid rather than a solid pellet like in most reactors today?

Continue reading “The Integral Molten Salt Reactor And The Benefits Of Having A Liquid Fission Reactor”

A Vintage Polaroid Camera Goes Manual

There once was a time when all but the most basic of fixed focus and aperture cameras gave the photographer full control over both shutter speed and f-stop. This allowed plenty of opportunity to tinker but was confusing and fiddly for non-experts, so by the 1960s and ’70s many cameras gained automatic control of those functions using the then quite newly-developed solid state electronics. Here in 2023 though, the experts are back and want control. [Jim Skelton] has a vintage Polaroid pack film camera he’s using with photographic paper as the film, and wanted a manual exposure control.

Where a modern camera would have a sensor in the main lens light path and a microcontroller to optimize the shot, back then they had to make do with a CdS cell sensing ambient light, and a simple analog circuit. He considered adding a microcontroller to do the job, but realized that it would be much simpler to replace the CdS cell with a potentiometer or a resistor array. A 12-position switch with some carefully chosen resistor values was added, and placed in the camera’s original battery compartment. The final mod brought out the resistors and switch to a plug-in dongle allowing easy switching between auto and switched modes. Result – a variable shutter speed Polaroid pack camera!

Sadly the film for the older Polaroid cameras remains out of production, though the Impossible Project in the Netherlands — now the heirs to the Polaroid name — brought back some later versions and have been manufacturing them since 2010. Hackers haven’t been deterred though and have produced conversions using Fuji Instax film and camera components, as with this Polaroid portrait camera, and [Jim]’s own two-camera-hybrid conversion.

Passively Generating Power Day And Night Takes The Right Parts

A thermoelectric generator (TEG) can turn a temperature difference into electricity, and while temperature differentials abound in our environment, it’s been difficult to harness them into practical and stable sources of power. But researchers in China have succeeded in creating a TEG that can passively and continuously generate power, even across shifting environmental conditions. It’s not a lot of power, but that it’s continuous is significant, and it could be enough for remote sensors or similar devices.

Historically, passive TEGs have used ambient air as the “hot” side and some form of high-emissivity heat sink — usually involving exotic materials and processes — as the “cold” side. These devices work, but fail to reliably produce uninterrupted voltage because shifting environmental conditions have too great of an effect on how well the radiative cooling emitter (RCE) can function.

The black disk (UBSA) heats the bottom while the grey square (RCE) radiates heat away, ensuring a workable temperature differential across a variety of conditions.

Here is what has changed: since a TEG works on temperature difference between the hot and cold sides, researchers improved performance by attaching an ultra-broadband solar absorber (UBSA) to the hot side, and an RCE to the cold side. The UBSA is very good at absorbing radiation (like sunlight) and turning it into heat, and the RCE is very good at radiating heat away. Together, this ensures enough of temperature difference for the TEG to function in bright sunlight, cloudy sunlight, clear nighttime, and everything in between.

As mentioned, it’s not a lot of power (we’re talking millivolts) but the ability to passively and constantly produce across shifting environmental conditions is something new. And as a bonus, the researchers even found a novel way to create both UBSA and RCE using non-exotic materials and processes. The research paper with additional details is available here.

The ability to deliver uninterrupted power — even in tiny amounts — is a compelling goal. A few years ago we encountered a (much larger) device from a team at MIT that also aimed to turn environmental temperature fluctuations into a trickle of constant power. Their “Thermal Resonator” worked by storing heat in phase-change materials that would slowly move heat across a TEG, effectively generating continuously by stretching temperature changes out over time.

Automated Shusher Keeps Conference Loudmouths In Line

Few things are more annoying than being at a conference and having an inconsiderate group conducting a vociferous sidebar that drowns out the speaker. More annoying still is the inevitable shushing; nobody likes being either the shusher or the shushed. So why not take the humans out of the loop and automate the chore of keeping the peace?

Such was the challenge presented to [BotBerg] before a recent conference, who came up with this automated shusher (translation) on short notice. The build is based on the Arduino Nano 33 BLE Sense Deck, a sensor-rich dev board that’s perhaps a little overkill for the job, but hey — you roll with what you’ve got. The board’s MEMS microphone is the sensor used here, which measures the ambient sound pressure level multiple times per second. When the background noise exceeds a potentiometer-set threshold, an MP3 player is triggered to play a sound clip entreating the offenders to pipe down. The whole thing is housed in a playful 3D-printed enclosure shaped like a mouth, which should be sufficient reminder alone to keep yours shut.

This was a quick-and-dirty prototype, of course, and probably could use some refinement. Given the behavior we’ve witnessed at some conferences, we’d say hooking it up to a Nerf turret gun would be a justifiable escalation.

Fast Scanning Bed Leveling

The bane of 3D printing is what people commonly call bed leveling. The name is a bit of a misnomer since you aren’t actually getting the bed level but making the bed and the print head parallel. Many modern printers probe the bed at different points using their own nozzle, a contact probe, or a non-contact probe and develop a model of where the bed is at various points. It then moves the head up and down to maintain a constant distance between the head and the bed, so you don’t have to fix any irregularities. [YGK3D] shows off the Beacon surface scanner, which is technically a non-contact probe, to do this, but it is very different from the normal inductive or capacitive probes, as you can see in the video below. Unfortunately, we didn’t get to see it print because [YGK3D] mounted it too low to get the nozzle down on the bed. However, it did scan the bed, and you can learn a lot about how the device works in the video. If you want to see one actually printing, watch the second, very purple video from [Dre Duvenage].

Generally, the issues with probes are making them repeatable, able to sense the bed, and the speed of probing all the points on the bed. If your bed is relatively flat, you might get away with probing only 3 points so you can understand how the bed is tilted. That won’t help you if your bed has bumps and valleys or even just twists in it. So most people will probe a grid of points.

Continue reading “Fast Scanning Bed Leveling”

Another Room-Temperature Superconductivity Claim And Questions Of Scientific Integrity

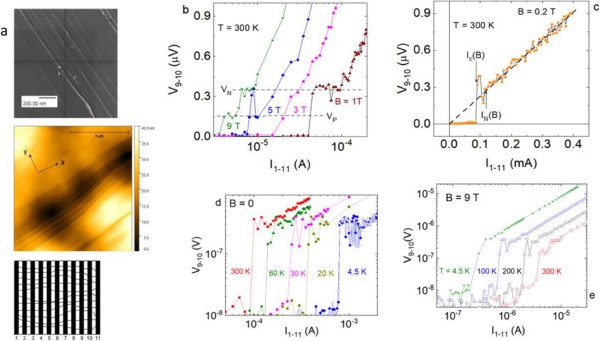
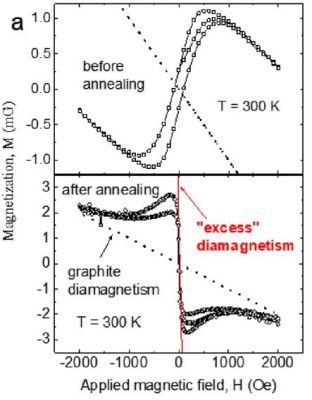
In early March of 2023, a paper was published in Nature, with the researchers claiming that they had observed superconductivity at room temperature in a conductive alloy, at near-ambient pressure. While normally this would be cause for excitement, what mars this occasion is that this is not the first time that such claims have been made by these same researchers. Last year their previous paper in Nature on the topic was retracted after numerous issues were raised by other researchers regarding their data and the interpretation of this that led them to conclude that they had observed superconductivity.

According to an interview with one of the lead authors at the University of Rochester – Ranga Dias – the retracted paper has since been revised to incorporate the received feedback, with the research team purportedly having invited colleagues to vet their data and experimental setup. Of note, the newly released paper reports improvements over the previous results by requiring even lower pressures.

Depending on one’s perspective, this may either seem incredibly suspicious, or merely a sign that the scientific peer review system is working as it should. For the lay person this does however make it rather hard to answer the simple question of whether room-temperature superconductors are right around the corner. What does this effectively mean?

Continue reading “Another Room-Temperature Superconductivity Claim And Questions Of Scientific Integrity”

Calibrating Thermal Cameras With Hot Patterned Objects

Thermal cameras are great if you want to get an idea of what’s hot and what’s not. If you want to use a thermal camera for certain machine vision tasks, though, you generally need to do a geometric calibration to understand what the camera is seeing and correct for lens distortion. [Henry Zhang] has shared various methods of doing just that.

It’s all about generating a geometrically-regular thermal pattern.

To calibrate a thermal camera, first you need a thermal pattern. This is like typical test image for a camera or screen, but with temperatures instead of colors. [Henry] explains several methods for doing this. One involves using a grid of nichrome wires to create a thermal pattern for calibration purposes. Another uses discs of cold aluminium inserted into a foam board. Even a simple checkerboard can work, with the black spaces heating up more from ambient sunlight than their neighbouring white spots. [Henry] then explains the mathematical techniques used for calibrating based on these patterns.

It’s a useful primer on the topic if you’re working with thermal camera systems. We’ve looked at some other interesting machine vision topics before, too. If you’ve got any great thermal imaging tips of your own, don’t hesitate to drop us a line!