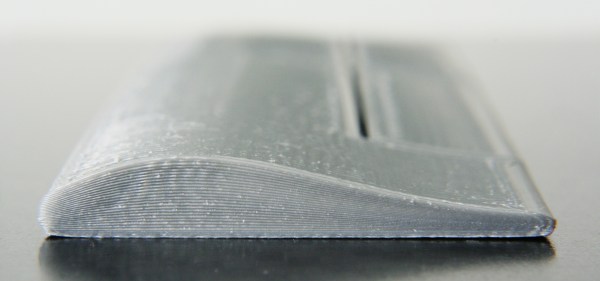
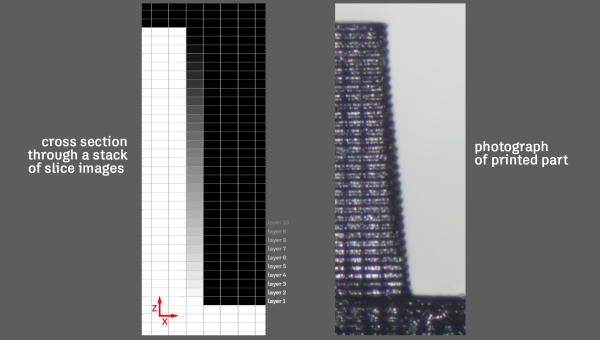
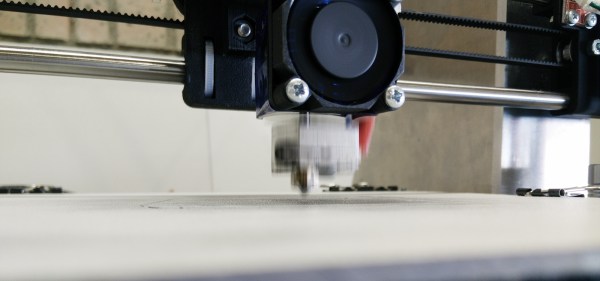
Non-planar layer Fused Deposition Modeling (FDM) is any form of fused deposition modeling where the 3D printed layers aren’t flat or of uniform thickness. For example, if you’re using mesh bed leveling on your 3D printer, you are already using non-planar layer FDM. But why stop at compensating for curved build plates? Non-planar layer FDM has more applications and there are quite a few projects out there exploring the possibilities. In this article, we are going to have a look at what the trick yields for us.
3d Printer hacks2780 Articles
Get Subpixel Printing With A DLP 3D Printer
A DLP 3D printer works by shining light into a vat of photosensitive polymer using a Digital Light Processing projector, curing a thin layer of the goo until a solid part has been built up. Generally, the resolution of the print is determined by the resolution of the projector, and by the composition of the polymer itself. But, a technique posted by Autodesk for their Ember DLP 3D Printer could allow you to essentially anti-alias your print, further increasing the effective resolution.
Continue reading “Get Subpixel Printing With A DLP 3D Printer”
Formlabs Form 1+ API Now Available On Github
Since 2014, the Form 1+ has been serving a faithful community of avid resin-oriented 3D printer enthusiasts. With an API now released publicly on Github, it’s time for the Form 1+ to introduce itself to a crew of eager hardware hackers.
Exposing an interface to the printer opens the door to a world of possibilities. With the custom version of PreForm that arrives with this release, a whopping 39 different properties are open for tuning, according to the post on Reddit. Combining these newly-accessible parameters with a sufficient number of hackers, odds are good that the community will be able to quickly converge on stable settings for 3rd party resins. (We’re most excited to see the Homebrew PCBs community start exposing their UV-sensitive PCBs with this hardware setup.)
Heads-up: poking around in this brave new world is almost certain to void your warranty, but if you’re eager to get SpacewΛr up-and-running, it might just be worth it.
3D Printering: G-Code Post Processing With Perl
Most of our beloved tools, such as Slic3r, Cura or KISSlicer, offer scripting interfaces that help a great deal if your existing 3D printing toolchain has yet to learn how to produce decent results with a five headed thermoplastic spitting hydra. Using scripts, it’s possible to tweak the little bits it takes to get great results, inserting wipe or prime towers and purge moves on the fly, and if your setup requires it, also control additional servos and solenoids for the flamethrowers.
This article gives you a short introduction in how to post-process G-code using Perl and Slic3r. Perl Ninja skills are not required. Slic3r plays well with pretty much any scripting language that produces executables, so if you’re reluctant to use Perl, you’ll probably be able to replicate most of the steps in your favorite language.
Continue reading “3D Printering: G-Code Post Processing With Perl”
New Part Day: ST’s 32-Bit 3D Printer Controller
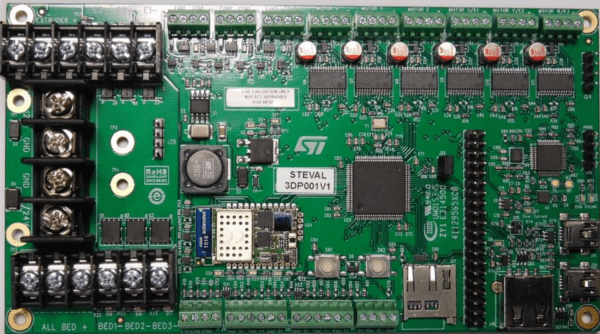
There are a few 32-bit ARM-based 3D printer controller boards out there such as the Smoothieboard, the Azteeg X5 mini, [Traumflug]’s Gen5 electronics, whatever board is in the Monoprice MP Mini Select, and several others I will be criticized for not mentioning. All of these ARM boards provide smoother acceleration, better control, and ultimately better prints from whatever 3D printer they’re controlling. Now, out of the blue, there’s a new board. It’s an evaluation board from ST — much like those famous Discovery boards — that sells itself as a plug and play solution for 3D printers.
The heart of this board is an STM32F401 — not the king of the STM32 line or the fastest ARM microcontroller, but anything faster or more capable will add considerably more to the BOM for this board. This controller board features six of ST’s L6474 motor drivers with enough current for some beefy NEMA 23 stepper motors , a multi-zone heated bed, and connections for a WiFi module and external LCD and keypad. You can buy this board right now for $118. This board isn’t a game changer, but it is evidence the game has been changed.
As with all 3D printer controller boards, there are a few aspects that will leave users wanting more. This is a board meant for 12V heaters (except for the bed, which has a 24V, 20A output), and the stepper drivers can only go up to 16 microsteps. That said, there’s not much else to complain about. This offering comes with a 32-bit firmware called Marlin4ST. From a quick perusal, it looks like the familiar configuration.h is still there, and still does what it’s supposed to do.
This ST Discovery board is extremely capable, available now, and relatively cheap, but that’s not really the big story here. What this board represents is a reference design and working firmware for a 32-bit ARM-based printer controller. That’s the future, and with this board the future might come a little sooner.
Thanks [jagerboots] for sending this one in.
Soviet-Era Tank Gets The 3D Printed Treatment
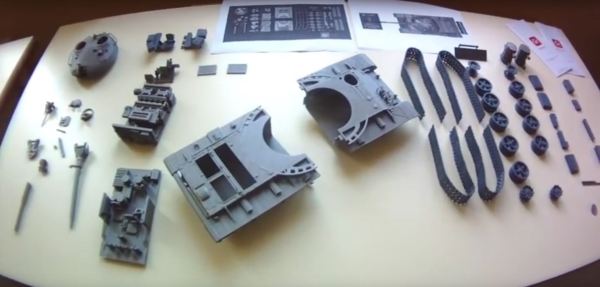
3D printers are celebrated for their capacity to replace missing or broken parts. How about an entire T-62 tank?
Now hold on a second — this is only a model replica. It is, however another expression of the myriad uses for 3D printers. Designed in Maya and requiring almost three weeks to print all 62 parts from about 70 meters of PLA filament. The assembly is not terribly involved, made easier by printing a few large sections such as the crew section and hull while the parts don’t get much smaller than the turret hatches. Nonetheless, he final product is about as true to life as you can get when designing the parts from scratch.
Continue reading “Soviet-Era Tank Gets The 3D Printed Treatment”
Sonic 3D Printer Auto Bed Leveling Makes A Swoosh
3D Printering: the final frontier. These are the voyages of another 3D printer hack. Its mission: to explore strange new ways of leveling a print bed.
So far, we’ve had servo probes, Allen key probes, Z-sled probes, inductive and capacitive contactless switches, just to name a few. All of them allow a 3D printer to probe its print bed, calculate a correction plane or mesh, and compensate for its own inherent, time variant, inaccuracies.
Continue reading “Sonic 3D Printer Auto Bed Leveling Makes A Swoosh”

