 Lobe pumps are perhaps most popularly known for their use in Rootes-type superchargers, but they can pump water, too. [Let’s Print] demonstrates this ably with a 3D-printed design that can pump with the best of them.
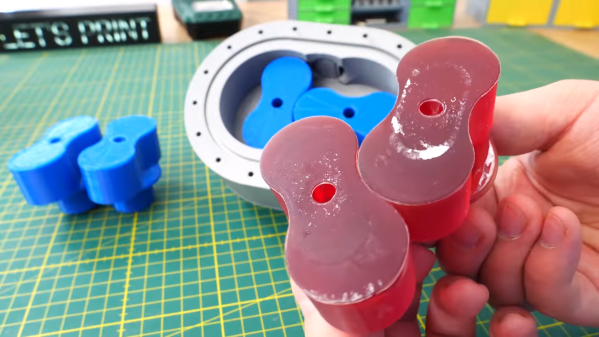
The design uses two figure-eight shaped counter-rotating rotors, or lobes. As the rotors turn, they trap fluid between the rotor and the housing, forcing it towards the outlet. It’s a positive-displacement design, meaning it traps a fixed volume of fluid in each rotation, moving it from inlet to outlet.
The design requires proper timing of the two rotating lobes in order to ensure they maintain the closed volume and don’t impact each other. This is achieved with a pair of timing gears on the back of the pump. The housing, lobes, and gears are all 3D-printed, making this a build that anyone can replicate at home with their own printer.
ABS was used for the rotors for its better handling of friction without melting as easily. However, resin-printed lobes were also employed for their higher tolerances, too, with both designs working acceptably in practice.
The pump still needs more improvement; the hope is to reduce the leaks out of the rear of the pump. [Let’s Print] also intends to add a motor to the pump itself rather than using a power drill to run the device. It’s great to see these 3D-printed pump builds continuing in earnest. Video after the break.