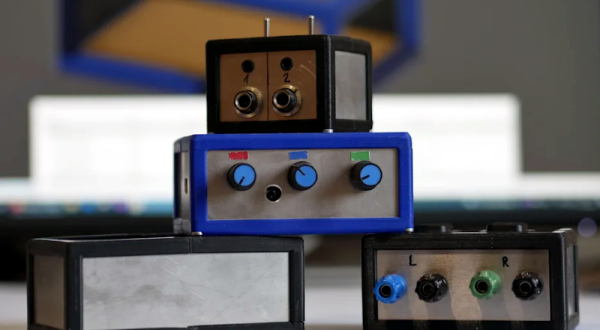
Building something, of course, requires your electronics skills. But packaging it is often an exercise in mechanics. You can buy off the shelf, of course, but sometimes it is hard to find just the right enclosure. You probably have a 3D printer, too, but sometimes 3D printing an entire case can be time consuming and isn’t always completely attractive. Enter [Johannes-Bosch] and Fusion 360. These 3D printed frames assemble into boxes and are easy to customize. The panels are aluminum, although we imagine you could substitute wood, acrylic, or even a 3D printed sheet of plastic, if you wanted to.
The video below shows some examples. If your German isn’t up to snuff, ask YouTube to automatically translate the subtitles and you’ll get the idea.
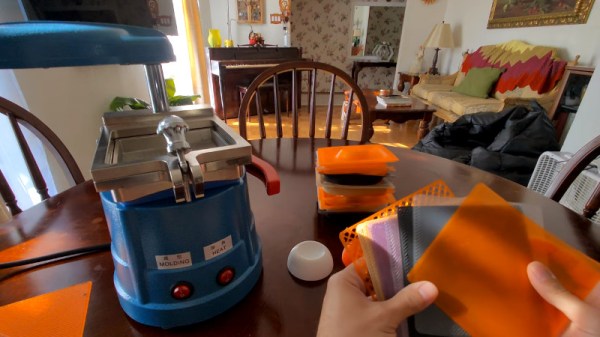
Even if they don’t have one themselves, we’d wager the average Hackaday reader is at least vaguely aware of how a vacuum former works on a fundamental level. You heat up a plastic sheet until it’s soft, then use a vacuum pump to pull the ductile material down onto an object and hold it there while it cools off. It’s easy to build a vacuum forming rig yourself, but small commercial units are cheap enough that it might not be worth your time. If everything goes to plan, the technique is a quick and effective way of duplicating items around the home and shop.
But we were recently tipped off to a variation of this classic technique that’s certainly worth further research. As demonstrated in a recent video, [Nathan Martinez] shows how 3D printed sheets can be used in place of the 5″ x 5″ squares of thermoplastic film that his imported vacuum former was designed to use. It’s easy enough to do: just model up a square with the appropriate 2D dimensions in your CAD package of choice, and extrude it to a height of about .5 mm.
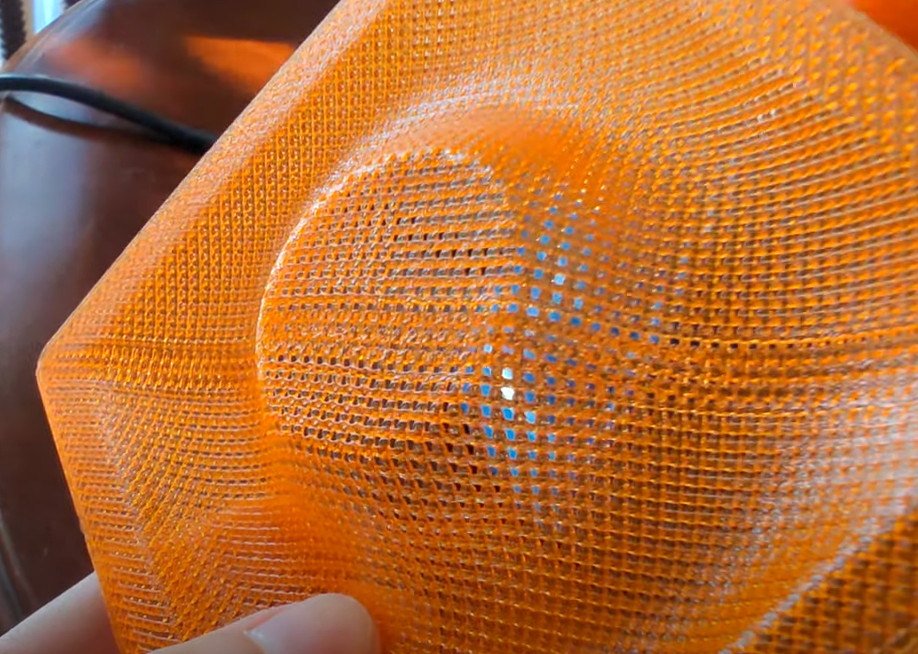
A printed mesh pattern could be used to form custom shaped filters or strainers.
So what’s the advantage? Well for one thing, it’s cheaper. Though admittedly, not by much. Going rate on Amazon seems to be about 90 cents per sheet for the real stuff, and some back of the envelope math shows the printed version coming in at around 30 cents given nominal filament costs. Whether or not those savings are worth the extra effort is certainly debatable.
But that’s not really the most interesting part. With printed sheets loaded into the vacuum former, you’ve got access to a much wider array of materials to work with. For example, [Nathan] shows off some very interesting flexible pieces he was able to produce using sheets of TPU. You can also experiment with different surface textures. These can not only be used to give your vacuum formed pieces a bit of interesting visual flair, but could actually have some practical applications. In the video we see how a printed mesh could be formed over a piece to create a conformal air vent or filter.
To be sure, there’s some room for improvement here. Not all the pulls were successes, and [Nathan] says getting the printed sheets up to the proper temperature can be tricky. But when it works, it works quite well, and we think there could be some untapped potential in this unexpected melding of new and old methods of at-home plastic production.
If you are tried of building things that fly, why not try a submarine like [DIYPerks] did? As you can see in the video below, the key is to control buoyancy, and the mechanism used is impressive. The sub has two giant syringes fore and aft to compress or decompress water. The plungers are now 3D-printed actuators that travel on a lead screw. Two high-torque motors and some batteries sandwiched in acrylic disks make up the rest. This is a big vessel — you won’t be trying this in your bathtub and maybe not even your pool unless it is a big one.
Of course, everything needs to be watertight. Instead of trying to waterproof a power switch, this sub uses a reed switch so that a nearby magnet can turn it on. Not an original idea, but we always think it is more elegant than seals and potting compounds.
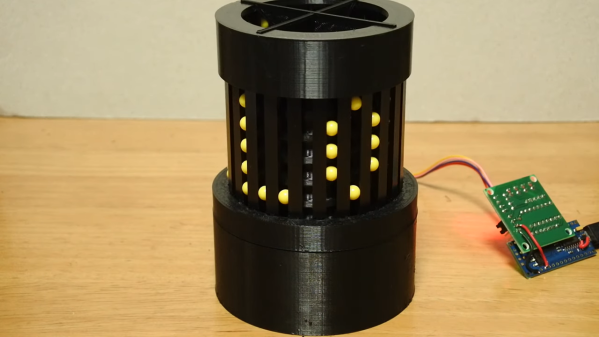
Don’t get us wrong — we love unique displays as much as anyone. But sometimes we stumble across one that’s so unique that we lack the basic vocabulary to describe it. Such is the case with this marble-raising dot-matrix alphanumeric display. But it’s pretty cool, so we’ll give it a shot.
The core — literally — of [Shinsaku Hiura]’s design is a 3D-printed cylinder with a spiral groove in its outside circumference. The cylinder rotates inside a cage with vertical bars; the bars and the grooves are sized to trap 6-mm AirSoft BBs, which are fed into the groove by a port in the stationary base of the display. BBs are fed into the groove at the right position to form characters, which move upwards as the cylinder rotates. Just watch the video below — it explains it far better than words can.
The clever bit is how the BBs are fed into the groove. Rather than have a separate mechanism to gate the feed port, there’s a backlash mechanism that opens the port when the motor powering the drum runs in reverse for a bit. It’s a clever use of cams to get the job done without adding an extra servo, which sort of reminds us of the design parsimony exhibited in his one-servo seven-segment display.
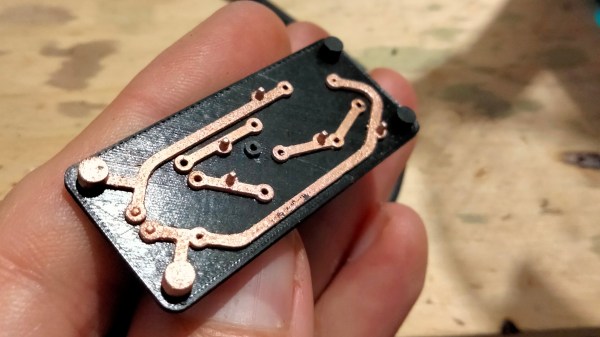
Conductive filament exists, but it takes more than that to 3D print something like a circuit board. The main issue is that traces made from conductive filament are basically resistors; they don’t act like wires. [hobochild]’s interesting way around this problem is to use electroplating to coat 3D-printed traces with metal, therefore creating a kind of 3D-printed circuit board. [hobochild] doesn’t yet have a lot of nitty-gritty detail to share, but his process seems fairly clear. (Update: good news! here’s the project page and GitHub repository with more detail.)
The usual problem with electroplating is that the object to be coated needs to be conductive. [hobochild] addresses this by using two different materials to create his test board. The base layer is printed in regular (non-conductive) plastic, and the board’s extra-thick traces are printed in conductive filament. Electroplating takes care of coating the conductive traces, resulting in a pretty good-looking 3D-printed circuit board whose conductors feature actual metal. [hobochild] used conductive filament from Proto-pasta and the board is a proof-of-concept flashing LED circuit. Soldering might be a challenge given the fact that the underlying material is still plastic, but the dual-material print is an interesting angle that even allows for plated vias and through-holes.
We have seen conductive filament used to successfully print workable electrical connections, but applications are limited due to the nature of the filament. Electroplating, a technology accessible to virtually every hacker’s workbench, continues to be applied to 3D printing in interesting ways and might be a way around these limitations.
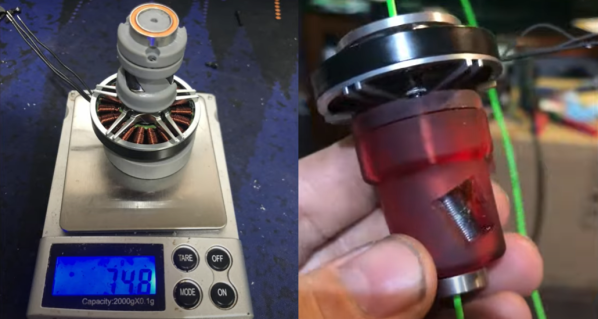
Getting a direct-drive BLDC extruder off the ground comes with a number of geometry challenges. First, filament needs to be fed through a motor with a hollow shaft. Since this motor will be operated under closed loop control via an ODrive, the motor also requires an encoder with a hole down the middle too. [wayne dalton] patiently walks us through all the changes made over seven iterations to produce a setup that will eventually mount onto a machine and start printing. But for that last step we’ll need to check back a bit later. Finally, this progress comes with the promise of a possible open source release of the design files, so we’re pretty eager to stay tuned for future videos.
In the last few years, we’ve seen state-of-the-art extruders move away from NEMA 17 motors in favor of more compact solutions like planetary gears and even lasers to push printers faster. We’re excited to see that folks keep trying to set the bar higher.
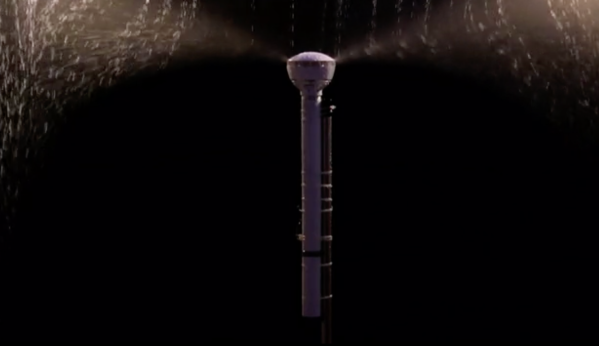
Many infamous Kickstarter projects have ultimately flopped or failed, leaving backers frustrated and angry. Often pitched with a splashy convincing video that happens to have critical components conveniently offscreen. [Allen Pan] was reminiscing about one such project, the air umbrella, and decide to redeem the project by making his own.
The basic idea of the air umbrella was a device that could create a cone of fast-moving air over your head to deflect air. Going off of the specs listed on the original Kickstarter page, [Allen] made a simple prototype that did nothing. Suspicions confirmed, he decided to keep going by buying a powerful electric leaf blower. A nozzle was 3d printed that could direct the air into the needed disc. Early testing with the mist function on a garden hose seemed promising, and they worked their way up to progressively larger raindrops.
Finally, the clouds of California smiled upon them, and it rained. [Allen] was ecstatic that his umbrella worked. He couldn’t hear much out of one ear as he was holding a leaf blower next to it for a few minutes, but it’s a small price to pay to stay dry with the Air Umbrella.