Hinges Live Inside 3D Prints

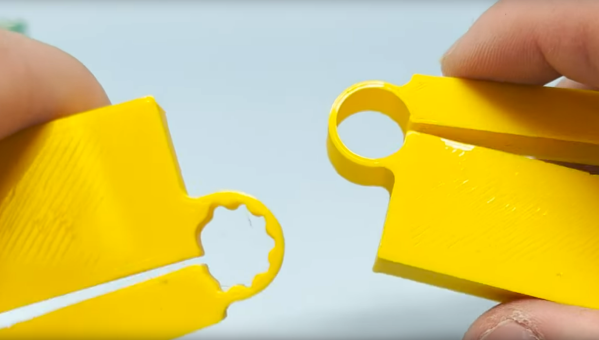
Since desktop 3D printers have become more common, we’ve seen dramatic shifts in all kinds of areas such as rapid prototyping, antique restoration, mass production of consumer goods, or even household repairs that might not have been possible otherwise. There are a lot of unique manufacturing methods that can be explored in depth with a 3D printer as well, and [Slant 3D] demonstrates how one such method known as the living hinge can be created with this revolutionary new tool.

Living hinges, unlike a metal hinge you might pick up at a hardware store, are integrated into the design of the part and made of the same material. Typically found in plastic containers, they allow for flexibility while keeping parts count and cost low. The major downside is that they create stresses in the materials when used, so their lifespan is finite. But there are a number of ways to extend their life, albeit with a few trade-offs.

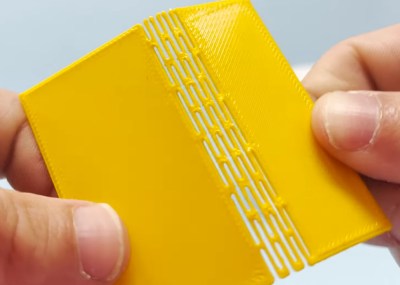
The first note is to make sure that you’re using the right kind of plastic, but after that’s taken care of [Slant 3D] builds a few flexible parts starting with longer circular-shaped living hinge which allows greater range of motion and distributes the forces across a wider area, at a cost of greater used space and increased complexity. A few other types of living hinges are shown to use less space in some areas, but make the hinges only suitable for use in other narrower applications.

One of the more interesting living hinges he demonstrates is one that’s more commonly seen in woodworking, known there as a kerf bend. By removing strips of material from a sheet, the entire sheet can be rotated around the cuts. In woodworking this is often done by subtracting material with a CNC machine or a laser cutter, but in 3D printing the voids can simply be designed into the part.

Continue reading “Hinges Live Inside 3D Prints”

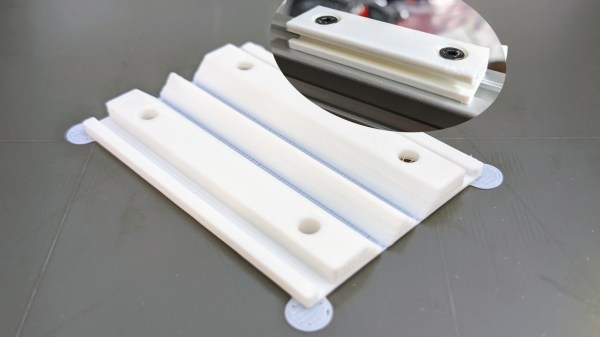
The eurorack rail piece, just printed in white plastic, not yet folded, with a folded example in the upper right corner

Bend Your Prints To Eliminate Supports

When designing even a reasonably simple 3D-printable part, you need to account for all the supports it will require to print well. Strategic offsetting, chamfering, and filleting are firmly in our toolkits. Over time we’ve learned to dial our settings in so that, hopefully, we don’t have to fumble around with a xacto knife after the bed has cooled down. On Twitter, Chris shows off his foldable 3D print experiments (nitter) that work around the support problem by printing the part as a single piece able to fold into a block as soon as you pop it off the bed.

The main components of this trick seem to be the shape of the place where the print will fold, and the alignment of bottom layer lines perpendicular to the direction of the fold lines. [Chris] shows a cross-section of his FreeCad design, sharing the dimensions he has found to work best.

Of course, this is Twitter, so other hackers are making suggestions to improve the design — like this sketch of a captive wedge likely to improve alignment. As for layer line direction alignment, [Chris] admits to winging it by rotating the part in the slicer until the layer lines are oriented just right. People have been experimenting with this for some time now, and tricks like these are always a welcome addition to our toolkits. You might be wondering – what kinds of projects are such hinges useful for?
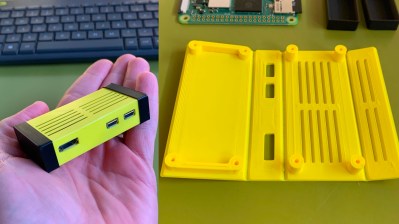
The example Chris provides is a Eurorack rail segment — due to the kind of overhangs required, you’d be inclined to print it vertically, taking a hit to the print time and introducing structural weaknesses. With this trick, you absolutely don’t have to! You can also go way further and 3D print a single-piece foldable Raspberry Pi Zero case, available on Printables, with only two extra endcaps somewhat required to hold it together.

Foldable 3D prints aren’t new, though we typically see them done with print-in-place hinges that are technically separate pieces. This trick is a radical solution to avoiding supports and any piece separation altogether. In laser cutting, we’ve known about similar techniques for a while, called a “living hinge”, but we generally haven’t extended this technique into 3D printing, save for a few manufacturing-grade techniques. Hinges like these aren’t generally meant to bend many times before they break. It’s possible to work around that, too — last time we talked about this, it was an extensive journey that combined plastic and fabric to produce incredibly small 3D printed robots!

We thank [Chaos] for sharing this with us!

See This Hybrid Approach To Folded 3D Printed Mechanisms

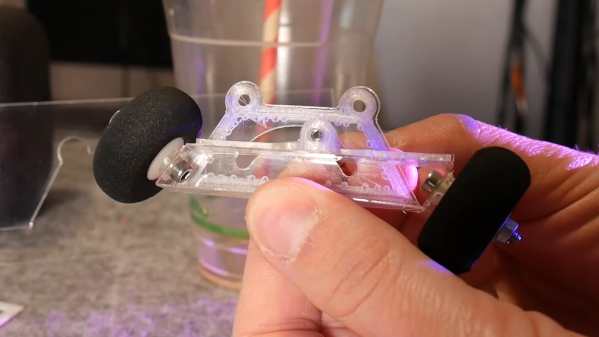
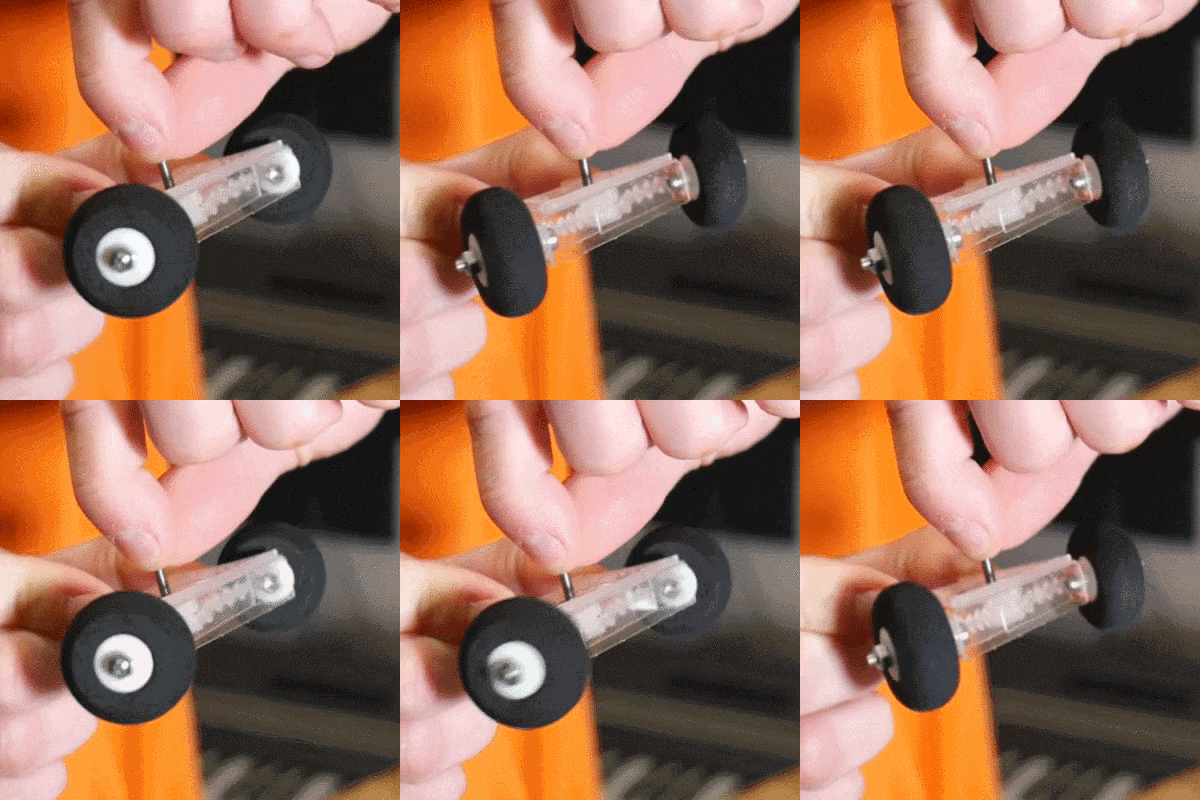
3D printers are quite common nowadays, but we’re still far from exhausting new ideas to try with them. [Angus] of [Maker’s Muse] recently got interested in 3D printing small mechanical assemblies that can be put together by folding them up, and also depend on folding linkages for the moving parts. (Video, embedded below.) The result would be lightweight, functional assemblies that would be simple to manufacture and require very few parts; but how to make the hinges themselves is the tricky part. As a proof-of-concept, [Angus] designed a clever steering linkage that could be printed flat and folded together, and shows his work on trying to make it happen.

[Angus] points out that that 3D-printed hinges have a lot of limitations that make then less than ideal for small and lightweight assemblies. Printing hinge pieces separately and assembling after the fact increases labor and part count, and print-in-place hinges tend to have loose tolerances. A living hinge made from a thin section of material that folds would be best for a lightweight assembly, but how well it works depends a lot of the material used and how it is made.

[Angus] tries many different things, and ultimately decided on a hybrid approach, combining laser cutting with 3D printing to create an assembly that consists of a laser-cut bottom layer with 3D printed parts on top of it to create a durable and lightweight device. He hasn’t quite sorted it all out, but the results show promise, and his video is a fantastic peek at just how much work and careful experimentation can go into trying something new.

Continue reading “See This Hybrid Approach To Folded 3D Printed Mechanisms”

Print Your Own Flexures

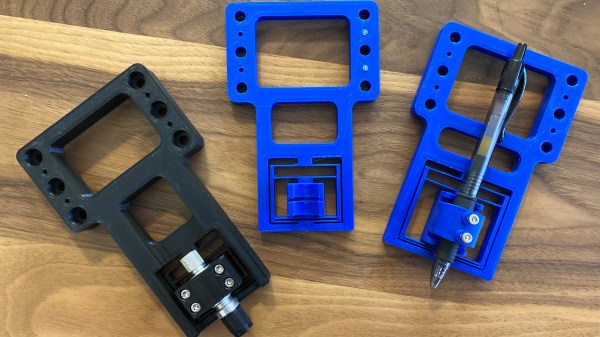
Game developer and eternal learner [David Tucker] just posted a project where he’s making linear flexures on a 3D printer. Tinkerer [Tucker] wanted something that would be rigid in five of the six degrees of freedom, but would provide linear motion along one axis. In this case, it is for a pen or knife on a CNC flatbed device. [David]’s design combines the properties of a 1-dimensional flexure and a spring to give a constant downward force. Not only is this an interesting build in and of itself, but he gives a good explanation and examples of more traditional flexible constructs. He also points out this site by MIT Precision Compliant Systems Lab engineer [Marcel Thomas] which provides a wealth of information on flexures.

Continue reading “Print Your Own Flexures”

Living Hinges At The Next Level

First of all, a living hinge is not a biological entity nor does it move on its own. Think of the top of a Tic Tac container where the lid and the cover are a single piece, and the thin plastic holding them together flexes to allow you to reach the candies disguised as mints. [Xiaoyu “Rayne” Zheng] at Virginia Tech designed a method of multimaterial programmable additive manufacturing which is fancy-ese for printing with more than one type of material.

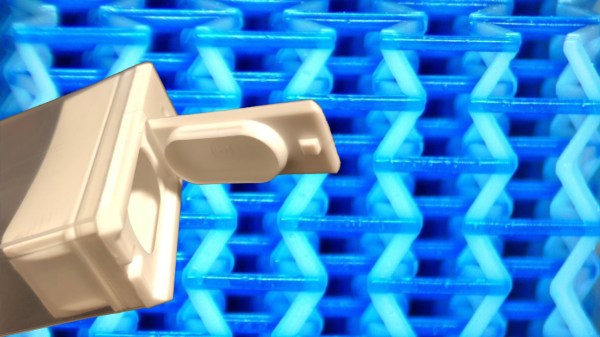
The process works under the premise of printing a 3D latticework, similar to the “FILL” function of a consumer printer. Each segment of material is determined by the software and mixed on the spot by the printer and cured before moving onto the next segment. Like building a bridge one beam at a time, if that bridge were meant for tardigrades and many beams were fabricated each minute. Mixing up each segment as needed means that a different recipe results in a different rigidity, so it is possible to make a robotic leg with stiff “bones” and flexible “joints.”

We love printing in different materials, even if it is only one medium at a time. Printing in metal is useful and could be consumer level soon, but you can print in chocolate right now.

Via Phys.org. Thank you again for the tip, [Qes].

3D Printing Flexible Surfaces Out Of Non-Flexible Material

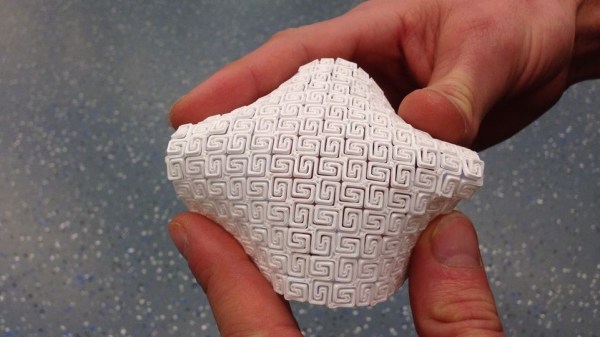
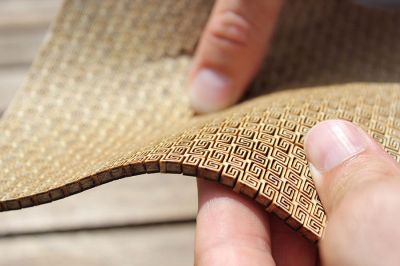
Here’s some interesting work shared by [Ben Kromhout] and [Lukas Lambrichts] on making flexible 3D prints, but not by using flexible filament. After seeing a project where a sheet of plywood was rendered pliable by cutting a pattern out of it – essentially turning the material into a giant kerf bend – they got interested in whether one could 3D print such a thing directly.

Inspiration for the project was this laser-cut plywood.

The original project used plywood and a laser cutter and went through many iterations before settling on a rectangular spiral pattern. The results were striking, but the details regarding why the chosen pattern was best were unclear. [Ben] and [Lukas] were interested not just in whether a 3D printer could be used to get a similar result, but also wanted to find out what factors separated success from failure when doing so.

After converting the original project’s rectangular spiral pattern into a 3D model, a quick proof-of-concept showed that three things influenced the flexibility of the end result: the scale of the pattern, the size of the open spaces, and the thickness of the print itself. Early results indicated that the size of the open spaces between the solid elements of the pattern was one of the most important factors; the larger the spacing the better the flexibility. A smaller and denser pattern also helps flexibility, but when 3D printing there is a limit to how small features can be made. If the scale of the pattern is reduced too much, open spaces tend to bridge which is counter-productive.

Kerf bending with laser-cut materials gets some clever results, and it’s interesting to see evidence that the method could cross over to 3D printing, at least in concept.

Two-Piece Boxes Thanks To Laser-Cut Flex Hinges

It sounds like a challenge from a [Martin Gardner] math puzzle from the Scientific American of days gone by: is it possible to build a three-dimensional wooden box with only two surfaces? It turns out it is, if you bend the rules and bend the wood to make living hinge boxes with a laser cutter.

[Martin Raynsford] clearly wasn’t setting out to probe the limits of topology with these boxes, but they’re a pretty neat trick nonetheless. The key to these boxes is the narrow to non-existent kerf left by a laser cutter that makes interference fits with wood a reality. [Martin]’s design leverages the slot and tab connection we’re used to seeing in laser-cut boxes, but adds a living flex-hinge to curve each piece of plywood into a U-shape. The two pieces are then nested together like those old aluminum hobby enclosures from Radio Shack. His GitHub has OpenSCAD scripts to parametrically create two different styles of two-piece boxes so you can scale it up or (somewhat) down according to your needs. There’s also a more traditional three-piece box, and any of them might be a great choice for a control panel or small Arduino enclosure. And as a bonus, the flex-hinge provides ventilation.

Need slots and tabs for boxes but you’re more familiar with FreeCAD? These parametric scripts will get you started, and we’ll bet you can port the flex-hinge bit easily, too.