Try NopSCADlib For Your Next OpenSCAD Project

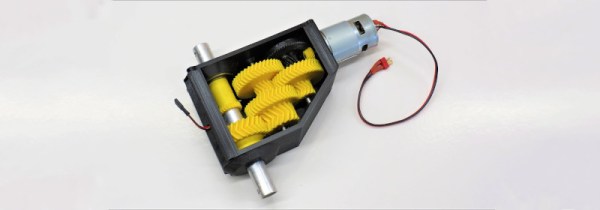
Most readers of this site are familiar by now with the OpenSCAD 3D modeling software, where you can write code to create 3D models. You may have even used OpenSCAD to output some STL files for your 3D printer. But for years now, [nophead] has been pushing OpenSCAD further than most, creating some complex utility and parts libraries to help with modeling, and a suite of Python scripts that generate printable STLs, laser-ready DXFs, bills of material, and human-readable assembly instructions complete with PNG imagery of exploded-view sub-assemblies.

Recently [nophead] tidied all of this OpenSCAD infrastructure up and released it on GitHub as NopSCADlib. You can find out more by browsing through the example projects and README file in the repository, and by reading the announcement blog post on the HydraRaptor blog. Some functionality highlights include:

  • a large parts library full of motors, buttons, smooth rod, et cetera
  • many utility functions to help with chamfers, fillets, precision holes, sub-assemblies, and BOM generation
  • Python scripts to automate the output of STLs, DXFs, and BOMs
  • automatic creation of documentation from Markdown embedded in your OpenSCAD files
  • automatic rendering of exploded subassemblies

All that’s missing is a nice Makefile to tie it all together! Try it out for your next project if you – like us – get giddy at the thought of putting your 3D projects into version control before “compiling” them into the real world.

We’ve discussed some complex OpenSCAD before: Mastering OpenSCAD Workflow, and An OpenSCAD Mini-ITX Computer Case.

This British 3D Printing Meetup Is On The Rise

Most people who are serious about designing, building, or improving 3D printers see the Midwest Reprap Festival as the place where the latest and greatest is on show for all to see. But if you live on the other side of the world as I do, chances are slim that you’ll be able to attend.

I live in the UK, and there haven’t traditionally been any events quite like MRRF, but that may be changing. The 3D Meetup UK in Birmingham is a community-organised event bringing together the 3D printing maker and hacker community for a couple of days of talks, demonstrations, and tours. I went along this year to see what was going on, and to take the temperature of the British side of this community.

Continue reading “This British 3D Printing Meetup Is On The Rise”

a 3d mesh of a rabbit, and a knit version of the same

Knitting Software Automatically Converts 3D Models Into Machine-knit Stuffies

We’ve seen our fair share of interesting knitting hacks here at Hackaday. There has been a lot of creative space explored while mashing computers into knitting machines and vice versa, but for the most part the resulting knit goods all tend to be a bit… two-dimensional. The mechanical reality of knitting and hobbyist-level knitting machines just tends to lend itself to working with a simple grid of pixels in a flat plane.

However, a team at the [Carnegie Mellon Textiles Lab] have been taking the world of computer-controlled knitting from two dimensions to three, with software that can create knitting patterns for most any 3D model you feed it. Think of it like your standard 3D printing slicer software, except instead of simple layers of thermoplastics it generates complex multi-dimensional chains of knits and purls with yarn and 100% stuffing infill.

The details are discussed and very well illustrated in their paper entitled Automatic Machine Knitting of 3D Meshes and a video (unfortunately not embeddable) shows the software interface in action, along with some of the stuffing process and the final adorable (ok they’re a little creepy too) stuffed shapes.

Since the publication of their paper, [the Textiles Lab] has also released an open-source version of their autoknit software on GitHub. Although the compilation and installation steps look non-trivial, the actual interface seems approachable by a dedicated hobbyist. Anyone comfortable with 3D slicer software should be able to load a model, define the two seams necessary to close the shape, which will need to be manually sewn after stuffing, and output the knitting machine code.

Previous knits: the Knit Universe, Bike-driven Scarf Knitter, Knitted Circuit Board.

Prusa Printer Gets An LCD-ectomy, Gains A VFD

What’s wrong with the OEM display on a Prusa I3 Mk3? Nothing at all. Then why replace the stock LCD with a vacuum fluorescent display? Because VFDs are much, much cooler than LCDs.

(Pedantic Editor’s Note: VFDs actually run a little warm.)

At least that’s the reasoning [Scott M. Baker] applied to his Prusa upgrade. We have to admit to a certain affection for all retro displays relying on the excitation of gasses. Nixies, Numitrons, and even the lowly neon pilot light all have a certain charm of their own, but by our reckoning the VFD leads the pack. [Scott] chose a high-quality Noritake 4×20 alphanumeric display module for his upgrade, thriftily watching eBay for bargains rather than buying from the big distributors. The module has a pinout that’s compatible with the OEM LCD, so replacing it is a snap. [Scott] simplified that further by buying a replacement Prusa control board with no display, to which he soldered the Noritake module. Back inside the bezel, the VFD is bright and crisp. We like the blue-green digits against the Prusa red-orange, but [Scott] has an orange filter on order for the VFD to make everything monochromatic. That’ll be a nice look too.

A completely none functional hack, to be sure, but sometimes aesthetics need attention too. And it’s possible that a display switch would help the colorblind use the UI better, like this oscilloscope mod aims to do.

Continue reading “Prusa Printer Gets An LCD-ectomy, Gains A VFD”

Autodrop3D Continues Working At 3D Printer Automation

It is an unfortunate fact that 3D printers spend most of their time sitting idle, waiting for a human to remove finished prints or waiting for the next print to start. Hackers see such inefficiency as an open invitation to devise a better way, and we’ve seen several innovative ideas come across these pages. Some have since been abandoned, but others have kept going. At Maker Faire Bay Area 2019 we had the chance to revisit one presented as Autodrop3D.

We saw a much earlier iteration entered in our Hackaday Prize in 2017 and it was fascinating to see how the basic ideas have developed over the past few years. The most visible component of the system is their print ejection system, which has greatly improved in robustness. Because the mechanism modifies the print bed and adds significant mass, it is best suited to delta printers as their print bed remains static. The concept might be adaptable to printers where the print bed only has to move along Z axis, but for now the team stays focused on deltas. There were two implementations on display at Maker Faire: a large one built on a SeeMeCNC RostockMAX v4, and a small one built on a Monoprice Mini Delta.

The ejection system is novel enough by itself, but the hardware is only one part of the end-to-end Autodrop3D vision. Their full software pipeline starts with web-based CAD, to integrated slicing, to print queue management, before G-code is fed to a printer equipped with their ejection system.

We admire inventors who keep working away at turning their vision to reality, and we look forward to seeing what’s new the next time we meet this team. In the meantime, if you like the idea of an automated print ejection mechanism but want more cartoon style, look at this invention from MatterHackers.

Assessing Nozzle Wear In 3D-Printers

How worn are your nozzles? It’s a legitimate question, so [Stefan] set out to find out just how bad 3D-printer nozzle wear can get. The answer, as always, is “It depends,” but exploring the issue turns out to be an interesting trip.

Reasoning that the best place to start is knowing what nozzle wear looks like, [Stefan] began by printing a series of Benchies with brand-new brass nozzles of increasing diameter, to simulate wear. He found that stringing artifacts, interlayer holes, and softening of overhanging edges and details all worsened with increasing nozzle size. Armed with this information, [Stefan] began a torture test of some cheap nozzles with both carbon-fiber filament and a glow-in-the-dark filament, both of which have been reported as nozzle eaters. [Stefan] found that to be the case for at least the carbon-fiber filament, which wore the nozzle to a nub after extruding only 360 grams of material.

Finally, [Stefan] did some destructive testing by cutting used nozzles in half on the mill and looking at them in cross-section. The wear on the nozzle used for carbon-fiber is dramatic, as is the difference between brand-new cheap nozzles and the high-quality parts. Check out the video below and please sound off in the comments if you know how that peculiar spiral profile was machined into the cheap nozzles.

Hats off to [Stefan] for taking the time to explore nozzle wear and sharing his results. He certainly has an eye for analysis; we’ve covered his technique for breaking down 3D-printing costs in [Donald Papp]’s  “Life on Contract” series.

Continue reading “Assessing Nozzle Wear In 3D-Printers”

3D Prints Turn Any Keyboard Isomorphic

In the history of weird musical instrument interfaces, isomorphic keyboards are a favorite. These keyboards look like a grid of buttons, but when you play them, the relative shapes of chords are always the same. The benefit? Just say no to five hundred years of clavier tradition. It looks cool, too. Theoretically, it’s easier to play independent of whatever key you’re in. [John Moriarty] has built one of these isomorphic keyboards, and unlike everything we’ve ever seen, there are no electronics. It’s all 3D printable and turns any MIDI keyboard into an isomorphic keyboard.

We have seen isomorphic (piano) keyboards before, from a slew of Cherry keyboard switches to a bunch of arcade buttons. There is one downside to these builds, and that is that it’s really just building a MIDI controller. [John]’s build is simply a 3D printable overlay for a traditional piano that turns any standard keyboard into an isomorphic keyboard. The advantage being that this is really just a few pounds of plastic to be printed out and not a mess of wiring and electronics. Simple, removable, reversible. Not bad.

This keyboard effectively adds two differently colored keytops to each key on a keyboard. The best explination of how this keyboard works is in this video, but the basic idea is that all the note names are grouped together by color; C flat, C natural, and C sharp are all blue, for example. This means a third interval is two colors away, and a minor third is two colors to the right and one ‘row’ down. Yeah, it’s weird but that’s what an isomorphic keyboard is.

Since this is just a bunch of 3D printed parts meant to fit on any piano keybed, this is something that’s extremely easy to replicate. All the files for this keyboard overlay are available on Thingiverse, and [John] is offering to print these key tops for others without a 3D printer.