Atari Tape Drive Turned Security DVR

We know that a lot of our beloved readers don’t take kindly to abuse of vintage hardware, so the Atari fans in the audience may want to avert their eyes for this one. Especially if they’re particularly keen on spinning up their Jawbreaker cassette on authentic hardware, as [iot4c] has gutted an Atari XC12 Program Recorder to turn it into an enclosure for a Raspberry Pi video storage device.

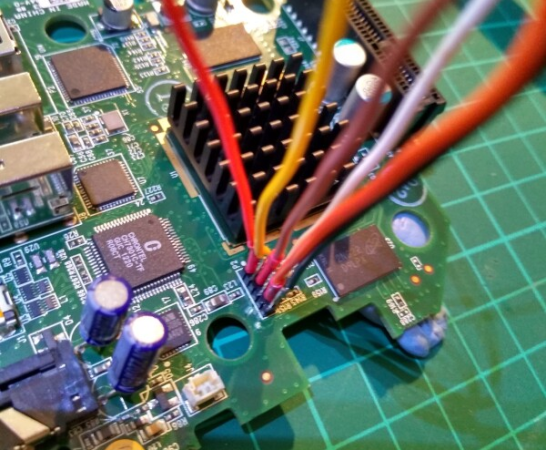
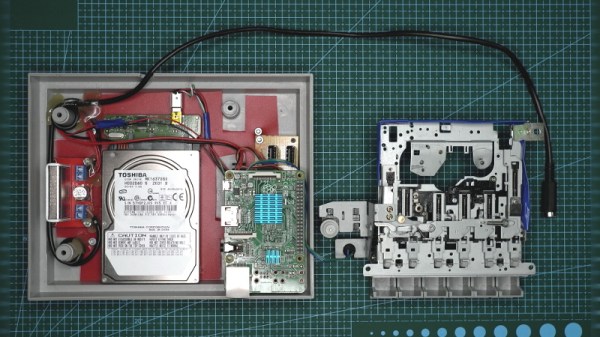
Step one of this conversion was, as you might expect, removing all the original hardware from the cassette recorder case. From there, [iot4c] fitted the Raspberry Pi, a USB hard drive, and a YDS-5A DC-DC converter to power them. Depending on what the drive setup looks like, it might also make sense to add a USB powered hub. A length of Ethernet cable was left hanging out the back of the Atari XC12 so it could be plugged into the network, but a panel mount RJ45 connector could spruce things up a bit.

Of course, gutting an old piece of hardware and sticking a Pi into it isn’t exactly breaking any new ground at this point. But we did appreciate that [iot4c] went the extra mile to wire it up so the “Save” LED now doubles as a network activity indicator. Which pretty much brings it full circle in terms of functionality for a network-attached video recorder.

Earlier in the year [iot4c] converted a 65XE into a USB keyboard with the help of an Arduino Leonardo, but the vintage Atari aficionados will be happy to note that at least in that case the donor machine remained fully functional.

SPARC CPU In A Cheap FPGA

There was a time when SPARC CPUs were the sole realm of pricey Sun workstations, but now you can put one on an FPGA with just a little trouble. The problem is you need a fairly big FPGA which isn’t always cheap unless someone goes out of business and you get lucky. [Ttsiodras] picked up a Pano logic thin client. Pano went under and their entire inventory is out on the surplus market at cheap prices. With a little FPGA magic, you can turn a few bucks into a SPARC-based computer.

The insides of the workstation have a Spartan 6 FPGA inside and you’ll need to solder in some JTAG wires, but that shouldn’t put anybody here off.  Of course, the Spartan 6 isn’t the newest tech so you’ll have to get an old version of the Xilinx tools but that’s not hard either. However, there is a strange irony you’ll need to be aware of if you use Linux.

Continue reading “SPARC CPU In A Cheap FPGA”

Josef Prusa Wants You To Change File Formats

We’ve all been there. You find that cool cat model on Thingiverse — we won’t judge. You download the STL, all ready to watch the magic of having it materialize on your print bed. But the slicer complains it isn’t manifold or watertight or something like that. What a let down. Part of this is due to shortcomings in the STL file format. There’s a newer format available, 3MF, and Josef Prusa and Jakub Kočí would like you to start using it.

STL — short for stereolithography — is a simple format that just holds a bunch of triangles. If you need any information about the part — like colors or materials. Worse still, as in our hypothetical example, there are no definition about how the triangles relate so you can create “bad” STL files. Even properly formed files can be tough to work with. You might scale for inches and the file is set for millimeters, for example.

Turns out 3MF is actually a ZIP archive and it can contain lots of information. The file can contain one or more models, colors, slicing data, copyrights, images, and lots more. The ZIP file is often shorter, too because of the compression. The big deal, though, is that the file format won’t allow nonmanifold models and removes ambiguity so that everything nicely prints. If your slicer stores data into the file — as the Prusa one does — other people using the same software can grab your settings, too.

The format isn’t really that new — it appeared around 2015 — but it hasn’t seen widespread adoption yet. Prusa encourages you to upload models in 3MF even if you also add an STL copy for people who haven’t made the switch yet.

So will you start using 3MF? Or are you already? The file format is open, they say. So if your favorite tool doesn’t like 3MF, you could always add support for it yourself.

Continue reading “Josef Prusa Wants You To Change File Formats”

Adding USB-C To The TS100

The TS100 is a popular entry into the new breed of small temperature-controlled soldering irons that, at least for some of us, have started to replace the bulky soldering stations of old. Unfortunately, one downside of this particular model is the need to plug it into a fairly ungainly laptop-style power supply, which certainly hinders its otherwise portable nature. But [Dennis Schneider] has come up with a very slick solution to that problem by adding a USB-PD module to his TS100.

The idea here is very simple: just remove the original DC barrel connector, and in its place install a USB-PD trigger module. In practice it took more than a little fiddling, cutting, persuasion, and creative soldering (ironically, with a soldering station), but the end result does look quite professional.

It helps that the USB-PD module [Dennis] used was almost the exact same width as the TS100 PCB, meaning that the modified iron could go back into its original case. Though as we saw not so long ago, there’s a growing community of 3D printed replacement cases should you select a trigger module that doesn’t so neatly fit the footprint of the original board. Or if you didn’t want to modify the iron at all, you could always just make an external adapter.

Those that have some experience with these irons might be wondering what the point of modifying the TS100 to take USB-C is when we already have the TS80. As it turns out, while the TS80 is using a USB-C connector it doesn’t actually use USB-PD, so its not taking advantage of the enhanced power delivery capabilities. We know, it’s all kind of confusing.

Announcing The “Take Flight With Feather” Contest

The Adafruit Feather is the latest platform for microcontroller development, and companies like Particle, Sparkfun, Seeed Studios, and of course Adafruit are producing Feather-compatible devices for development and prototyping. Now it’s your turn! The Take Flight With Feather contest challenges you to design a board to fit in the Feather ecosystem, with the grand prize of having your boards manufactured for you and listed for sale on Digi-Key.

To get started, take a look at the current Feather ecosystem and get acquainted with this list of examples. From there, get to work designing a cool, useful, insane, or practical Feather. But keep in mind that we’re looking for manufacturability. Electron savant Lady Ada will be judging each board on the basis of manufacturability.

What’s a good design? We’re looking for submissions in the following categories:

  • The Weirdest Feather — What’s the most ridiculous expansion board you can come up with?
  • You’ll Cut Yourself On That Edge — We’re surrounded with bleeding-edge tech, what’s the coolest use of new technology?
  • Retro Feather — Old tech lives on, but can you design a Feather to interact with it? Is it even possible to build a vampire Ethernet tap or an old acoustically-coupled modem?
  • Assistive Tech — Build a Feather to help others. Use technology to improve lives.
  • Wireless Feather — Add a new wireless technology to the Feather ecosystem

In addition to the grand prize winner, five other entries (one in each of the 5 categories above) will receive $100 Tindie gift certificates. The contest begins now and runs through December 31st. To get started, start a project on Hackaday.io and use the “Submit Project To” dropdown box on the left sidebar of your project page to enter it in the contest.

FBus: An Extensible And Easily Configurable FPGA Based DAQ

[flow] is a little disillusioned with commercial Data Acquisition Systems (DAQs) and channeled his frustration into his own, very cool, FPGA based solution.

The project takes form as a back plane into which various cards can be slotted. The the interface is just a PCI-e connector. If you need analog input, simply insert the card for it. Ethernet output? Same process. Modularity and expandability are the themes here.

[flow] already has projects in mind for his new DAQ. He’s using it to build an inverted pendulum. However, his planned cards really show the possibilities, anything from a logic analyzer card to an HDMI Output card allow for a wide array of configurations. There is also a small suite of tools which makes this process relatively easy to manage.

We can definitely see this evolving into a useful tool on our bench for prototyping.

DSP Spreadsheet: Frequency Mixing

Circuit simulation and software workbooks like Matlab and Jupyter are great for being able to build things without a lot of overhead. But these all have some learning curve and often use clever tricks, abstractions, or library calls to obscure what’s really happening. Sometimes it is clearer to build math models in a spreadsheet.

You might think that spreadsheets aren’t built for doing frequency calculation and visualization but you’re wrong. That’s exactly what they’re made for — performing simple but repetative math and helping make sense of the results.

In this installment of the DSP Spreadsheet series, I’m going to talk about two simple yet fundamental things you’ll need to create mathematical models of signals: generating signals and mixing them. Since it is ubiquitous, I’ll use Google Sheets. Most of these examples will work on any spreadsheet, but at least everyone can share a Google Sheets document. Along the way, we’ll see a neat spreadsheet trick I should probably use more often.

Continue reading “DSP Spreadsheet: Frequency Mixing”