If you are like us, you tend to do your 3D printing with plastic or maybe–if you are lucky enough to have access to an expensive printer–metal. [Adam Feinberg] and his team at Carnegie Mellon print with flesh. Well, sort of. Printing biomaterials is a burgeoning research area. However, printing material that is like soft tissue has been challenging. In a recent paper, [Feinberg] and company outline a method called FRESH. FRESH uses a modified MakerBot or Printrbot Jr. printer to deposit hydrogel into a gelatin slurry support bath. The gelatin holds the shape of the object until printing is complete, at which point it can be removed with heat. If you don’t want to wade through the jargon in the actual paper, the journal Science has a good overview (and see their video below).
The gelatin is mixed with calcium chloride and gelled for 12 hours at low temperature. It was then turned into a slurry using an off-the-shelf consumer-grade blender. A centrifuge was used to remove most of the soluble gelatin. Printing inks were made with materials like collagen and fibrin. The FRESH process actually uses liquid ink that gels in the gelatin.
The printer uses an open source syringe extruder found on the NIH 3D print exchange (they never say exactly which one, though and we had trouble matching it from the pictures). In true hacker fashion, the printer prints its own syringe extruder using the stock one from ABS and PLA plastic. Then you simply replace the standard extruder with the newly printed one (reusing the stock stepper motor).
The paper describes printing items including a model of a 5-day-old embryonic chick heart, an artery, and a miniature human brain model. Another team of researchers in Florida have a similar system, as well.
We’ve talked about bioprinting before and even mentioned how to make your own inkjet-based bioprinter. The FRESH method looks like it is in reach of the hacker’s 3D printing workshop. We cringe to think what you will print when you can finally print body parts.
Continue reading “Printing Soft Body Tissue” →

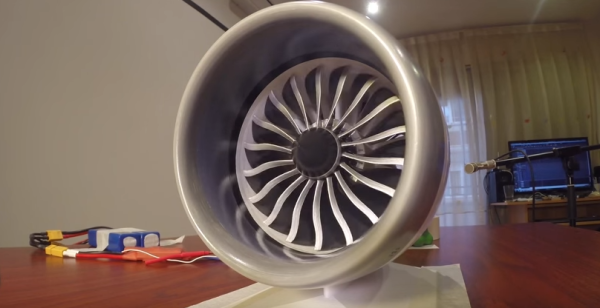
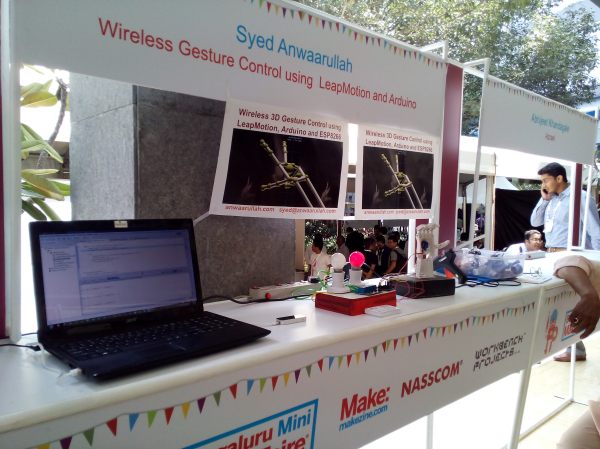
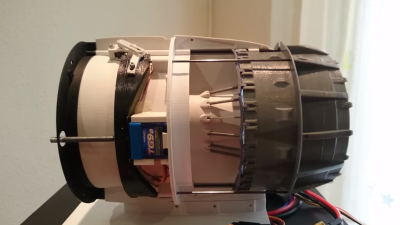 What sets this apart from other jet models is the working reverse thrust system. [Harcoreta] painstakingly modeled the cascade reverse thrust setup on the 787/GEnx-1B combo. He then engineered a way to make it actually work using radio controlled plane components. Two servos drive threaded rods. The rods move the rear engine cowling, exposing the reverse thrust ducts. The servos also drive a complex series of linkages. These linkages actuate cascade vanes which close off the fan exhaust. The air driven by the fan has nowhere to go but out the reverse thrust ducts. [Harcoreta’s] videos do a much better job of explaining how all the parts work together.