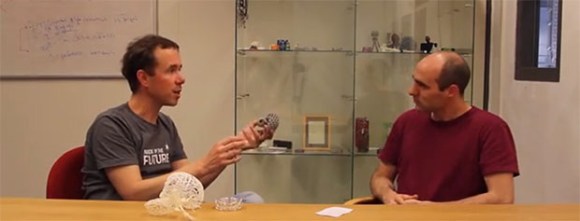
3D Printed HOG Drive

3d-printed-hog-drive

Here’s a 3D printed Hemispherical Omnidirectional Gimballed Drive system which you can make at home. That’s a mouthful which is why it is commonly referred to as a HOG drive. Never heard of one? Well you need to keep up with your Hackaday because about 20 months ago we featured this amazing robot project that uses one. The design is a tricycle orientation with the HOG drive as the only powered ‘wheel’. But it’s not really a wheel, it’s a half-sphere (a hemisphere which is not pictured above but attaches to the motor spindle) which can provide thrust in any direction depending on which way the motor is spinning a how the gimbal bracket is oriented.

Unfortunately [Dan] isn’t showing off a vehicle that is powered by the device just yet. But from what we’ve seen in the demo after the jump it is fully functional. His target project for the system is a line-following robot which we hope to post as a follow-up when he reaches that goal.

Continue reading “3D Printed HOG Drive”

Making A Violin Mold With A 3D Printer

IMG104

Some people see 3D printers as expensive and slow devices for replicating bracelets, whistles, and Yoda heads. Until the world transitions to a plastic octopus-based economy, those of us with 3D printers will have to find something useful for these tools. Bayesian Empiritheurgy out of Halifax, Nova Scotia wanted to do something useful with their 3D printer for the large-scale, distributed hackerspace competition, The Deconstruction. They ended up using their printer to make molds for a paper mache violin, and ended up being fairly successful at it.

The basic idea behind their paper mache violin was to create a plastic mold for exactly half a violin body. This block was covered in newspaper drenched in wheat paste. Once the paste was dry, the violin half was pulled off the mold and another half was created. These were stitched and glued together, resulting in a violin body.

The bridge, tailpiece, tuners, and fingerboard were 3D pprinted and held together with epoxy. The epoxy flexed a lot, so every time a string was tuned it threw out the tuning of the other three strings. In the video after the break, you can check out the paper mache and plastic violin being played. It’s not much for the eyes or ears, but everyone had fun, and the team completed the proof of concept for a fiberglass or carbon fiber violin we’d suggest they try next.

Continue reading “Making A Violin Mold With A 3D Printer”

Giving 3D Printed Parts A Shiny Smooth Finish

No matter how good a 3D printer gets, you’re always going to have visible print layers. Even with very high-quality prints with sub-0.1mm layer height, getting a shiny and smooth finish of injection molded plastic is nearly impossible. That is, of course, until you do some post-print finishing. [Neil Underwood] and [Austin Wilson] figured out a really easy way to smooth out even the jankiest prints using parts you probably already have lying around.

The technique relies on the fact that ABS plastic and acetone don’t get along together very well. We’ve seen acetone used to smooth out 3D printed objects before – either by dunking the parts in an acetone bath or brushing the solvent on – but these processes had mixed results. [Neil] and [Austin] had the idea of using acetone vapor, created in a glass jar placed on top of a heated build plate,

The process is pretty simple. Get a large glass jar, put it on a heated build plate, add a tablespoon of acetone, and crank the heat up to 110C. Acetone vapor will form in the jar and react with any printed part smoothing out those layers. The pic above shows from right to left a 3D printed squirrel at 0.35 mm layer height, 0.1 mm layer height – the gold standard of high-end repraps – and another print with 0.35 layer height that was run through a vapor bath for a few minutes. Amazing quality there, and cheap and easy enough for any 3D printer setup.

You can check out the tutorial video after the break along with a video showing exactly how dangerous this is (it’s not, unless you do something very, very dumb).

Continue reading “Giving 3D Printed Parts A Shiny Smooth Finish”

Laser Kaleidoscope Uses More 3D Printing And Less Scavenging

laser-kaleidoscope

At first we thought that [Pete Prodoehl] was using the wrong term when calling his project a Laser Kaleidoscope. We usually think of a kaleidoscope as a long tube with three mirrors and some beads or glass shards in one end. But we looked it up and there’s a second definition that means a constantly changing pattern. This fits the bill. Just like the laser Spirograph from last week, it makes fancy patterns using spinning mirrors. But [Pete] went with several 3D printed parts rather than repurposing PC fans.

In the foreground you can see the potentiometers which adjust the motor speeds. The knobs for these were all 3D printed. He also printed the mounting brackets for the three motors and the laser diode. A third set of printed parts makes mounting the round mirrors on the motor shaft quite easy. All of this came together with very tight tolerances as shown by the advanced shapes he manages to produce in the video after the break. Continue reading “Laser Kaleidoscope Uses More 3D Printing And Less Scavenging”

SCARA Arm Finally Prints Plastic Parts

SCARA

Here’s a neat alternative to the usual gantry setup you see on 3D printers. [Quentin] designed and build a SCARA arm 3D printer that just saw its first print.

We caught wind of [Quentin]’s SCARA arm a few weeks ago when it was still just a few plastic parts and a glimmer of ambition in its creator’s eye. Most of the parts are 3D printed, including the blue arms for the x and y axes that are driven by stepper motors. The z axis is controlled by two lead screws, and judging by the height of [Quentin]’s machine, he has a pretty big printable volume – at least as large as some of the delta bot 3D printers we’ve seen.

So far [Quentin] has printed a handful of calibration cubes and a wheel with a fairly impressive print resolution. You can check out a video of the SCARA arm printer after the break.

Continue reading “SCARA Arm Finally Prints Plastic Parts”

An Industrial RepRap

rep

It may just be another 3D printer, but [Jonas] and [Simon]’s Kühling & Kühling RepRap Industrial is a cross between a work of art and a beautiful machine tool. It also looks to be a pretty nice 3D printer, to boot.

The Kühling RepRap is built out of 20mm t-slot aluminum with plastic sides that keep the machine’s internals at a toasty 70° C, just about the optimal temperature for making large, complex prints. The machine has two extruders with all the cables tucked away in 3D printed cable carriers. One really interesting bit of innovation is the tool less belt t tensioning system.

On the list of upcoming features, [Jonas] and [Simon] say they want to add a touch screen controller powered by a Raspberry Pi, and a controller that’s even more capable than RAMPS electronics boards. No word on how much a Kühling & Kühling RepRap will cost, but like any quality-looking tool, we don’t expect it to be cheap.

3Doodler, A 3D Drawing Pen

Here’s something that’s making its way to the top of our, “why didn’t we think of that” list. It’s called 3Doodler, a device based on the plastic extrusion technology found in 3D printers stuffed into a pen that fits in the palm of your hand.

If you’re familiar with 3D printers, the design of the 3Doodler should come as second nature to you. Inside this electronic plastic-melting pen is a small motor that forces 3mm ABS or PLA filament through a heated nozzle. With the 3Doodler, you can draw in three dimensions by simply lifting the tip of the 3Doodler into the air.

While 3Doodler is obviously aimed at creating plastic objects by hand, we’re wondering if this device could be successfully adapted to work with 3D printers. The 3Doodler team put a very, very small and inexpensive extruder and hot end inside the 3Doodler, and they’ve got something on their hands we’d love to tear apart just to see how it ticks.

You can see the 3Doodler introduction video after the break.

Continue reading “3Doodler, A 3D Drawing Pen”