Melting Plastic Powder Together, One Layer At A Time

[youtube=http://www.youtube.com/watch?v=vVOtKSKyIvI&fw=470]

Here’s an interesting development in the world of 3D printers: A rapid prototyping machine that melts plastic powder together to create objects with extremely good resolution

The Blueprinter works by drawing a 0.1 mm thick layer of plastic powder over the build platform. After that, a very hot needle-shaped probe melts the plastic together. This process continues at a rate of 10mm an hour on the z axis, and a very precise plastic model eventually appears in the powder.

There is no price ( or solid release date ) for the Blueprinter, but this 3ders.org article from earlier this year tells us the price for the machine will be €9,995, with a material cost of €49 per kg. Pricey, yes, but seeing as how the RepRap community already has the techniques behind melting plastic down pat, it might now be too hard to build your own plastic sintering printer.

If you know of any current projects or builds that are trying to emulate this plastic powder melting technique, drop us a note on the tip line. We’d love to see a version of this printer up and running. Until then, you can check out the render showing a rendered Blueprinter in action, along with a demo of a plastic clip printed on this sintering printer.

Continue reading “Melting Plastic Powder Together, One Layer At A Time”
3D Printed AR-15 Lower Works

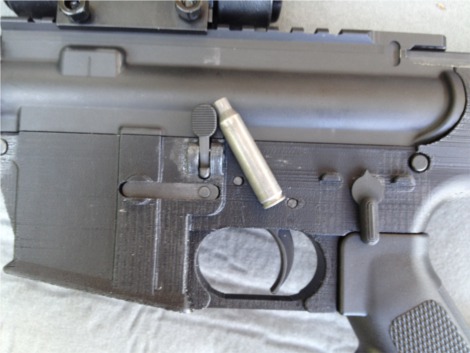
Ar15.com user [HaveBlue] has been working for some time on a 3D printed lower receiver, and now reports that the parts are fully working. Using a Stratasys 3D printer from the 90’s [HaveBlue] managed to spin out a modified version of an already available model from cncguns.com. He strengthened the holes for the takedown lugs, which hold the upper and lower halves of the rifle together. Strengthened the bolt hold lugs, which when the magazine is empty lifts a lever assembly that catches the bolt as it springs back to push another round into the chamber. and added an integral trigger guard AKA the bar that surrounds the trigger.

Legally this print is a veritable gauntlet of state and federal regulations. At least in the US. The lower receiver is the part of the rifle that holds the spring and pins that operate the rifle’s trigger safety and hammer assembly, hold the magazine in place,  and mount the buttstock/return spring tube. The other key point about the lower receiver is that it contains the primary traceable identification markings, the serial number. All of the parts that are contained within the lower receiver can be ordered online (this varies state to state). In fact, every single other part of the rifle can be bought and sold freely. The only component of the rifle that can not be ordered online, and requires a background check at a gun store, is the body of the lower receiver (we have to keep saying that this varies state to state). Typically laws allow though for the manufacture of this part without a serial number so long as it is never sold to another individual (again, state laws vary widely).

There is some more info on the build at [HaveBlue]’s website here and here, but it is currently down.  This sort of steps up 3D printing past the nerf gun stage, but we have seen shot gun and pistol hacks.

Yet Another RepRap Host Looks Pretty Cool

Joining the pantheon of other RepRap host software packages such as ReplicatorG, RepSnapper, and Skeinforge is Yet Another RepRap Host, a project by [Arkadiusz] that combines a lot of neat features into a very cool package.

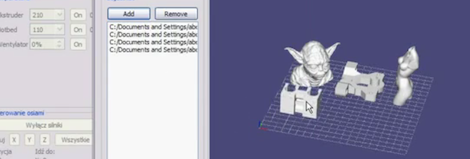
One thing we’ve really got to give [Arkadiusz] credit for is a virtual table that allows you to import several .STL files, place them on a virtual build platform, and print them all at once. Previously, the only way we knew how to do this was by either creating a single .STL file with all the desired parts already in place, or arraying several object to increase production. The virtual table feature allows anyone to bypass those steps and print out a lot of objects all at once.

YARRH also allows you to view the GCode in 3D. This feature is a little kludgy at the moment, but [Arkadiusz] says it’s functional and more than serviceable to run a 3D printer.

Right now, YARRH is only available for Windows, but a package for Ubuntu (and hopefully OS X) are coming down the pipe. You can check out some videos of YARRH in action after the break.

Continue reading “Yet Another RepRap Host Looks Pretty Cool”

Drag And Drop Images For 3D Printing

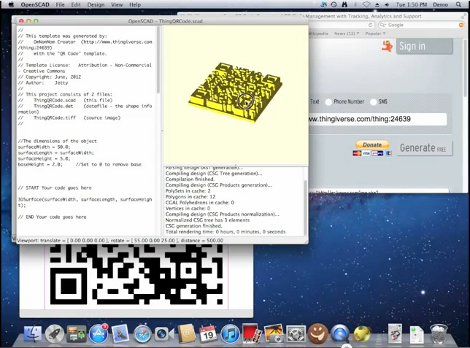
This piece of software called OmNomNom works with OpenSCAD to turn 2D images into 3D models. It’s literally a drag-and-drop process that renders almost instantly.

Here the example is a QR code, which is perfect for the software since it’s a well-defined black and white outline in the source image. But the video after the break shows several other examples that don’t rely on this simplicity. For instance, the Superman logo, which uses four different colors, is converted quite easily. There’s also a depth map of [Beethoven’s] bust that is converted into a 3D object. The same technique can be used to create terrain from topographic source images.

Once the file has been converted to a model it can still be tweaked like normal. This allows you to customize size and depth to suit your needs. This is where OpenSCD comes into play, but if you don’t use that program you can still export an STL file directly from OmNomNom for use on your 3D printer.

Continue reading “Drag And Drop Images For 3D Printing”

Printing A Boat Made Out Of Milk Jugs

Today, groups from all over the Pacific Northwest will take up their oars and head over to Green Lake for the 42nd annual Seafair Milk Carton derby. The team who builds the fastest boat made out of milk cartons wins the regatta (and $10,000). This year, we’d put our money on the 3D printer group from the University of Washington; they printed a boat large enough to carry a person using crushed melted milk jugs.

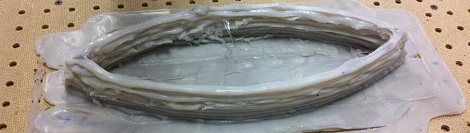
After building a huge extruder to feed shredded HDPE plastic through a nozzle, the team repurposed an old plasma cutter to serve as an 8-foot-long 3D printer. There were a number of problems the team ran into – getting layers to fuse together, finding a suitable printing surface, and perfecting the art of squeezing melted milk jugs through a heated metal tube – but the final result is impressive, to say the least.

As far as how lake-worthy the UW team’s boat is, we have no idea. The milk jug regatta will be held later today, and if you have an update of how the team fared, send us a tip.

3D Printing With A Delta Robot That Seems To Simplify The Concept

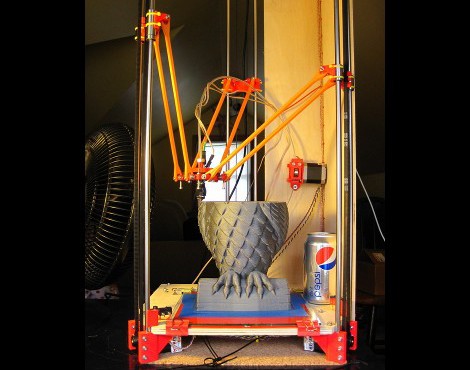
This 3d printing delta robot really seems to solve a lot of the hurdles faced by previous offerings. With other delta printers we’ve looked at the motor control of the three arms is usually a it complicated. On this build the motors can just be seen in this image at each corner under the build platform. Each motor has a belt that loops from the bottom to the top for the machine, driving an arm along two precision rods.

It’s also interesting to note that the printer head doesn’t have a motor mounted on it for feeding the filament. Instead, the motor is mounted remotely. You can see it above the soda can in this image. It feeds the filament through a hollow tube spanning the gap between the extruder and the motor. This acts as a Bowden cable. With less mass to move this may make it easier to control the location of the print head.

After the break you can catch a clip of the team showing off the speed and dexterity of the delta bot, followed by a printing demo.

Continue reading “3D Printing With A Delta Robot That Seems To Simplify The Concept”

RA 3D Printer Controller Board Does Everything, Has Disco Lights

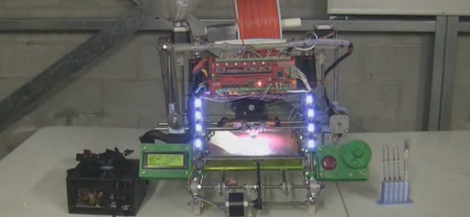
3D printers are getting far, far more complicated than a 4-axis, plastic-squirting CNC machine. These days, you really haven’t earned your geek cred unless you’ve hacked an LCD and SD card interface into your 3D printer, or at least experimented with multiple extruders. There’s a problem with the controller boards everyone is using, though: most boards simply don’t have enough output pins, greatly reducing the number of cool things a 3D printer can do.

Enter RA. It’s a new 3D printer controller board with IO for any imaginable setup. Going down the feature list of RA, we’re wondering why we haven’t seen some of these features before. A 24-pin ATX power header is soldered directly to the board, giving RA users a stupidly easy way to power their printer. Of course there are outputs for LEDs, camera triggers (printer time-lapse movies are really cool), light rings, buzzers, an LCD/rotary encoder/SD card control panel, and support for two heated beds for gigantic printers. If printing in one color isn’t good enough for you, RA has support for three extruders

Compared to other 3D printer boards such as RAMPS or the Sanguinololu, the number of outputs on this board is simply amazing. If you’re planning to build a huge, feature-laden 3D printer, you probably couldn’t do much better than what RA is offering.