Giant PC fan

3D-Printed Parts Let You Assemble Your Own Biggest Fan

It’s getting close to the time of year when we need to start carefully vetting projects here at Hackaday. After all, nobody likes to get punked by an early April Fool’s joke. But as silly as this outsized PC fan looks, it sure seems like a legit build, if a bit on the pointless side.

Then again, perhaps pointless is too harsh a word to use. This 500-mm fan is by [Angus] over at Maker’s Muse, and it represents a lot of design work to make it buildable, as well as workable and (mostly) safe. Using both CNC-cut MDF and printed parts, the fan is an embiggened replica of a normal-sized case fan. The fan’s frame had to be printed in four parts, which lock together with clever interlocking joints. Each of the nine blades locks into a central hub with sturdy-looking dovetails.

And sturdy is important, as the fan is powered by a 1,500 Watt brushless DC motor. With a 4:1 reduction thanks to a printed gear train, the fan spins at around 3,300 RPM, which makes a terrifying noise. There’s a little bit of “speed-wobble” evident, but [Angus] managed to survive testing. The fan, however, did not — the 3D-printed gears self-destructed after a full-speed test, but not before the fan did its best wind tunnel imitation. And the RGB LEDs looked great.

This one reminds up of something we might see [Ivan Miranda] come up with. In fact, his super-sized 3D printer might have been just the thing to shorten [Angus]’ print times.

Continue reading “3D-Printed Parts Let You Assemble Your Own Biggest Fan”

Doubled Up 3D Printer Upgrade Doubles The Fun

[Nathan] from Nathan Builds Robots on YouTube is no stranger to modding 3D printers, whether it’s a good idea or not, it’s just fun to find out sometimes. His latest escapade he calls the Double Ender (video, embedded below), where he not only doubles up the hotend, but the doubles up a few other bits too. The aim was to achieve dual material printing, with his specific goal to combine plain nylon and carbon fiber-loaded nylon in the same print, to get the best properties of both materials.

Perfects results on the first try!

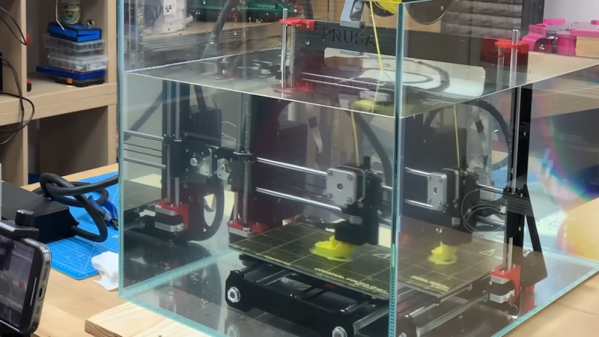
Taking a stock Ender 3 v2, [Nathan] first installs a dual Z axis kit, doubling up the Z axis screw and associated stepper motors. Likely this was needed to compensate for the additional weight of subsequent mods. Since the stock Ender mainboard has only one Z axis port, the less obvious solution was to just install a second mainboard! By leveraging the immense hackability of the Klipper printer firmware/software stack,he was able to get this weird configuration to work.

Next the main part of the build; the Phaetus Tai Chi dual hot end installation. For some reason, initially, it was decided to combine the stock bowden injector/extruder with a direct drive second unit, which we guess keeps the reciprocating weight down a bit and does let you directly compare bowden and direct drive print results on the same machine. Anyway, the first dual material prints came out pretty good after a few (quickly glossed over) fails, and did work well enough that dual-nylon printing could now be an option. After switching the build to a dual direct-drive setup, [Nathan] found it easier to get the machine to switch filaments more reliably, which makes sense when you think about the impact of all that extra filament in the bowden tube.

[Nathan] clearly has been burned (haven’t we all?) possibly literally, by the curious habit of some Chinese suppliers, of randomly assigning power supply polarity to red/black wire pairs. The solution, somewhat belt-and-braces, was to simply make up custom power cables with an embedded rectifier. Well, we guess that’s one less thing to worry about, but do look away when those PSU hacks are being shown!

Multi-material or multi-color FDM printer options are plenty, here’s a cool way of using a servo to swing a pair of hotends to the same point, and we also saw a while back, a way of using a sprung-loaded rocker to flip the unused hotend up out the way when not needed.

Continue reading “Doubled Up 3D Printer Upgrade Doubles The Fun”

Tired Of 3D Printed Skirts? Try Kisses

One popular option when 3D printing is to have the printer draw a loop or two around the print before starting. This serves several purposes: it clears the print head for one thing. It also marks the area of the print bed in use and many people use it to adjust the leveling if necessary. However, the little scraps of plastic do add up. [Makers Mashup] decided to try something different and now uses what he dubs the landing strip and kisses method.

The landing strip turns out to be a piece of blue tape and the kiss in question is like the chocolate kind and does not involve pressing your lips against the nozzle. There’s a wizard that generates startup code for you that has the style of purge if you like.

Continue reading “Tired Of 3D Printed Skirts? Try Kisses”

Syringe with diluted nail polish used to fill into cursive "FuzzyLogic" letters extruded into a surface of a 3D-printed block of plastic, as a demonstration.

Brighten Up Your Prints With This Nail Polish Approach

It’s not enough to 3D-print a part – there’s a myriad of things you can do from there! [FuzzyLogic] shows us his approach of adding inlay labels, icons and text to a 3D print, by extruding them into the print and filling the resulting cavity with nail polish! This makes for colorful and useful prints, as opposed to dull single-color parts we typically end up with.

The devil’s in the details, and [FuzzyLogic] has got the details down to a technique. Nail polish has to be diluted with acetone so that it flows well, and a particular combination of syringe and needle will be your friend here. Of course, don’t forget to factor surface tension in – even with well-diluted nail polish, you cannot make the grooves too thin. A bit more acetone on a q-tip helps in case of any happy little accidents, and a coat of clear acrylic spray paint seals the lettering firmly in place. The five-minute video tells you all about these things and a quite few more, like the basics of extruding text and icons in a typical CAD package, and has a bit of bonus footage to those watching until the end.

Adding markings to our prints is a lovely finishing touch! If you’re looking for more of that, here’s a custom tool-changing printer with a pen attachment making beautiful custom enclosures for the Pocket Operator.

Continue reading “Brighten Up Your Prints With This Nail Polish Approach”

5-Axis 3D Printing For The Rest Of Us

By now we’re all used to the idea of three dimensional printing, as over the last fifteen years or so it’s become an indispensable tool for anyone with an interest in making things without an industrial scale budget. There are still a few limitations to the techniques used in a common 3D printer though, in particular being tied to layers in a single orientation. It’s something that can be addressed by adding tilt and rotational axes to the printer to deliver a five-axis device, but this has not been available in an affordable form. [Freddie Hong] and colleagues have tackled the production of an affordable printer, and his solution fits neatly on the bed of a Prusa i3 to convert it to five-axis machine without breaking the bank.

The quantity and quality of the work is certainly impressive, with suitable slicing software being developed alongside the 3D printed parts to fit the two extra axes. For now all we can do is look at the pictures and the video below the break, but once the work has been presented the promise that all the necessary files will be made public. We can see versions of the hardware finding their way onto printers otherĀ  than the Prusa, and we can see this becoming yet another piece of the regular armory available to those of us who make things.

Continue reading “5-Axis 3D Printing For The Rest Of Us”

3D Printed Shoes Make Bigfoot Tracks

[Stephan Henrich] is probably going to set off a wave of bigfoot sightings if his new shoe, the Cryptide sneaker takes off. The shoe is completely 3D printed in flexible TPE using a laser sintering printer from Sintratec. The shoe takes a name from cryptozoology and, in fact, would leave a puzzling footprint due to its articulated toes and scaly-looking sole.

Judging from the look of the sole, it should be pretty cushy and we presume if you were 3D printing these, you’d scan or precisely measure the intended foot for a perfect fit. You can see a video about the shoe below.

Continue reading “3D Printed Shoes Make Bigfoot Tracks”

A vortex puff hitting the craft

Swap The Laser For A Vortex Cannon And You Have… Lift?

When people are thinking of the future of space travel, an idea that floats around is a spaceship with a giant solar sail pushed along by a massive laser. Inspired by the concept but lacking a giant laser, [Tom Stanton] build a small craft powered by a vortex cannon.

Creating a vortex is hard enough, but creating a vortex with enough oomph to travel a longer distance and push something takes some doing. [Tom] started with some cheap solenoids, but had a few issues. Their interior nozzles were quite small, which restricted airflow. He used four valves all plumbed together to provide the volume of air needed. Additionally, he found that their response time was lacking. They couldn’t quite switch off quickly enough so instead of a puff of air, it pushed out something closer to a stream. To compensate, [Tom] 3d printed and tried a few different sizes of cone nozzles to see if that helped. Unfortunately, it did not. So he combined the nozzle with an expansion chamber that allowed the pressure wave to shorten, then it narrows to speed it up again. This provided a decent vortex.

Next [Tom] turned to his craft. After designing a 3d model, he had a template to cut out some shapes from paper and taped them together to form a light vehicle that can capture the vortex. The initial tests weren’t too promising as the craft twisted and the string that it traveled on had too much friction. Switching to a vertical test showed more promise but trying to generate multiple vortexes rapidly was unsuccessful as the turbulence from the previous rings broke up the newer rings.

So what’s to be learned from this? It seems like he doesn’t have much to show. [Tom] tweaked and iterated his way to a working vortex cannon and has continued to refine his craft. Hopefully, in the future, we’ll see a fully-functional version of this. The lesson is to keep enumerating the possibilities. Like this webcam based posture sensor iterating its way to success. Video after the break.

Continue reading “Swap The Laser For A Vortex Cannon And You Have… Lift?”