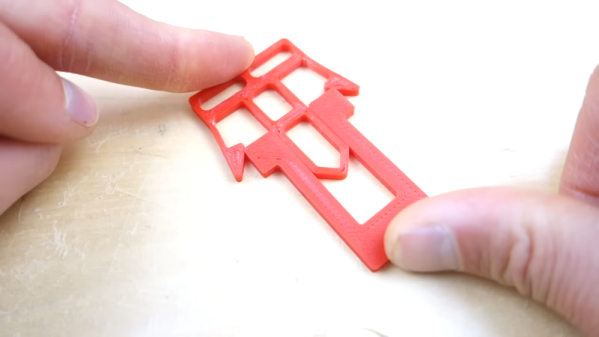
One of the great things about plastic is that it can be relatively flexible. We see things all the time that snap together, but when 3D printing, you don’t often run into snap fit designs. [Engineers Grow] has a video to help you design snap fittings that don’t break.
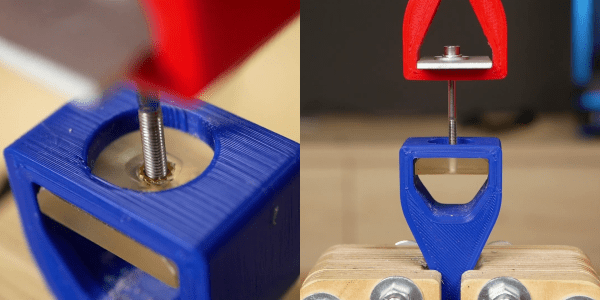
In the first video that you can see below, he covers three parameters that can help. The first is the length of the snap element. Secondly, the undercut size can be reduced. You can also try making the snap; as thin as possible, although in the example he went too thin and wound up breaking the snap anyway.
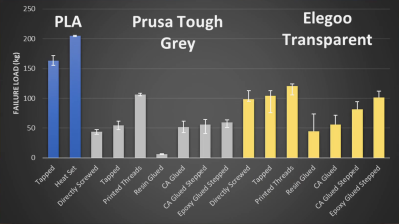
The final suggestion, covered in detail in the second video below, is to change the material you use. The key parameter is known as elongation at break. For PLA the typical value for this is 8%. ABS is 10%, PETG is 24% and Nylon is 100%. Simplistically, you could assume that a PETG piece could deform up to 25% before breaking. That may be true, but it will permanently deform long before that. The video suggests using 10 or 15% of the value to assure the part doesn’t lose its shape.
In the third video, you’ll learn, too, that print orientation counts. Making the hooks grow off the build plate leads to a weak hook as you might expect.
We’ve looked at the mechanics behind these before. You can find a lot of detailed technical data about joints, too.
Continue reading “Oh Snap! 3D Printing Snapping Parts Without Breakage”