Build Your Swarm: Control Cockroaches For Under $30!

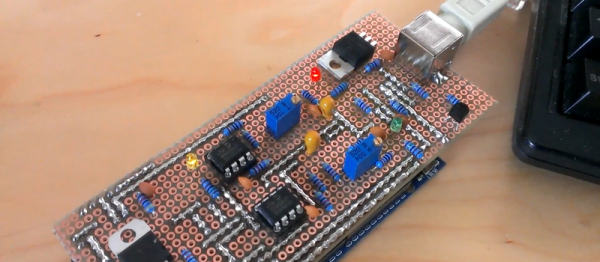
Have you ever wanted to control an army of cockroaches? We’ve all seen remote control cockroaches before — and they really are quite a fascinating specimen to work with — but did you know you can control one for about $30 worth of components, with a Arduino Micro?

It’s actually pretty simple. By stimulating a cockroaches antenna with variable frequencies (to mimic neural signals) you can convince the cockroach that they’ve hit a wall and should turn the other way. What results is a remote-controlled roach. How cool is that!

Continue reading “Build Your Swarm: Control Cockroaches For Under $30!”

Pacman Proves Due Is More Than Uno

If you’re wondering what the difference is between the good ol’ Arduino Uno and one of the new-school Arduinos like the Arduino Due, here’s a very graphic example: [DrNCX] has written a stunning Pacman clone for the Due that seems to play just like the arcade. (Video embedded below the break.)

001The comparison between the Uno and Due isn’t quite fair. The Due runs on an 84 MHz, 32 bit ARM Cortex-M3 processor. It’s in a different league from the Uno. Still, we view this as an example of the extended possibilities from stepping up into a significantly faster micro. For instance, the video is output to both an ILI9341 TFT screen and external 8-bit VGA at once.

Besides using some very nice (standard) libraries for the parts, it doesn’t look like [DrNCX] had to resort to any particular trickery — just a lot of gamer-logic coding. All the code is up on GitHub for you to check out.

Can the old Arduinos do this? For comparison, the best Pacman we’ve seen on an AVR platform is the ATmega328-based RetroWiz, although it is clocked twice as fast as a stock Uno. And then there’s Hackaday Editor [Mike Szczys]’s 1-Pixel Pacman, but that’s cheating because it uses a Teensy 3.1, which is another fast ARM chip. People always ask where the boundary between an 8-bit and 32-bit project lies. Is a decent Pacman the litmus test?

Continue reading “Pacman Proves Due Is More Than Uno”

Finally, A Modern Theremin

Ever wanted to own your own Theremin but couldn’t justify dropping hundreds of dollars on one? Now you can build your own, or buy it for a quintuplet of Hamiltons. The Open.Theremin.UNO project has built up antenna-based oscillator control around the ubiquitous Arduino Uno board.

So what’s the Arduino in there for? This is a digital Theremin, but check out the video below and you’ll agree that it sounds amazing and has excellent response. The aluminum antennas used for volume and pitch are attached to the top portion of the shield but it sounds like they’re not included in the kit. Don’t fret, you can use a variety of materials for this purpose. On the bottom you need to connect a speaker cable, and also a ground wire if that cable’s not grounded.

As the name implies, this is Open Hardware and we’re quite happy with the documentation on their site and the BOM (found on the GitHub repo). This design was shown off back in 2013 hiding in a pack of cigarettes. If you don’t want to build your own they’re selling kits on their site for 48 Euro delivered, or on Tindie for $55.

Okay, we’ve screwed this up so many times that we’re going to try to get it right here: the Theremin was not heard in the opening of Star Trek the original series, or in the opening of Doctor Who. It wasn’t featured in “Good Vibrations” either. As far as we can tell, it’s not used for anything in pop culture at all… but recognizing the sound and knowing what one is remains core geek knowledge.

If you want a Theremin to play using your entire body you need the Theremin Terpsitone.

Continue reading “Finally, A Modern Theremin”

A Power Switch For The Chromecast

Chromecasts are fantastic little products, they’re basically little HDMI sticks you can plug into any monitor or TV, and then stream content using your phone or computer as the controller. They are powered by a micro USB port in the back, and if you’re lucky, your TV has a port you can suck the juice off. But what if you want to turn it off while you use a different input on your TV so that your monitor will auto-sleep? You might have to build a power switch.

Now in all honesty, the Chromecast gets hot but the amount of power it draws when not in use is still pretty negligible compared to the draw of your TV. Every watt counts, and [Ilias] took this as an opportunity to refine his skills and combine a system using an Arduino, Bluetooth, and Android to create a robust power switch solution for the Chromecast.

The setup is rather simple. An HC-05 Bluetooth module is connected to an Attiny85, with some transistors to control a 5V power output. The Arduino takes care of a bluetooth connection and uses a serial input to control the transistor output. Finally, this is all controlled by a Tasker plugin on the Android phone, which sends serial messages via Bluetooth.

All the information you’ll need to make one yourself is available at [Ilias’] GitHub repository. For more information on the Chromecast, why not check out our review from almost three years ago — it’s getting old!

Running Calculus On An Arduino

It was Stardate 2267. A mysterious life form known as Redjac possessed the computer system of the USS Enterprise. Being well versed in both computer operations and mathematics, [Spock] instructed the computer to compute pi to the last digit. “…the value of pi is a transcendental figure without resolution” he would say. The task of computing pi presents to the computer an infinite process. The computer would have to work on the task forever, eventually forcing the Redjac out.

Calculus relies on infinite processes. And the Arduino is a (single thread) computer. So the idea of zeno_03running a calculus function on an Arduino presents a seemingly impossible scenario. In this article, we’re going to explore the idea of using derivative like techniques with a microcontroller. Let us be reminded that the derivative provides an instantaneous rate of change. Getting an instantaneous rate of change when the function is known is easy. However, when you’re working with a microcontroller and varying analog data without a known function, it’s not so easy. Our goal will be to get an average rate of change of the data. And since a microcontroller is many orders of magnitude faster than the rate of change of the incoming data, we can calculate the average rate of change over very small time intervals. Our work will be based on the fact that the average rate of change and instantaneous rate of change are the same over short time intervals.

Continue reading “Running Calculus On An Arduino”

Precision CNC Drawing With EtchABot

Turning the classic toy Etch-A-Sketch into a CNC drawing tablet intrigues a large number of hackers. This version by [GeekMom] certainly takes the award for precision and utility. Once you build something like this, you can hardly stop writing firmware for it; [GeekMom] produced an entire Arduino library of code to allow joystick doodling, drawing web images, and a self-erasing spirograph mode. The topper is the version that runs as a clock!

gallery

The major hassle with making a CNC version of this toy is the slop in the drawing mechanism. There is a large amount of backlash when you reverse the drawing direction. If that isn’t bad enough, the backlash is different in the vertical or horizontal directions. Part of [GeekMom’s] presentation is on how to measure and correct for this backlash.

The EtchABot uses three small stepper motors. Two drive the drawing controls and the third flips the device forward to erase the previous drawing. The motors are each controlled by a ULN2003 stepper motor drivers. An Arduino Uno provides the intelligence. Optional components are a DS3231 Real Time Clock and a dual axis X-Y joystick for the clock and doodling capability. Laser cut wood creates a base for holding the Etch-A-Sketch and the electronics.

The write up and details for this project are impressive. Be sure to check out the other entries in [GeekMom’s] blog. Watch the complete spirograph video after the break.

Continue reading “Precision CNC Drawing With EtchABot”

The Smallest Google Street View In Miniatur Wunderland

The world’s largest model railway exhibit — on display in Germany of course — is quite the attraction. The huge Miniatur Wunderland features towns and trains from Germany, Switzerland, Austria, and even a little America. And it’s all on Google Maps.

[Frank] accepted the challenge to build a tiny Google Streetview train, capable of traversing the entire Wunderland. It features a fish-eye camera on both the front and rear car, and is powered by an Arduino — the Wattuino Nanite 85. He upgraded the train to use tiny stepper motors to allow for precise movement along the tracks to get all the shots in perfect Streetview fashion.
Continue reading “The Smallest Google Street View In Miniatur Wunderland”