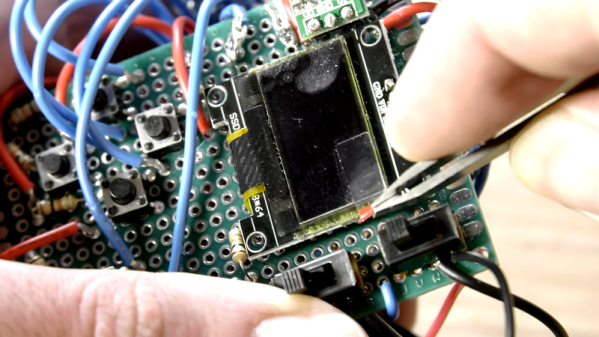
[Michael Pick] calls himself the casual engineer, though we don’t know whether he is referring to his work clothes or his laid back attitude. However, he does like to show quick and easy projects. His latest? A little portable Tetris game for $9 worth of parts. There is an Arduino Pro Mini and a tiny display along with a few switches and things on a prototyping PC board. [Michael] claims it is a one day build, and we imagine it wouldn’t even be that much.
Our only complaint is that there isn’t a clear bill of material or the code. However, we think you could figure out the parts pretty easy and there are bound to be plenty of games including Tetris that you could adapt to the hardware.
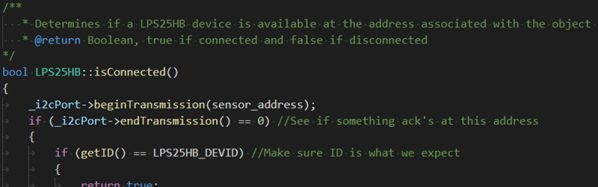
The Arduino IDE has a bit of a split personality. On the one hand, it is a simple environment where you can just pick and choose a few libraries, write a few lines of code, and make lots of interesting things. On the other hand, it is also an ecosystem in which many different boards and libraries can be supported. Writing a great library that everyone can easily use takes a little forethought. There is an official style guide, but a recent post by [Nate] from Sparkfun points out lessons learned from writing more libraries than most people.
Of course, as you might expect, some of this is a matter of opinion, and [Nate] admits that. For example, they always use the serial port at 115,200 baud, but they do note that 9,600 baud is also popular. They also suggest making code as readable as possible, which is usually good advice. In the old days, writing terse code might lead to higher efficiency, but with modern compilers, you ought to get a tight final result even when doing things in a pretty verbose fashion.
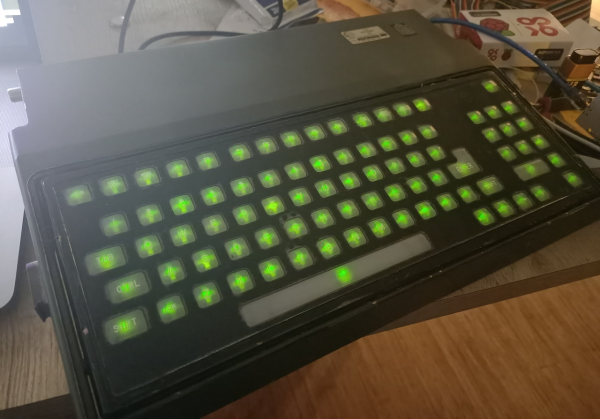
When [easyjo] picked up this late ’80s Marconi mil-spec keyboard for cheap, he knew it wouldn’t be easy to convert it to USB — just that it would be worth it. Spoiler alert: those LEDs aren’t a mod, they’re native. They get their interesting shape from the key traces, which are in the four corners.
Despite having way-cool buttons such as WPNS HOLD, and the fact that Control is on the home row where it belongs, this keyboard does not look fun to type on at all for any length of time. Of course, the point of this keyboard is not comfort, but a reliable input device that keeps out dust, sweat, liquids, and the enemy.
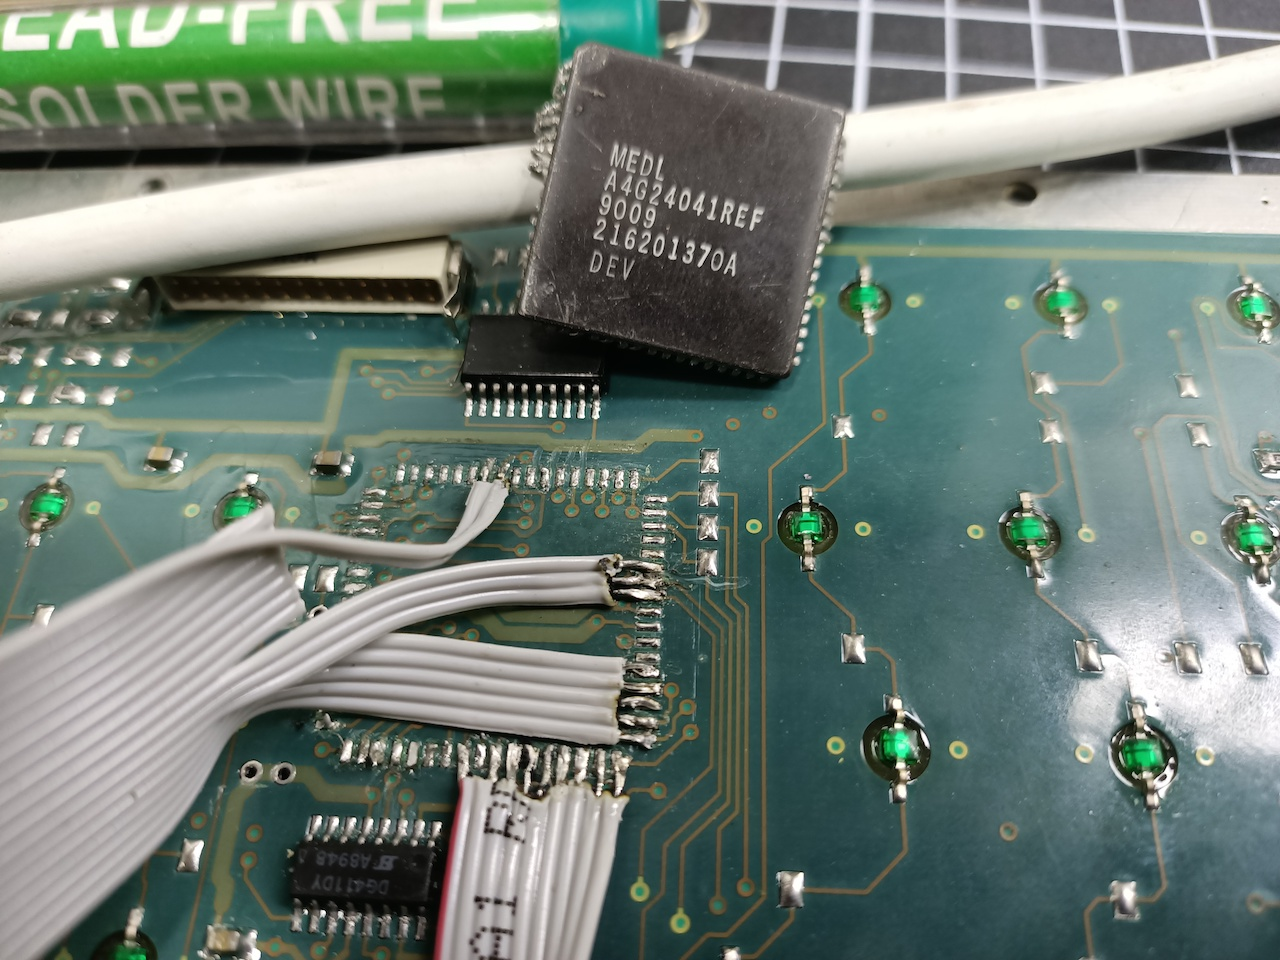
This is probably why the controller is embedded into the underside of the key switch PCB instead of living on its own board. [easyjo] tried to analyze the signals from the existing 26-pin connector, but it didn’t work out.
So once he was able to decode the matrix, he removed the controller chip and wired the rows and columns directly to an Arduino Leonardo. Fortunately, the LEDs were just a matter of powering their columns from the front side of the board.
The availability of certain kinds of military surplus can make for really interesting modernization projects, like adding POTS to a field telephone.
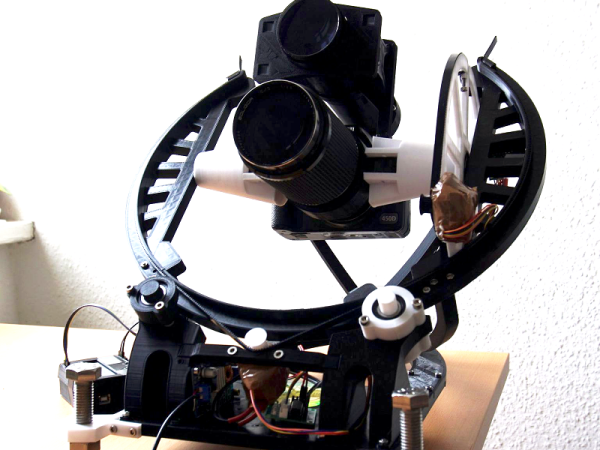
If you want to take beautiful night sky pictures with your DSLR and you live between 15 degrees and 55 degrees north latitude you might want to check out OpenAstroTracker. If you have a 3D printer it will probably take about 60 hours of printing, but you’ll wind up with a pretty impressive setup for your camera. There’s an Arduino managing the tracking and also providing a “go to” capability.
The design is over on Thingiverse and you can find code on GitHub. There’s also a Reddit dedicated to the project. The tracker touts its ability to handle long or heavy lenses and to target 180 degrees in every direction.
Would you like to know the great thing about this community we have here? All the spitballing that goes on every day in the comments, the IO chat rooms, and in the discussion threads of thousands of projects. One of our favorite things about the Hackaday universe is that we help each other out, and because of that, our collective curiosity pushes so many designs forward.
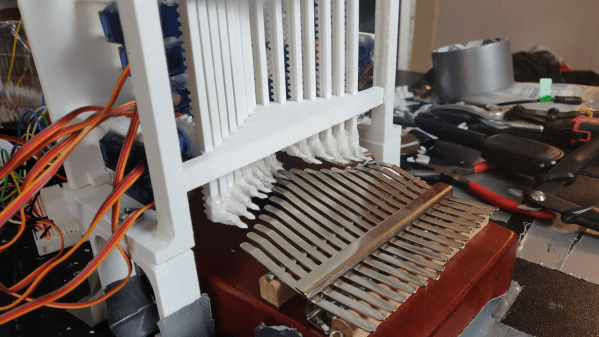
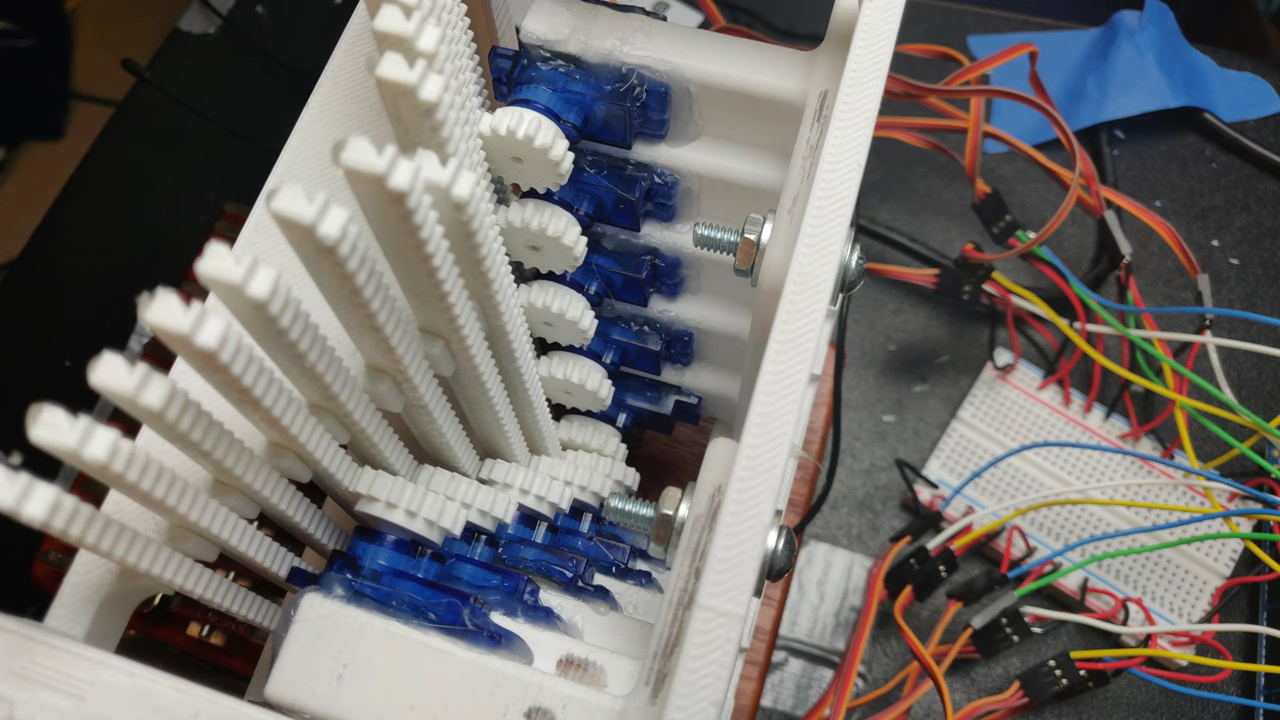
[Gurpreet] knows what we’re talking about. He’s back with version two of his self-playing kalimba, driven as strongly as ever by the dulcet tones of the Avatar theme. Now the robo-kalimba is rocking two full octaves, and thanks to your comments and suggestions, has relocated the servos where they can’t be picked up by the soundboard.
We gasped when we saw the new mechanism — a total of 15 rack and pinion linear actuators that make the kalimba look like a tiny mechanical pipe organ. Now the servos float, fixed into a three-part frame that straddles the sound box. [Gurpreet] melted servo horns to down to their hubs rather than trying to print something that fits the servos’ sockets.
Thumb your way past the break to check out the build video. [Gurpreet] doesn’t shy away from showing what went wrong and how he fixed it, or from sharing the 3D printering sanity checks along the way that kept him going.
Plucking kalimba tines is a difficult problem to solve because they’re stiff, but with timbre sensitive to many degrees of pressure. A slightly easier alternative? Make a toy player piano.
If everything goes according to plan, Elon Musk says the first generation of SpaceX’s massive Starship will make an orbital flight before the end of 2020. That’s a pretty bold claim, but when you’ve made landing rockets on their tails as in the old science fiction pulp magazines seem routine, we suppose you’ve earned the right to a bit of bravado. We’re excited to see the vehicle evolve over the next several months, but even if the real one stays grounded, we’ll gladly take this “flying” Starship model from [Chris Chimienti] as a consolation prize.
A magnetic levitation module, we’re officially in the future.
Feeling a bit let down by the 3D printable models of the Starship he found online, [Chris] set out to build his own. But it wasn’t enough to just make his bigger, stronger, and more accurate to Starship’s current design; he also wanted to make it a bit more exciting. Some RGB LEDs an Arduino embedded in the “cloud” stand the rocket sits on was a good start, and the landing pad inspired by SpaceX’s real autonomous spaceport drone ship Just Read the Instructions looks great all lit up.
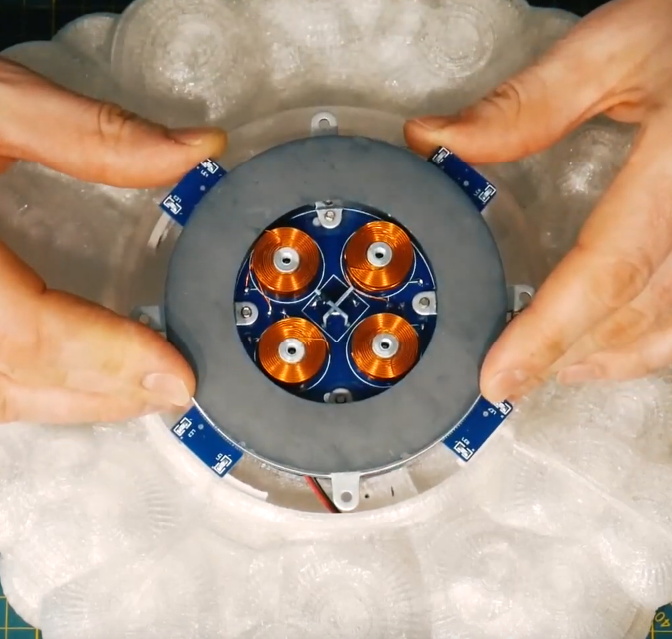
But this is Starship we’re talking about, a vehicle that could literally push humanity towards being a multi-planet species. To do it justice, you’ve really got to knock it out of the park. So [Chris] found a magnetic levitation module online that could support a few hundred grams, and set to work on making his plastic Starship actually hover over the landing pad.
As you might imagine, it was a bit tricky. The first versions of the rocket looked great but came out too heavy, so he switched over to printing the model in so-called “spiral vase mode” which made it entirely hollow. Now far lighter and with a magnetic plate fit into the bottom, it was stable enough to float on its own. For the final touch, [Chris] added some red LEDs and a coin cell battery to the base of the Starship so it looks like the sleek craft is performing a last-second landing burn with its “impossible” full-flow staged combustion engines.
This isn’t the first time we’ve seen a model rocket with an electronic glowing cloud under it, but it’s certainly the first one we’ve seen that could levitate in mid-air. While this little rocket might not make it all the way to Mars, we wouldn’t be surprised to see it touching down on the desks of other hackers and makers in the near future.
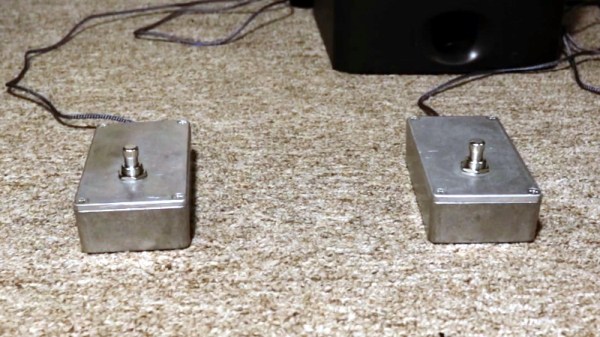
You’ve (probably) got four limbs, so why are you only using half of them when you’re working on the computer? Just because your toes don’t have the dexterity to type (again, probably) doesn’t mean your feet should get to just sit there doing nothing all day. In a recent project, [MacCraiger] shows you just how easy it can be to put some functionality under foot by building a pair of media control stomp switches.
Crimp pin connectors grant +50 professionalism.
If the devices pictured above look a lot like guitar effects, that’s because they share a lot of parts. [MacCraiger] used the same sort of switch and aluminum case that you might see on a pedal board, as he figured they’d be better suited to a lifetime of being stepped on than something he 3D printed.
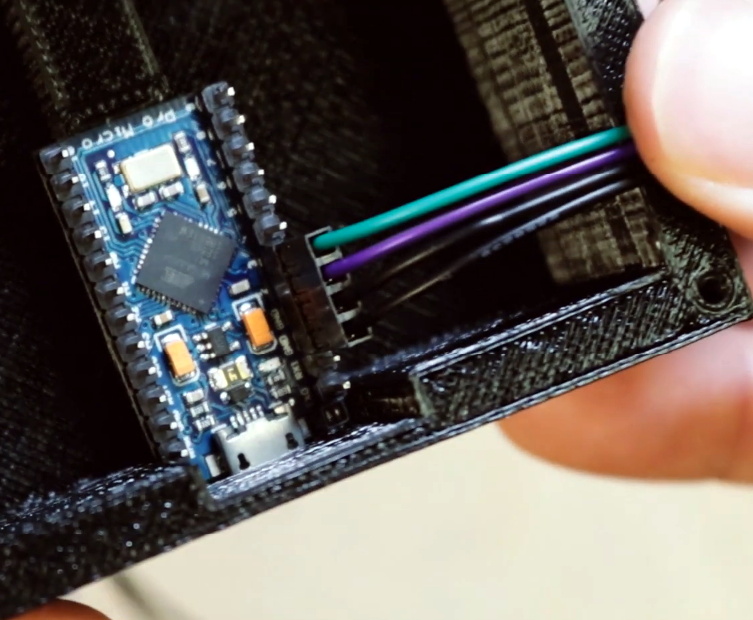
Up on the desk, and this time in a printed case, is the Arduino Leonardo that they connect to. The wiring for this project is very straightforward, with the switches connected directly to the GPIO pins. From there, the Arduino firmware emulates a USB Human Interface Device and fires off the appropriate media control keystrokes to skip to the next track or pause playback depending on which switch has been engaged.
This hardware isn’t exactly breaking any new ground here, but we did like how [MacCraiger] used standard 3.5 mm audio cable and the associated jacks to connect everything up. It’s obviously on-theme for what’s essentially a music project, but more importantly, gives the whole thing a very professional look. Definitely a tip to mentally file away for the future.