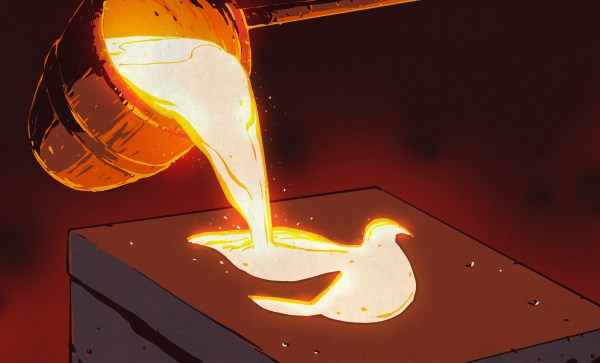
In the world of additive manufacturing, there’s always need materials being added to the list of potential filaments to use for printing objects. A method of rapid liquid printing of concrete designed by [Anatoly Berezkin] of Stoneflower 3D makes it possible to print a large variety of shapes from concrete while avoiding the negative effects of fast dehydration. The technique is based on an approach to printing polyurethanes, developed by MIT in 2017. This technique requires physically drawing a 3D object within a gel suspension using a chemical curing process. The gel allows gravity to not affect the printing process, as well as helping out with the curinng. Berezkin, an engineer and hobbyist working out of his garage, has published other work including print heads, ceramic printing, and micro printing sets.
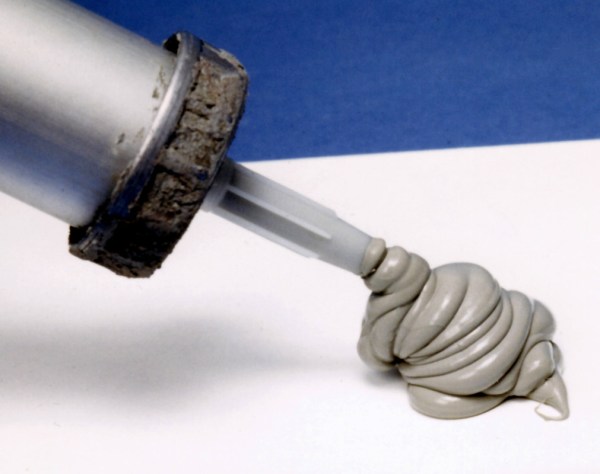
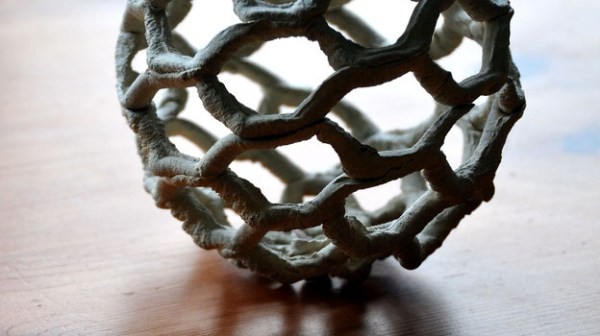
One might be skeptical of whether the weight of the material could cause potential collapse during the printing process, or whether it is simply unrealistic to print objects given the time needed for the concrete to dry. Their demo shows the process being done in household items – bowls and tupperware – combining affordable items such as clay, concrete, and sand for the matrix and mortar. The viscous clay is strong enough to act as a good scaffold for keeping the concrete structure in place as it is being printed. As their video demonstrates, at least for simply objects, the process seems relatively fast.
RLPC doesn’t require toxic chemicals or proprietary components such as gels and suspensions. Its immersion of the final printed object in a humid environment is also superior to the standard process of liquid deposition for hardening concrete. Moreover, the process simply requires clay or retarded mortar for the matrix and mortar paste for turning into concrete. It’s advertised as eco-friendly, but just the simplicity of the materials needed for the matrix and mortar make this a promising technique.
Continue reading “Printing Liquid Concrete” →