If you listen to the zeitgeist, graphene is the next big thing. It’s the end of the oil industry, the solution to global warming, will feed and clothe millions, cure disease, is the foundation of a space elevator that will allow humanity to venture forth into the galaxy. Graphene makes you more attractive, feel younger, and allows you to win friends and influence people. Needless to say, there’s a little bit of hype surrounding graphene.
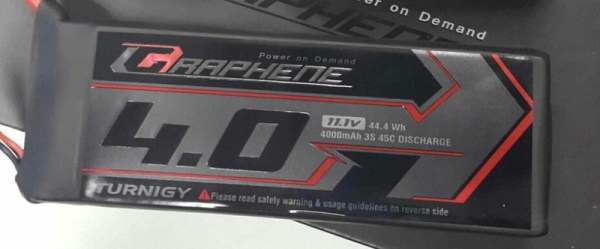
With hype comes marketing, and with marketing comes products making dubious claims. The latest of which is graphene batteries from HobbyKing. According to the literature, these lithium polymer battery packs for RC planes and quadcopters, ‘utilize carbon in the battery structure to form a single layer of graphene… The graphene particles for a highly dense compound allowing electrons to flow with less resistance compared to traditional Lipoly battery technologies” These batteries also come packaged in black shrink tubing and have a black battery connector, making them look much cooler than their non-graphene equivalent. That alone will add at least 5mph to the top speed of any RC airplane.
For the last several years, one of the most interesting potential applications for graphene is energy storage. Graphene ultracapacitors are on the horizon, promising incredible charge densities and fast recharge times. Hopefully, in a decade or two, we might see electric cars powered not by traditional lithium batteries, but graphene supercapacitors. They’ll be able to recharge in minutes and drive further, allowing the world to transition away from a fossil fuel-based economy. World peace commences about two weeks after that happens.
No one expected graphene batteries to show up now, though, and especially not from a company whose biggest market is selling parts to people who build their own quadcopters. How do these batteries hold up? According to the first independent review, it’s a good battery, but the graphene is mostly on the label.
[rampman] on the RCgroups forums did a few tests on the first production runs of the battery, and they’re actually quite good. You can pull a lot of amps out of them, they last through a lot of charging cycles, and the packaging – important for something that will be in a crash – is very good. Are these batteries actually using graphene in their chemistry? That’s the unanswered question, isn’t it?
To be fair, the graphene batteries shipped out to reviewers before HobbyKing’s official launch do perform remarkably well. In the interest of fairness, though, these are most certainly not stock ‘graphene’ battery packs. The reviewers probably aren’t shills, but these battery packs are the best HobbyKing can produce, and not necessarily representative of what we can buy.
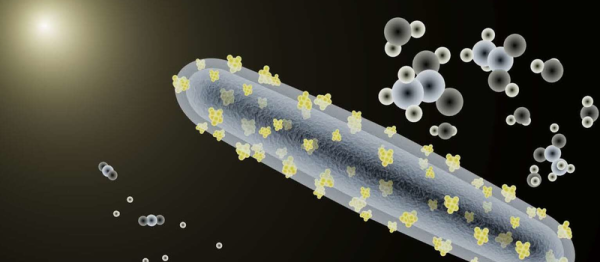
It’s also doubtful these batteries use a significant amount of graphene in their construction. According to the available research, graphene increases the power and energy density of batteries. The new graphene batteries store about as much energy as the nano-tech batteries that have been around for years, but weigh significantly more. This might be due to the different construction of the battery pack itself, but the graphene battery should be lighter and smaller, not 20 grams heavier and 5 mm thicker.
In the RC world, HobbyKing is known as being ‘good enough’. It’s not the best stuff you can get, but it is cheap. It’s the Wal-Mart of the RC world, and Wal-Mart isn’t introducing bleeding edge technologies that will purportedly save the planet. Is there real graphene in these batteries? We await an in-depth teardown, preferably with an electron microscope, with baited breath.