[Johannes] has been reading Hackaday for years but this is the first project he’s tipped us off about. It’s a laser engraver built from a DVD burner diode (translated). It turned out so well we wonder what other projects he’s forgotten to tip us off about?
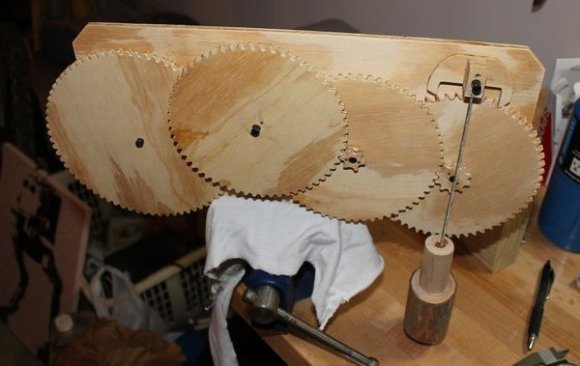
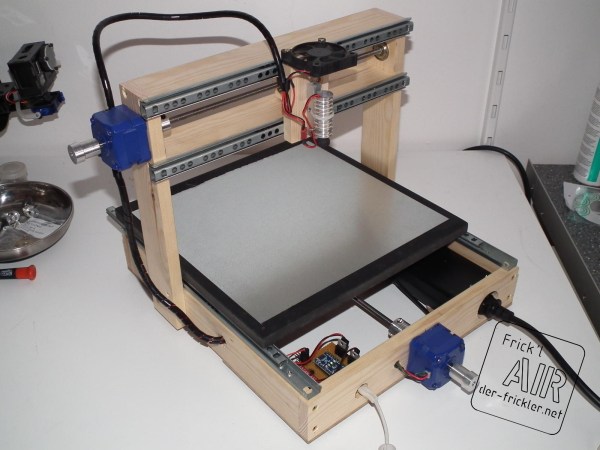
This is the second CNC machine he’s seen through from start to finish. It improves upon the knowledge he acquired when building his CNC mill. The frame is built from pine but also uses bits of plywood and MDF. It can move on the X and Y axes, using drawer sliders as bearings. The pair of blue stepper motors drive the threaded rods which move the platform and the laser mount. Just above the laser he included a small DC fan to keep it from burning up. The control circuitry is made up of an Arduino Nano and a stepper motor driver board. Catch a glimpse of the engraver cutting out some stencil material after the break.
There must be something about Spring that brings out the urge to work with laser diodes. We just saw a similar 1W cutter last week.
Continue reading “DVD Laser Diode Used To Build A Laser Engraver”