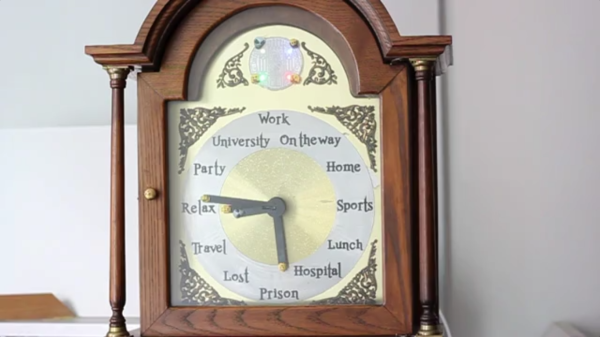
Just like the clock from Harry Potter, a team of media informatics students at the University of Munich built a grandfather clock that doesn’t keep track of time; instead, it keeps track of where everyone is, whether it be their university, work, or in prison.
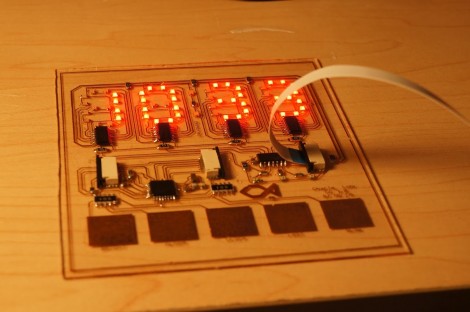
The build uses Android and iOS apps on each team member’s cell phone to send their current location to a web server. A circuit built inside an old grandfather clock the team picked up from eBay communicates with the web server through a WiFly Shield to control a quartet of servos and drive the clock hands.
Because the grandfather clock only came with two clock hands, the team used a series of four concentric shafts to move each hand around the dial. With a bit of clever gear fabrication on their laser cutter, they were able to use unmodified servos move the hands all the way around the clock.
The avatars on the tip of each clock hand are the remains of decapitated LEGO minifigs, a choice that makes sense after viewing the build video available after the break.