AppleCrate II Doubles The Cluster Computing Fun

apple_crate_II

Back in 2004, Apple hobbyist/guru [Michael Mahon] built a cluster of Apple IIe main boards dubbed the “AppleCrate” as an experiment in parallel computing. Now that a few years have passed, he is back with a new iteration of the device, aptly named AppleCrate II.

AppleCrate II was built to address some of the design limits of his first cluster project as well as to expand his parallel computing capabilities. His gripes with the first model were primarily structural in nature. The new system is organized in horizontal layers, using metal standoffs between each main board, rather than relying on a shaky wooden superstructure to keep things together. He also found his previous 8-processor configuration a bit limiting, so the AppleCrate II has 17 nodes – 16 slaves and one main board dedicated to running the operation. The cluster even uses his own homebrew networking stack known as NadaNet to enable communications between the boards.

The project is pretty impressive, so be sure to swing by his site if you want to learn more.  He has a ton of technical details there, as well as copies of all of the software he used to get the cluster up and running.

[via BoingBoing]

Analog Projection Clock So Simple You Should Have Thought Of It

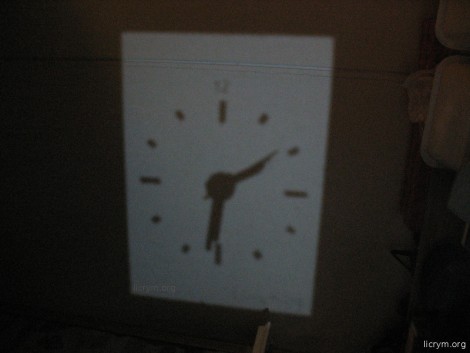
The image you see above is the result of a simple analog projection clock. It shows the time on the ceiling. We have one in our bedroom but it’s a red digital display which we don’t think is nearly as fun as this clever hack. Grab a cheap analog clock, a mirror, and a white LED and you can build your own.

The mirror is going to reflect light from the LED onto a ceiling or other surface. It acts as the clock face. The tick marks for each hour were made by scratching the reflective material (often called the silvering) from the back of the mirror. A hole is drilled at the center of the class and the analog clock is mounted with its hands on the business side. The one problem with this setup is that since the light is being reflected, the clock will appear to run backwards. Not a problem, if you just reverse the polarity of the coil which moves the clockwork the projection will move in the expected clockwise direction.

[via Make]

DIY Sunrise Alarm Clock

sunrise_alarm_clock

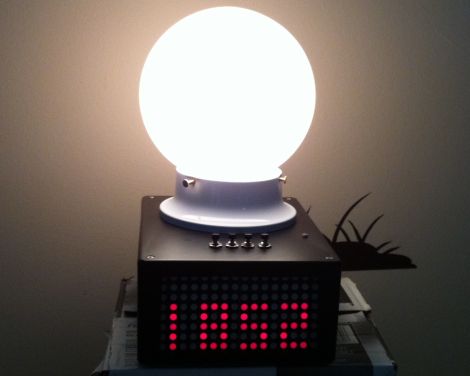
As a project for an embedded systems class, [Alan] recently built himself a sunrise-simulating alarm clock. You are probably familiar with these sorts of timepieces – they gradually light up the room to awaken the sleeping individual rather than jarring them awake with a buzzer or the radio. Since many commercial units with this feature are sold for $70 and up, his goal was to replicate the functionality at a fraction of the cost, using only open source components.

An Arm Cortex M3 processor runs the show, displaying the time via a pair of 8×8 LED matrix panels on the front of the device. The clock is programmed to gently wake up its user by simulating a sunrise over a period of 5, 15, 30, 45, or 60 minutes. If the user has not woken up before the sunrise simulation is complete, the clock resorts to a traditional piezo alarm to rouse the heavy sleeper.

The project is nicely done, and after looking at his bill of materials it seems to be far cheaper than many sunrise alarm clocks you will find in stores.

Cutting Paper Scrolls With Frickin’ Lasers

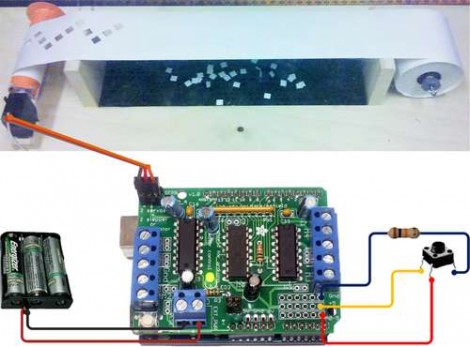
This circuit illustration adds a scrolling paper feeder to the bed of a laser cutter. In the video after the break you can see that the actual assembly is put on the bed of the laser cutter. After the laser has cut out the specified pattern, the scroll is wound to move an un-cut portion into place. It uses a servo motor to drive one of the spools.

An Arduino Uno with a servo shield is being used for this application. It has one button which winds one spool for a pre-programmed period of time. There’s a few issues with this setup, namely that it’s not tied into the CNC program that runs the laser. There’s also a lack of precision when using a continuously rotating servo like this. If it were upgraded to use a stepper motor and patched into the CNC hardware this would make cutting new scrolls for your player piano a breeze.

Here’s a project that does the opposite, it takes old player piano rolls and digitizes them.

Continue reading “Cutting Paper Scrolls With Frickin’ Lasers”

Build Your Own Programmable Logic Controller

[Q] is an Electrical Engineer who works in an industrial setting. He frequently uses Programmable Logic Controllers at work but had never built one himself. He decided to undertake the project at home and managed to build a PLC that outputs 120V AC or 12 V DC and has optoisolated inputs.

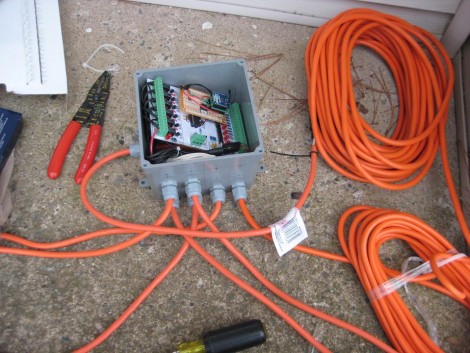
On the circuit board you’ll find an ATmega8 and an EEPROM for extra data storage. Six outputs are controlled by relays since they are able to output either alternating or direct current. There are eight inputs which use optical isolators as buffers to protect the microcontroller.

So what did he end up using this for? It was part of his Christmas light setup last year. The image above shows the PLC in a water-tight electrical box with extension cords running to each of the devices he wishes to control. The example code is what he used on the X-mas setup, but it should be enough of a guide to program this to work with just about any application.

Meet Mr. Clappidoo

mr_clappidoo

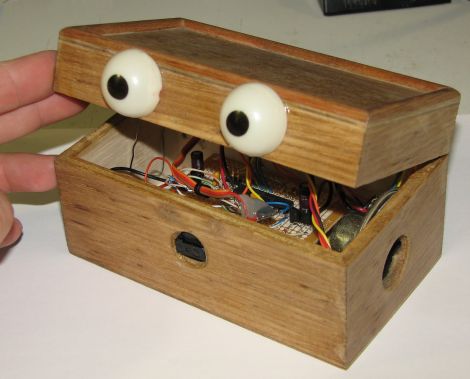
[Laurence] tinkers around the house quite a bit, making all sorts of fun interactive toys for his children to play with. Mr. Clappidoo is a toy that he finished a while back, which bears a striking resemblance to one of his projects we recently showed you, Papydoo. This is not a coincidence, as Papydoo was created after Mr. Clappidoo was built, borrowing many features from his predecessor.

Who is your daddy and what does he do?

It’s a good thing you asked. Mr. Clappidoo uses an IR motion sensor to detect nearby objects, waking up and interacting with whatever crosses his path. He is capable of four different random moods ranging from angry to flirty. He projects these moods by changing the color of his LED-lit eyes as well as playing simple sounds. A balsa wood chest makes up Clappidoo’s body, and he repeatedly claps his lid mouth open and shut using a small servo, hence the name.

Like his other projects, [Lawrence] has focused his efforts to ensure that the three AA batteries used to power Clappidoo last as long as possible. He says that with moderate usage the device can run off the same set of batteries for a few months before needing replacement.

It’s a fun little contraption, sure to please the kids. Stick around for a quick video of Clappidoo in action.

Continue reading “Meet Mr. Clappidoo”

USB Keyboard Prankster

Being a long time prankster, [cyclonite] came up with this pretty clever hack in an old USB flash drive.

The drive was removed from its case, and the stock memory and controller was removed. On the back, an attiny 2313 is glued to the pcb, while resistors are swapped to work with the VUSB library. Wirewap wire is used to jumper all the needed points to the new micro controller on the back, and a temporary ICSP header was fitted on the end to load software.

What your’re left with is an innocent looking usb drive that, when plugged in, sets itself up as a keyboard then proceeds to toggle the caps lock on your victims computer every few minuets. Classic.

Join us after the break for a quick video.

Continue reading “USB Keyboard Prankster”