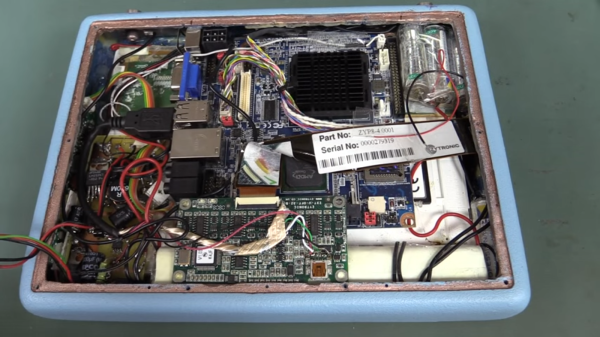
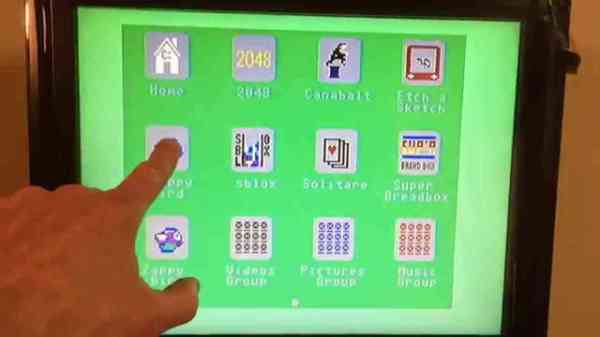
Nothing spices up a quiet afternoon like the righteous indignance of an upset engineer, especially if that engineer is none other than [Dave Jones], on his EEVblog YouTube Channel. This week [Dave] has good reason to be upset. A viewer sent him what looked to be a nondescript 2010 era tablet from a company called Esinomed. From the outside it looked like a standard issue medical device. Opening up the back panel tells a completely different story though. This thing is quite possibly the worst hack job [Dave] (and we) have ever seen. This is obviously some kind of sales demo or trade show model. Even with that in mind, this thing is a fail.
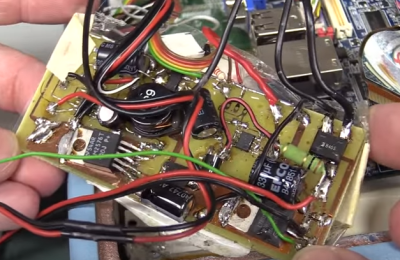 The tablet is based upon an off-the-shelf embedded PC motherboard and touchscreen controller. [Dave] took some offense at the hacked up USB connector on the touchscreen. We have to disagree with [Dave] a bit here, as the video seems to show that a standard mini-b connector wouldn’t have fit inside the tablet’s case. There’s no excuse for the USB cable shield draped over the bare touch controller board though. Things go downhill from there. The tablet’s power supply is best described as a bizarre mess. Rather than use a premade DC to DC converter, whoever built this spun their own switch mode power supply on a home etched board. The etching job looks good, but everything else, including the solder job, is beyond terrible. All the jumps and oddly placed components make it look like a random board from the junk bin was used to build this supply.
The story gets even worse with the batteries. The tablet has horribly hand soldered NiMH cells shoved here, there and everywhere. Most of the cells show split shrink wrap – a sure sign they have been overheated. It’s hard to tell from the video, but it appears as if a few cells have their top mounted vent holes covered with solder. That’s a great way to turn a simple rechargeable battery into a pipe bomb. Batteries can be safely hand soldered – Radio Controlled modelers did it for decades before LiPo cells took over.
We’ve all hacked projects together at the last minute; that’s one of the things we celebrate here on Hackaday. However, since this is a commercial medical device (with serial number 11 no less) we have to stamp this one as a fail.
Continue reading “Fail Of The Week: Dave Jones And The Case Of The Terrible Tablet”
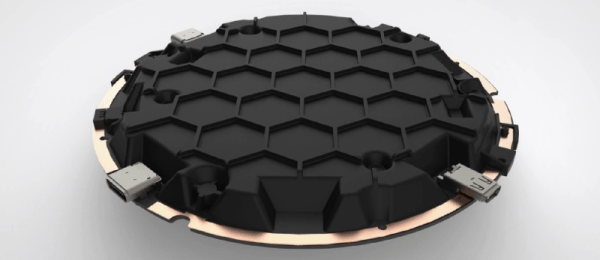
 The big draw to the ORWL is a ‘honeycomb mesh’ that completely covers every square inch of circuit board. This honeycomb mesh is simply a bit of plastic that screws on to the ORWL PCB and connects dozens of electronic traces embedded in this board to a secure microcontroller. If these traces are broken – either through taking the honeycomb shell off or by breaking it wide open, the digital keys that unlock the computer are erased.