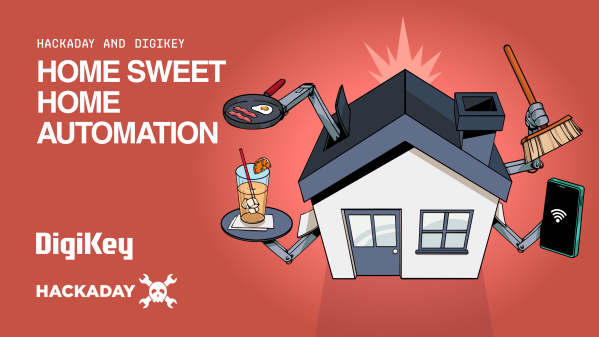
The 2022 Hackaday Prize is focused on taking care of the planet. The theme of our second challenge round, “Reduce, Recycle, Revamp” is all about tailoring your projects to make use of existing resources and keeping material out of the landfill rather than contributing to it. Our judges have scrutinized the entries and handed me the sealed envelope. All of these ten projects will receive $500 right now and are eligible for the Grand Prize of $50,000, to be announced in November.
We were looking for two broad types of recycling projects in this round, either projects that incorporate a significant recycled component in their build, or projects that facilitate recycling themselves, and frankly we got a good mix of both! Continue reading “2022 Hackaday Prize: Reuse, Recycle, Revamp Finalists”→
When it comes to design decisions, we’re often advised to “think outside the box.” It’s generally good advice, if a bit abstract — it could really mean anything. But it appears that someone took it quite literally with this nifty little smart knob display and input device.
[Dimitar]’s inspiration for RoenDi — for “rotary encoder and display” — came from an unusual source: a car dashboard, and specifically, the multipurpose knobs that often crop up in a car’s climate control cluster. Designed for ease of use while driving while causing as little distraction as possible, such knobs often combine a rotary encoder with one or more indicators or buttons. RoenDi builds on that theme by putting a 1.7″ round LCD display in the middle of a ring attached to an Alps rotary encoder, allowing the knob to be customized for whatever you want it to represent. The backplane sports a powerful STM32 microcontroller with a lot of the GPIO pins broken out, so customization and interfacing are limited only by your imagination. The design is open source, so you can either build your own or support the project via Crowd Supply.
Unlike the haptic smart knob we’ve been seeing a bit about lately, which also features a round LCD at its center, RoenDi’s feedback is via the physical detents on the encoder. We think both devices are great, and they fill different niches in the novel input ecosystem.
Douglas Engelbart’s 1968 “Mother of all Demos” introduced the world to a whole range of technologies we take for granted today, the most prominent being his great invention, the computer mouse. However, the MOAD also showcased things like cut-and-paste text editing, a point-and-click interface, video conferencing, and even online collaboration à la Google Docs. One of the innovations shown that for some reason didn’t stand the test of time was the chorded keyboard: an input device with five keys that can be pressed simultaneously in different combinations, the same way you would play chords on a piano.
It’s important to note that the chorded keyboard was not meant to be just an additional set of five keys. Instead, Engelbart showed the clever interplay between the chorder and the mouse: the five keys under his left hand and the three mouse buttons under his right could be combined to create a full 8-bit input device. [Russ]’s device therefore includes a USB host interface to connect a USB mouse as well as a USB client interface that presents itself as a combination mouse/keyboard device to the PC.
The brains of the device are formed by a Teensy 4.1, which reads out the codes sent by the mouse as well as the five keys on top. If one or more of those keys are pressed together with a mouse button, then a keyboard code is generated corresponding to Engelbart’s original keycode mapping. We’re wondering how practical this whole setup would be in real life; it looks like something you’d have to try hands-on to find out. Fortunately, all the schematics, code and STL files are available on the project page, so with just a bit of work you can have your own MOAD setup on your desk today.
We’ve featured a couple of chorded keyboards on these pages; the Pico Chord, the Chordie and the BAT spring to mind. If you’re looking for a recap of Engelbart’s stunning presentation, check out our piece on the Mother of all Demos, 50 years on.
The desk of any self-respecting technology enthusiast in the 2020s is not complete without a special keyboard of some sort, be it a vintage IBM Model M, an esoteric layout or form factor, or just a standard keyboard made with clacky mechanical switches. But perhaps we’ve found the one esoteric keyboard to rule them all, in the form of [HIGEDARUMA]’s 8-bit keyboard. You can all go home now, the competition has been well and truly won by this input device with the simplest of premises; enter text by setting the ASCII value as binary on a row of toggle switches. No keyboard is more retro than the one you’d find on the earliest microcomputers!
Jokes aside, perhaps this keyboard may be just a little bit esoteric for many readers, but it’s nevertheless a well-executed project. Aside from the row of binary inputs there is a keypress button which sends whatever the value is to the computer, and a stock button that allows for multiple inputs to be stored and sent as one. If you pause for a moment and think how often you use Ctrl-C and Ctrl-V for example, this is an essential function. There’s more information on a Japanese website (Google Translate link), which reveals that under the hood it’s a Bluetooth device running on an ESP32.
We can imagine that with a bit of use it would be possible to memorize ASCII as binary pretty quickly, in fact we wouldn’t be at all surprised to find readers already possessing that skill. But somehow we can’t imagine it ever being a particularly fast text input device. Take a look for yourselves, it’s in the video below the break.
When it comes to rendering text input into an electronic form,the newest keyboards use USB for wired interfacing, while the oldest Morse keys use a single conductor. Shall the two ever meet? For [Matthew Sparks] the answer is yes, with his “The Gadget” Morse-to-USB HID interface which presents a Morse key to a computer as though it were a USB keyboard.
At its heart is a Seeduino Arduino clone, upon which the Morse key waggles a pin, and which through the extensive magic of software recognizes the keyed characters and converts them into USB key presses for the computer. It’s thus a surprisingly simple project, and the write-up spends far more time proselytizing the art of the carrier wave than it does on Arduino code.
Morse is simultaneously a manual art form, an efficient means of communicating through congested radio bands, and an anachronism, which probably explains its continued appeal in the radio amateur fraternity. We’re not sure how many keyboard warriors will switch to the single key with this project, but we can see that it might be a useful aid to learning as well as a pretty quick input method for the owner of an experienced fist.
The need to provide custom controls for complex software packages has been satisfied in many ways, the most usual of which is to have a configurable keypad. It’s a challenge [Meir Michanie] has taken up in a slightly different way, by creating a custom touch-screen macro pad. Unlike the buttons, this allows entirely custom layouts with different shaped keys in any configuration.
At its heart is a versatile ESP32 touch screen development board of the type that can be found easily among the pages of your favorite online electronics mart. The Arduino IDE has been used to program the device, and configuration is as simple of providing it with a PNG of the desired layout, and a CSV file to define the buttons. The whole then connects via BLE where it’s presented to the host computer as a keyboard. The result is one of the coolest macro pads we’ve ever seen, with a limitless number of options.
With such a neat idea it’s perhaps no surprise among the numbers of macro pads that have made it to these pages there might be another take on the same idea.
The 2022 Hackaday Prize continues to hurtle along, with two of the five Challenges already in the rear-view mirror. While we’re naturally excited about every phase of this year’s contest, we’ve got particularly high hopes for what the community can do with this third Challenge: Hack it Back.
It’s a simple formula: find some outdated and disused piece of gear, spruce it up, and keep it out of the landfill. But extending the lifetime of consumer hardware is only one side of the coin, by upgrading and modifying something instead of buying an off-the-shelf replacement, you also turn the mundane into something unique and personal. But of course, we hardly have to explain the benefits to you fine folk — this is the sort of bespoke engineering we see on a nearly daily basis here at Hackaday. The difference now is that there’s cash prizes on the line.
What’s that you say? You aren’t the type to be seduced by shiny new features? Happy to keep things local while others ship it all off to the cloud? You’ll get no complaints from us, and that’s why the Hack it Back Challenge also recognizes repairs that simply put a piece of gear back into service. But don’t be fooled, as fixing something can often be harder than rebuilding it from scratch.
Ready to put your hardware-reviving skills on display? Just head over to Hackaday.io, make a new project page, and get hacking. But don’t wait too long, you’ve only got until July 24th to enter the Hack it Back Challenge and stake your claim on one of the ten $500 awards up for grabs.