magic_music_table_accessible_jukebox

Magic Table Gives Disabled Child Control Over Her Music

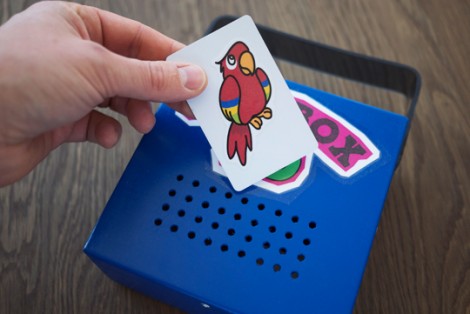
Instructables user [XenonJohn] recently put together a fantastic tutorial detailing how he made an RFID-controlled jukebox. The Magic Music Table was created for a disabled child, who is unable to use a CD payer, nor navigate small buttons and menus on MP3 players. He originally though about making the buttons more accessible a la the Frankenkindle, but ultimately settled on making the table instead.

Embedded in the center of the Music Table under a piece of plexiglass is a small project box containing an iPod, Arduino Mega, and a Parallax RFID reader. He crafted small RFID “bricks” that can be waved over the RFID reader, triggering the iPod to play a specific album from a large playlist. The Arduino acts as the middleman, controlling the RFID reader and relaying the appropriate information to the iPod when required.

The system looks pretty sturdy, and [XenonJohn] says that it works great. We think it’s a wonderful use of technology – you certainly can’t argue with brightening up a child’s day.

Continue reading to see a video of the Magic Music Table in action.

Continue reading “Magic Table Gives Disabled Child Control Over Her Music”

Makita Jobsite Radio Gets A Few Extra Bells And Whistles

[Jose] added several features to a Makita AM/FM jobsite radio, and did such a good job that you can’t tell they weren’t originally part of the design. The original radio has a compartment for a battery pack used with Makita’s line of rechargeable tools, and offers AM/FM radio, as well as auxiliary audio playback via a pair of speakers. [Jose] augmented those speakers by adding a pair of tweeters as well.

Next on his list of features were a couple of power bus add-ons. In the image on the right you can see the results of adding an automotive cigarette lighter to the side of the unit. Opposite this you’ll find a pair of USB ports that are activated by a lighted toggle switch. The ports are part of a USB car charger that is patched into the battery with a flip of that switch.

Finally, there’s a built-in Bluetooth audio receiver that connects to the auxiliary input. As shown in the image on the left, he can now play tunes from his cellphone without the need for a cord. See him showing off the device in the video after the break.

Continue reading “Makita Jobsite Radio Gets A Few Extra Bells And Whistles”

Adding An External Audio Input To The Sansa Clip+

adding_external_mic_input_sansa_clip

Workshop 88 member [Jim] got his hands on a couple of SanDisk Sansa Clip+ MP3 recorder/players from Woot, and was anxious to see what he could do with them.

The first order of business was to install RockBox, an open source hardware package built for a wide range of MP3 players. He was impressed with how robust the firmware was, though he thought the Sansa’s built-in microphone could use a bit of upgrading. Acting on a tip from a fellow square dance enthusiast, he disassembled one to see how he might add an external audio input.

He pried the existing mic apart, and desoldered it from the motherboard, installing a small capacitor and resistor in its place. He extended some wires through the case, then powered up the unit to make sure it was still alive and well. Since things still looked good, [Jim] put some audio on the Sansa’s new inputs and sure enough it recorded the audio without a hitch.

He says that his initial guesses for the capacitor and resistor values were pretty decent, though with a bit of tweaking he should be able to get exactly the recording levels he was looking for. Not bad for a $20 audio recorder!

Schäuble Jr Aims To Take Away Your Privacy!

[Mnt] wrote in to tell us about this 360 degree array of cameras featured on [Codeninja]. This has to be one of the most impressive arrays of cameras and sound equipment that we’ve seen at Hack a day.

The array is capable of 360 degree x 140 degree panoramic views using the 9 cameras arranged in a circle around the base. Impressive in itself, these cameras are all capable of both pan and tilt rotation via and Arduino-controlled servo setup. It also has a native 360 degree camera mounted on top of everything for calibration purposes and IR-LED illumination capabilities.

On top of all of this, the camera array also features audio capability with a 9-microphone setup, presumably one for each camera. This, coupled with piezoelectric speakers should provide for echolocation capability. Although jokingly called the “Schäuble Jr.” after a German politician, we’re not sure of the true purpose for this “sensor array.” We can only hope that it will be used for good. A very impressive build, it will be interesting to see what comes of it.

SPDIF Passthrough Lets You Digitally Manipulate The Audio

[Mike Field] took what he had learned with a few past projects and combined them to make this FPGA-based SPDIF audio pass-through. In order to get the SPDIF signal ready for the FPGA he needed a few components to use for level conversion. Once everything was connected he used a first in first out (FIFO) buffer to ensure that the outgoing bitrate is the same as the input, while still allowing enough time for the FPGA to do some digital manipulation.

This reminds us of the NeTV, which is an HDMI pass-through device. That one allows you to overlay your own video information to any TV that has an HDMI port. This would allow you patch into any audio system that’s using SPDIF, letting you inject your own audio, such as a paging system in a public lobby, or the ringing of a phone when you get a call, or to create your own sounds.

We like his overhand knot cable management system to keep those jumper wires from becoming too much of a mess on the breadboard.

Bluetooth Cassette Adapter

Today, with iPods that can hold entire music collections and cell phones that stream music from the Internet, the lowly cassette seems like an anachronism. [Matt] still has a cassette deck in his truck, but wanted Bluetooth connectivity for his stereo. The obvious solution was to stuff Bluetooth headphones into a cassette adapter.

Audio cassette adapters are dead-simple devices. They’re really just a tape head, stuffed into the shell of a cassette and a wire going out to a media player. To put Bluetooth into his adapter, [Matt] got a cheap pair of Bluetooth headphones and tore them apart. He was left with a circuit board, battery, and two earphones. [Matt] cut off the leads to the ear phones and wired them to the cassette adapter head. After a little bit of modifications to the case, [Matt] had a functional Bluetooth-cassette adapter.

While it’s true [Matt] could have gotten a ready-made Bluetooth cassette adapter shipped from China to his door for $10, there’s not much fun in just buying one. Kudos to [Matt] for going the home-brew route.

Program An Arduino Using Your Sound Card

audioino_programming_arduino_with_sound

[Chris] wrote us to share a neat technique he has been using to program the Arduinos he uses in his projects. He likes to build bare bones Arduino clones rather than sacrifice full dev boards, and instead of programming them via traditional means, he is using his computer’s sound card.

He builds a simple dead bug Arduino (which he calls an Audioino) using a handful of resistors, a pair of caps, an LED, a reset switch, and most importantly – an audio jack. After burning a special audio bootloader to the chip, he can connect the Arduino directly into his computer’s speaker port for programming.

Once the microcontroller is connected to his computer, he runs the IDE-generated hex file through a Java app he created, which converts the data into a WAV file. With the Arduino put into programming mode, he simply plays the WAV file with an audio player, and the code is uploaded.

He says that this method of programming comes in handy in certain cases where he builds things for friends, because they can easily update the software on their own without a lot of fuss.