The Rube-Goldberg Of Car Audio

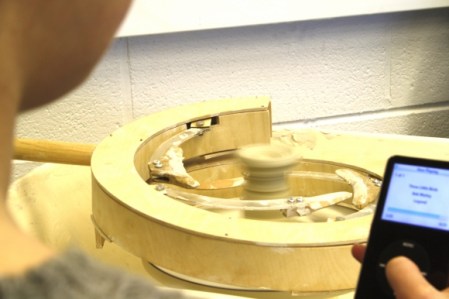
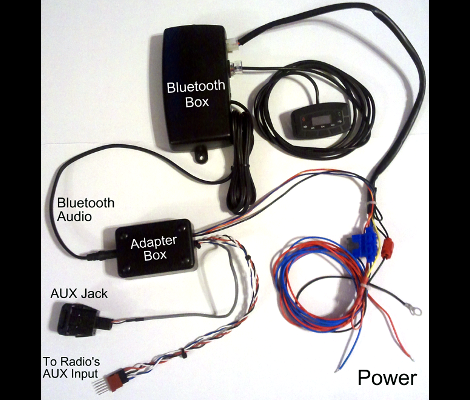
[Anthony Pray] had his car stereo stolen. When thinking about replacing it he realized the he and his wife never used it for anything other than an Auxiliary connection to play songs from their cellphones. So instead of buying a head unit he pulled an unused home audio amplifier out of a dark corner of his house and wired it to the car speakers. Problem solved, except that the under-dash installation meant the only volume control is on the phone playing the audio. He decided to build a wireless audio controller that would let him send commands to the phone without quite as much distraction from the road.

The device you see above is his creation. What a beauty. But seriously, it’s so random and hacked together how can you not love it? And, it works!

The frame is made from plastic coat hangers, and the wheel is an old RC control knob. There’s even a play/pause feature built from the clicking properties of a retractable ball-point pen. A Cypress PSoC board reads the knob and pen positions, then pushes commands via a Bluetooth module in order to control the phone. He recorded a testing video (after the break) which gives you a better look at the functionality of this setup. Continue reading “The Rube-Goldberg Of Car Audio”

Looking Toward Christmas Decor By Learning About DMX

So Halloween finally arrived, we hope you had enough time to pull off your frightening feats in the way you had originally envisioned. Now it’s time again to look to the future and start planning this year’s Christmas decorations. Lights are always a popular theme, and this year you might want to look into DMX lighting controls and decide if that’s a route you want to take. [Akiba] has your back, he just put together a set of videos explaining the DMX lighting protocol and how to use it with an Arduino.

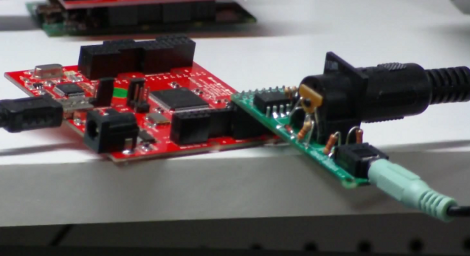
The thought here is that the Arduino can be used as a sort of DMX hub that is connected directly to a computer running open source controller hardware. It can send commands which the Arduino decodes, deciding whether to just pass them on to DMX compatible devices, or to do what it does best and control other hardware that is not normally accessible through the lighting command protocol. To the control program your four-dollar strand of LED lights looks no different from a thousand dollar stage light, making it cheap and easy to build your own entertaining holiday show right in your front yard. See the second video in this series after the break where [Akibo] details the hardware setup for his system. The other parts are available at the link above.

Be careful, this can be a consuming endeavor. Don’t believe us? Just look around and you’ll find no shortage of large DMX builds just for Christmas lights.

Continue reading “Looking Toward Christmas Decor By Learning About DMX”

Ball Of Dub Has Lots Of Wub

[Lizzie] from LustLab sent in her Ball of Dub that turns a few accelerometer and a digital audio workstation and turns everything into an aural experience of wubs and dubs. The Ball of Dub can turn just about anything into dubstep, and does so with a fairly interesting user interface.

There isn’t a build log for the Ball of Dub, but  the folks at LustLab did send in a basic overview of her project. Inside the ball, there’s a Razor IMU from Sparkfun that is attached to the ever-popular XBee wireless transceiver. A tiny program on an Arduino calibrates the gyroscope and accelerometer and sends that data to the DAW at 50Hz.

The host computer is running Renoise, a very popular tracker that can accept MIDI and OSC input. A Processing app parses the ball spin, free fall and impact, averages them over a period of time, and pipes that into the OSC input of Renoise. In [Lizzie]’s video, the ball spin is sent to a low-pass filter on the baseline track, and the average impact is applied to the vocal track.

This isn’t the first time we’ve seen some fairly strange ways to modulate wub; we saw real instruments covering Skrillex earlier this month. The Ball of Dub wins in the simplicity department, though.

Synthesizing Sound With A Light Sensitive Pen And CRT Television

Here’s the latest project from [Niklas Roy’s] workshop. Lumenoise is an audio synthesizer controlled by drawing with a light-sensitive pen on a CRT television.

The pen is a self-contained module which connects to the TV via audio and composite video RCA plugs. Inside the clear pen housing you’ll find a microcontroller which generates the audio and video. The business end of the pen contains a phototransistor which lets the ATmega8 take a reading from the video screen. Since the chip is generating that video signal, it’s possible to calculate the pen tip’s position on the screen and modulate the sound output based on that data. You can watch a recording of the results in the video after the break.

This is a very simple circuit to build, and [Niklas] makes the point that most of us have a CRT hanging around in a dark corner somewhere. We think this would be a fantastic soldering project to do with the kids, and that this would be right at home as a children’s museum piece because of the wow factor involved in playing around with it.

We can really tell from this and some of his past projects that [Niklas] just loves the 8-bit audio.

Continue reading “Synthesizing Sound With A Light Sensitive Pen And CRT Television”

Halloween Hacks: Scaring Small Children With Huffman Coding

The team over at NerdKits decided they needed to do something for Halloween. Only on Halloween is scaring small children is an admirable goal, so they demoed a way to play creepy sounds after a door has been opened.

To trigger the sound, a magnetic reed switch from an alarm system is attached to a front door. This triggers the microcontroller and with a bit of delay, some creepy audio can be played on a pair of speakers. The team decided to store all the audio data on the flash memory of their ATmega328p, but that wouldn’t allow for a very long scream. To extend the length of the wails of the damned, the NerdKits team decided to use Huffman coded audio.

Because Huffman coding relies on the most common value being assigned the shortest code, the team used a bit of Python and C magic to figure out the optimal encoding for their audio file. After the evil laugh was sufficiently compressed, the microcontroller was programmed to decode the audio and send it to a pair of speakers. The team made all the software for their project available here for your perusal.

Although this project could be thrown together in an hour with an Arduino and an MP3 shield, the NerdKits team wants to get kids to learn how things work, also an admirable goal. [Humberto] from NerdKits put a video up explaining the theory of the project. Check it out after the break.

Continue reading “Halloween Hacks: Scaring Small Children With Huffman Coding”

Tiny MP3 Module Is Perfect For Your Next Project

tiny_embedded_mp3_module

If your next project needs the ability to play MP3s but you don’t have a lot of room to spare in your enclosure, [Boris] has just the thing you need. His tiny embedded MP3 module supports playback of up to 65,536 songs or as many as you can fit on a 16GB microSD card, which isn’t bad in the least.

The module relies on a PIC24F for input and control, while a VS1011 handles all of the MP3 decoding responsibilities. He says that the module would be great for voice-enabled vending machines, telephone systems, cars, and more.

With such a wide range of possible applications, he decided that the module should be able to support several different input methods. The board can be controlled via a set of digital input buttons, which is perfect for direct human interaction, while it also supports serial control for scenarios where it is part of a larger embedded system.

Of course, we’ve seen tiny MP3 players like this before, but we like the fact that this module was designed to operate in standalone mode or as a component in a larger device. Of course all of the device’s schematics, code, and a BoM are available, allowing you to build your own if you are comfortable with SMD soldering.

Remote-controlled VMUSIC2 Audio Player

ir_controlled_vmusic2_audio_player

[Ron] was looking for a way to play his MP3s around the house without having to use his computer. He also wanted the ability to remotely control his tunes with an old camcorder remote he had sitting around – not exactly a feature you would find in an off the shelf personal audio player.

Ultimately, he decided to construct his own remote-controlled audio player using a VMUSIC2 audio module, which can decode MP3s from any standard USB drive. The VMUSIC2 is controlled by a Propeller demo board, which also handles receiving and decoding IR signals from his camcorder remote. While he was originally dumping ID3 tag data to his computer for debugging purposes, he recently added an LCD screen for displaying song information in a more useful manner.

The MP3 player seems to work pretty well if the video below is any indication, though it’s begging for a nice enclosure to tie things together. We like the project so far, so we’re sure [Ron] won’t fail to impress when it’s completely finished.

Continue reading “Remote-controlled VMUSIC2 Audio Player”