An External Autofocus For DSLRs

Most modern DSLR cameras support shooting full HD video, which makes them a great cheap option for video production. However, if you’ve ever used a DSLR for video, you’ve probably ran into some limitations, including sluggish autofocus.

Sensopoda tackles this issue by adding an external autofocus to your DSLR. With the camera in manual focus mode, the device drives the focus ring on the lens. This allows for custom focus control code to be implemented on an external controller.

To focus on an object, the distance needs to be known. Sensopoda uses the HRLV-MaxSonar-EZ ultrasonic sensor for this task. An Arduino runs a control loop that implements a Kalman filter to smooth out the input. This is then used to control a stepper motor which is attached to the focus ring.

The design is interesting because it is rather universal; it can be adapted to run on pretty much any DSLR. The full writeup (PDF) gives all the details on the build.

IP camera hack

How To Backup And Restore Your IP Camera Firmware

[Filipe] has been playing around with custom firmware for inexpensive IP cameras. Specifically, he has been using cameras based on a common HI3815 chip. When you are playing around with firmware like this, a major concern is that you may end up bricking the device and rendering it useless. [Filipe] has documented a relatively simple way to backup and restore the firmware on these cameras so you can hack to your heart’s content.

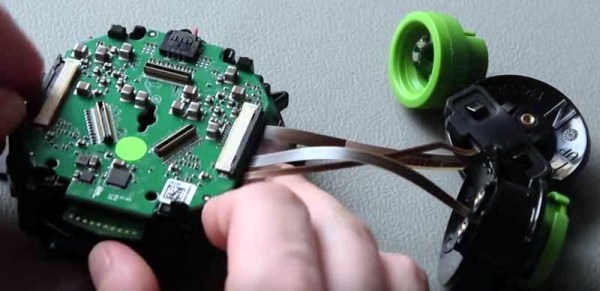
The first part of this hack is hardware oriented. [Filipe] cracked open the camera to reveal the PCB. The board has labeled serial TX and RX pads. After soldering a couple of wires to these pads, [Filipe] used a USB to serial dongle to hook his computer up to the camera’s serial port.

Any terminal program should now be able to connect to the camera at 115200 baud while the camera is booting up. The trick is to press “enter” during the boot phase. This allows you to log in as root with no password. Next you can reset the root password and reboot the camera. From now on you can simply connect to the phone via telnet and log in as root.

From here, [Filipe] copies all of the camera’s partitions over to an NFS share using the dd command. He mentions that you can also use FTP for this if you prefer. At this point, the firmware backup is completed.

Knowing how to restore the backup is just as important as knowing how to create it. [Filipe] built a simple TFTP server and copied the firmware image to it in two chunks, each less than 5MB. The final step is to tell the camera how to find the image. First you need to use the serial port to get the camera back to the U-Boot prompt. Then you configure the camera’s IP address and the TFTP server’s IP address. Finally, you copy each partition into RAM via TFTP and then copy that into flash memory. Once all five partitions are copied, your backup is safely restored and your camera can live to be hacked another day.

An MSP430 Clone Of The Canon RC-1 Remote

For reasons we both agree with and can’t comprehend, most ‘prosumer’ SLR cameras don’t have mechanical shutter releases. Instead, IR LEDs are brought into the mix, the Canon RC-1 remote trigger being the shutter release of choice for people who didn’t choose Nikon. [Vicente] cloned the Canon RC-1, but he didn’t do it to save money; there’s a lot to learn with this project, and making his own allows him to expand it with more features in the future.

Studying the function of the Canon RC-1, [Vicente] found that some compromises needed to be made. The total power emitted by an IR LED is usually a function of its beamwidth; a smaller beamwidth means more photons reaching the IR receiver in the camera. This also means the remote must be aimed at the camera more accurately. In the end, [Vicente] decided on a higher power LED with a tighter beamwidth that’s just slightly below the optimum wavelength for the receiver. It’s all an exercise in compromise, but other components could see similar performance.

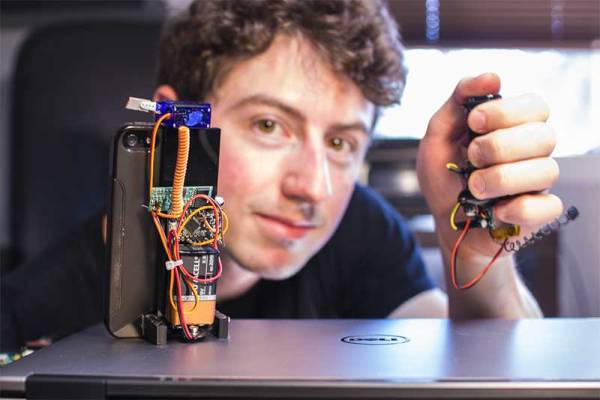
With the LED selected, [Vicente] moved on to building the actual controller. He chose an MSP430 microcontroller for its low power consumption, driving the LED with a watch battery and a transistor. Put together on a piece of protoboard, it’s actually pretty close to a TV-B-Gone. With everything soldered up, it’s good enough to trigger his camera’s shutter from about 5 meters away. Future improvements include cleaning up the code, making the timing more accurate with a crystal, and implementing low power mode on the MSP430.

Recording Time Lapse Of Endangered Reptiles Hatching

The tuatara is a reptile native to New Zealand, and thanks to the descendants of stowaway rats on 17th century ships, these little lizards are critically endangered. [Warren] was asked if he could film one of these hatchlings being born and pulled out a Raspberry Pi to make it happen.

[Warren] constructed a small lasercut box to house the incubating egg, but he hit a few snags figuring out how to properly focus the Raspi camera board. The original idea was to use a Nikkor macro lens, without any kind of adapter between it and the camera board. A bit of googling lead [Warren] to this tutorial for modifying the focus on the Raspi camera, giving him a good picture.

The incubator had no windows and thus no light, making an IR LED array the obvious solution to the lighting problem. Time was of the essence, so an off-the-shelf security camera provided the IR illumination. After dumping the video to his computer, [Warren] had a video of a baby tuatara hatching. You can check that out below.

Continue reading “Recording Time Lapse Of Endangered Reptiles Hatching”

A Single Pixel, Color Digital Camera

[Ben] has written all sorts of code and algorithms to filter, sort, and convolute images, and also a few gadgets that were meant to be photographed. One project that hasn’t added a notch to his soldering iron was a camera. The easiest way to go about resolving this problem would be to find some cardboard and duct tape and built a pinhole camera. [Ben] wanted a digital camera. Not any digital camera, but a color digital camera, and didn’t want to deal with pixel arrays or lenses. Impossible, you say? Not when you have a bunch of integral transforms in your tool belt.

[Ben] is only using a single light sensor that outputs RGB values for his camera – no lenses are found anywhere. If, however, you scan a scene multiple times with this sensor, each time blocking a portion of the sensor’s field of view, you could reconstruct a rudimentary, low-resolution image from just a single light sensor. If you scan and rotate this ‘blocking arm’ across the sensor’s field of view, reconstructing the image is called a Radon transform, something [Ben] has used a few times in his studies.

camera [Ben]’s camera consists of the Adafruit RGB light sensor, an Arduino, a microSD card, a few servos, and a bunch of printed parts. The servos are used to scan and rotate the ‘blocking arm’ across the sensor for each image. The output of the sensor is saved to the SD card and moved over to the computer for post-processing.

After getting all the pixel data to his laptop, [Ben] plotted the raw data. The first few pictures were of a point source of light – a lamp in his workspace. This resulted in exactly what he expected, a wave-like line on an otherwise blank field. The resulting transformation kinda looked like the reference picture, but for better results, [Ben] turned his camera to more natural scenes. Pointing his single pixel camera out the window resulted in an image that looked like it was taken underwater, through a piece of glass smeared with Vaseline. Still, it worked remarkably well for a single pixel camera. Taking his camera to the great outdoors provided an even better reconstructed scene, due in no small part to the great landscapes [Ben] has access to.

camera dolly

Timelapse Photography On An Android-Powered Dolly

If you’re heading off on a trip to Alaska, you need to make sure you have plenty of supplies on hand for the wilderness that awaits. If you’re [Bryce], that supply list includes some interesting photography equipment, including a camera dolly that he made to take time-lapse video of the fantastic scenery.

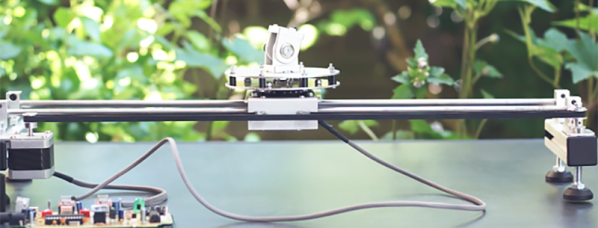
On the hardware side, the dolly carries the camera on a rail that is set up on a slant. The camera starts on one side and moves up and towards the otherside which creates a unique effect in the time-lapse. The rig is driven by a stepper motor, and rides on some pretty fancy bearings. The two cameras [Bryce] plans to use are a Canon T2i and a EOS-M which sit on the top from a tripod.

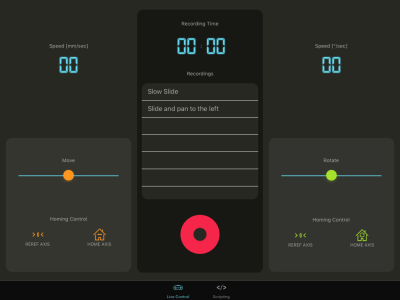
The software and electronics side is interesting as well. Instead of the usual Arduino, [Bryce] opted for controlling the rig through Android and a IOIO board. This gives the project a lot of options for communications, including Bluetooth. The whole thing is powered by a 19V battery pack. If you’re looking for something a little simpler, you might want to check out the egg timer for time lapse! Check out the video of [Bryce]’s rig in action after the break.

Continue reading “Timelapse Photography On An Android-Powered Dolly”

Photography Rig Captures Holy Grail Shots

You’ve seen amazing shots of water spouts and milk crowns. You’ve seen shots of bullets piercing glass ornaments, playing cards, and poor, defenseless pieces of fruit. Maybe you’ve even seen that holy grail of shots—a bullet piercing a water spout. But how is it done? How do photographers capture this two-headed mythical beast of high-speed photography? [Maurice] has cracked the code and shared it for all to see.

He uses a Camera Axe to trigger the camera, a device he came up with years ago that’s on its fifth version. His setup uses a 100mm macro lens, a key flash, and two fill flashes that sit behind a diffusing wall of whiteness. All three flashes are connected to a multi-flash board which feeds into Camera Axe. [Maurice] explains how he gets nice, tall water spouts by thickening it with xanthan gum. He adds Jet Dry to reduce the surface tension and some food coloring to keep things interesting.

[Maurice] also runs through his pellet shooting rig, which he made with some polyethylene tubing and an air compressor. He ended up shooting the pellets at 20psi, which sends them traveling at 75 feet per second. They move slowly enough that he can use his own stomach to stop them in the demonstration. Dialing in just the right settings to get the pellet to intersect the spout at the right time took some finagling, and that will hold true for anyone who attempts to recreate this setup. He gives a link to his code files in the video description to get you started. Video is after the break.

Continue reading “Photography Rig Captures Holy Grail Shots”