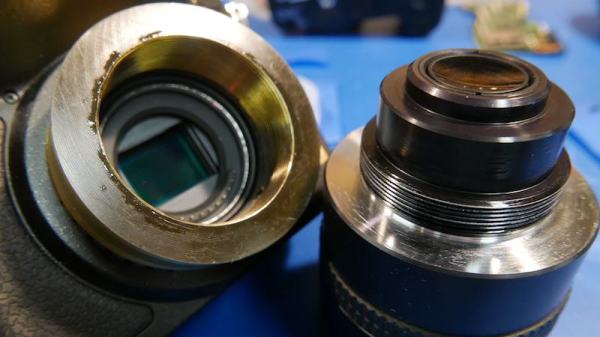
Anyone who is into photography knows that the lenses are the most expensive part in the bag. The larger the aperture or f-stop of the lens, the more light is coming in which is better for dimly lit scenes. Consequently, the price of the larger glass can burn a hole in one’s pocket. [Anthony Kouttron] decided that he could use a Rodenstock TV-Heligon lens he found online and adapt it for his micro four-third’s camera.
The lens came attached to a Fischer Imaging TV camera which was supposedly part of the Fluorotron line of systems used for X-ray imaging. We find [Anthony’s] exploration of the equipment, and discovery of previous hacks by unknown owners, to be entertaining. Even before he begins machining the parts for his own purposes, this is an epic teardown he’s published.
Since the lens was originally mounted on a brass part, [Anthony Kouttron] knew that it would be rather easy to machine the custom part to fit standardized lens adapters. He describes in detail the process for cleaning out the original mount by sanding, machining and threading it. Along the way you’ll enjoy his tips on dealing with a part that, instead of being a perfect circle on the outside, had a formidable mounting tab (which he no longer needed) protruding from one side.
The video after the break shows the result of shooting with a very shallow depth of field. For those who already have a manual lens but lack the autofocus motor, a conversion hack works like a charm as well.
Continue reading “X-Ray Imaging Camera Lens Persuaded To Join Micro Four Thirds Camera”

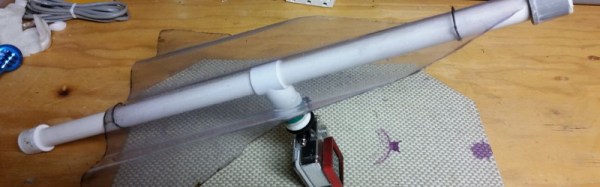
 The virtues of PVC pipe are many and varied. It’s readily available in all manner of shapes and sizes, and there’s a wide variety of couplers, adapters, solvents and glues to go with it. Best of all, you can heat it to a point where it becomes soft and pliable, allowing one to get a custom fit where necessary. [Brian] demonstrates this in using a heat gun to warm up a reducer to friction fit the DSLR lens mount. Beyond that, the mount uses a pair of lenses sourced from jeweller’s loupes to bring the image into focus on the camera’s sensor, mounted tidily inside the PVC couplers.