No Need To Buy A Woodchipper – Build One!

Polish YouTuber WorkshopFromScratch finally got fed up with tripping over piles of garden detritus and decided to have a go at building a woodchipper (Video, embedded below). Since they had a ‘small’ 1.5kW gearmotor just lying idle (as you do) it was an obvious fit for a machine that needs torque rather than supersonic speed. The video is a fabulous 20-minute journey through the workshop showing just about every conceivable metalworking tool being used at some point.
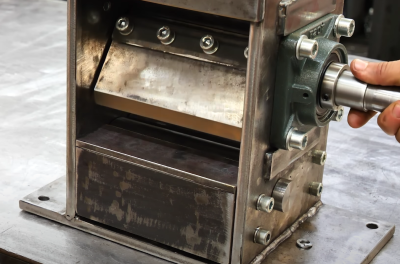
Checkout out the thickness of my blades!

One interesting point is the bottom roller, which sits between a pair of removable guides, which should help the thing self-feed without jamming. Whether that was necessary is not for us to judge, but it can’t hurt. The frame looks like it was constructed from at least 1/4″ thick steel, which is expensive if you don’t happen to have a supply to hand. There’s lots to see, everything from thin sheet metalworking, which was plasma cut, constructing the feed and exhaust guides, to box sections being skilfully welded at some interesting angles to make a cart to move the thing. They tell us the blades were constructed from some seriously thick slabs of C45 grade steel, but currently are not hardened. This is planned for the future, but we suspect not something that is easily achieved in the home workshop!

If this channel is familiar, then you might remember the earlier stump grinder they built. If you are drowning in sawdust, but have a log burner, then you’ll appreciate this sawdust briquette machine.

Continue reading “No Need To Buy A Woodchipper – Build One!”

ESP32 Rover With PCB Chassis Is Ready To Roll

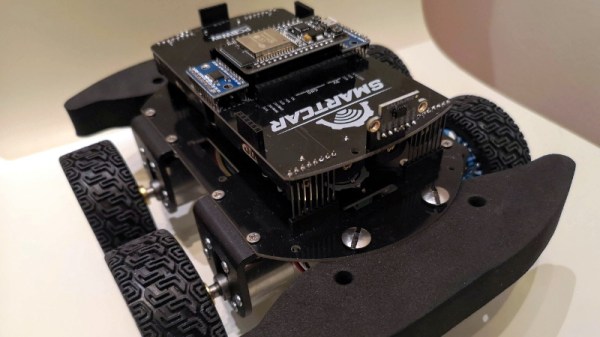
The microcontrollers are cheap, the sensors are cheap, even the motors are cheap. So why are all the good wheeled robotics platforms so expensive? [Dimitris Platis] wanted to develop an affordable platform for experimenting with rovers, but the cheap plastic chassis he was using gave him all sorts of problems. So he did what any good hacker would do, and built a better version himself.

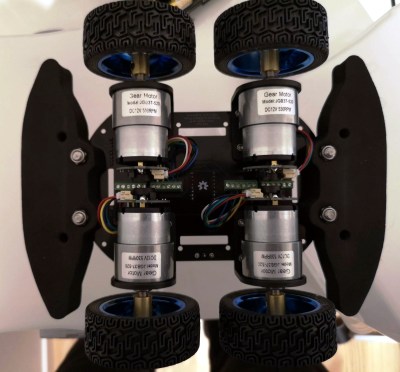
Interestingly, [Dimitris] decided to go with a chassis made from two PCB panels. The motors, mounted to small angled brackets, bolt directly to the lower PCB. These aren’t your standard $2 DC cans either. Each JGB37-520 gearhead motor comes complete with an encoder that allows your software to determine speed, distance, and direction. The upper PCB connects to the lower with several rows of pin headers, and plays host to whatever electronics payload you might be experimenting with at the time.

For the controller, [Dimitris] says the ESP32 is hard to beat by pretty much any metric you want to use. With integrated wireless and considerable computational power, there’s plenty of options for controlling your little rover either remotely or autonomously. But he also says that every effort has been made to ensure that you could switch out the microcontroller with something else should you want to spin up a customized version.

The whole idea reminds us a bit of quadcopters we’ve seen in the past, where the PCB wasn’t just being used structurally as a place to bolt the motors and hardware to, but actually contained functional traces and components that reduced how much wiring you needed to do. Naturally, this means that any damage to the chassis might cripple the electronics, but presumably, that’s what the big foam bumpers are there for.

[Dimitris] designed this project for educational use, so he assumes you’ll want to build 10 or 12 of these for your whole classroom. In those quantities, he says each bot will cost around $60. If you wanted to reduce the price a bit more, he says swapping the motors would be your best bet as they’re the single most expensive component of the design. That said, $60 for a quality open source rover platform sounds pretty fair to us.

Still too much? You could check out one of the 3D printable rover designs we’ve covered over the years. Or see if you can get lucky and pick up a cheap robot from the clearance rack and hack it.

Motorizing An IKEA SKARSTA Table

We’ve been told that standing at a desk is good for you, but unless you’re some kind of highly advanced automaton you’re going to have to sit down eventually no matter what all those lifestyle magazines say. That’s where desks like the IKEA SKARSTA come in; they use a crank on the front to raise and lower the desk to whatever height your rapidly aging corporeal form is still capable of maintaining. All the health benefits of a standing desk, without that stinging sense of defeat when you later discover you hate it.

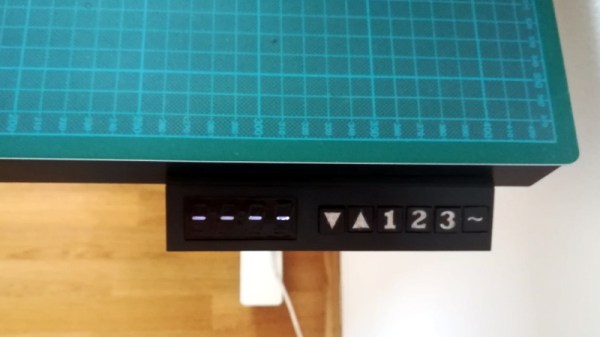
But who wants to turn a crank with their hand in 2019? Certainly not [iLLiac4], who’s spent the last few months working in conjunction with [Martin Mihálek] to add some very impressive features to IKEA’s adjustable table. Replacing the hand crank with a motorized system which can do the raising and lifting was only part of it, the project also includes a slick control panel with a digital display that shows the current table height and even allows the user to set and recall specific positions. The project is still in active development and has a few kinks to work out, but it looks exceptionally promising if you’re looking to get a very capable adjustable desk without breaking the bank.

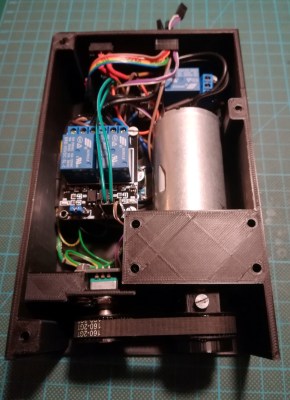
The heart of the project is a 3D printable device which uses a low-RPM DC gear motor to turn the hex shaft where the crank would normally go. A rotary encoder is linked to the shaft of the motor by way of printed GT2 pulleys and a short length of belt, which gives the system positional information and avoids the complexity of adding limit switches to the table itself.

For controlling the motor the user is given the option between using relays or an H-Bridge PWM driver board, but in either event an Arduino Nano will be running the show. In addition to controlling the motor and reading the output of the rotary encoder, the Arduino also handles the front panel controls. This consists of a TM1637 four digit LED display originally intended for clocks, as well as six momentary contact tactile switches complete with 3D printed caps. The front panel’s simple user interface not only allows for setting and recalling three preset desk heights, but can even be used to perform the calibration routine without having to go in and hack the source code to change minimum and maximum positions.

We’ve seen all manner of hacks and modifications dealing with IKEA products, from a shelving unit converted into a vivarium to a table doing double duty as a cheap plate reverb. Whether you’re looking for meatballs or some hacking inspiration, IKEA seems to be the place to go.

Ease Rover Development With These Self-Contained Track Units

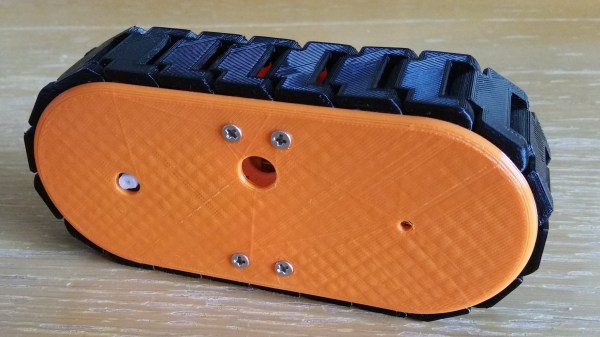
Tracked drive systems are great, but implementation isn’t always easy. That’s what [nahueltaibo] found every time he tried to use open sourced track designs for his own rovers. The problem is that a tracked drive system is normally closely integrated with a vehicle’s chassis, mixing and matching between designs is impractical because the tracks and treads aren’t easily separated from the rest of the vehicle.

To solve this, [nahueltaibo] designed a modular, 3D printable rover track system. It contains both a motor driver and a common DC gearmotor in order to make a standalone unit that can be more easily integrated into other designs. These self-contained rover tracks don’t even have a particular “inside” or “outside”; they can be mounted on a vehicle’s left or right without any need to mirror the design. The original CAD design is shared from Fusion 360, but can also be downloaded from Thingiverse. A bit more detail is available from [nahueltaibo]’s blog, where he urges anyone who tries the design or finds it useful to share a photo or two.

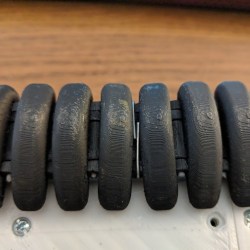
3D printed tank tracks — including this one — often use a piece of filament as a hinge between track segments and sometimes slightly melted on the ends to act as a kind of rivet, which is itself a pretty good hack.

3D Printed Tank Has Slick Tread Design

Tank projects are great because while every tank design is the same in a fundamental way, there’s nevertheless endless variety in the execution and results. [Hoo Jian Li]’s 3D Printed Tank is smartly laid out and has an unusual tank tread that shows off some slick curves.

The tank itself is remotely controlled over Bluetooth with a custom controller that uses the common HC-05 Bluetooth radio units. The treads are driven by four hobby gearmotors with custom designed wheels, and run over an idler wheel in the center of the body. There isn’t any method of taking up slack in the track and a ripple in the top surface of the track is visible as it drives, but the tank is small enough that it doesn’t seem to mind much. STL files and source code is available on GitHub; unfortunately the repository lacks a wiring diagram but between the low component count, photos, and source code that’s not a show-stopper.

Tank treads see a lot of variation, from 3D printed designs for tracks that use a piece of filament as hinges to an attempt to use a conveyor belt as a tank tread for a go-kart. Some tank projects even eschew treads altogether and go for a screw drive.

Camera Slider Helps Get The Shots With E-Waste Controller

A camera slider is an accessory that can really make a shot. But when your business is photography rather than building camera accessories, quick-and-dirty solutions often have to suffice. Thus the genesis of this camera slider controller.

The photographer in question in [Paulo Renato], and while his passion may be photography, he seems to have a flair for motorized dollies and sliders. This controller is a variable-speed, reversible, PIC-based design that drives an eBay gearmotor. The circuit lives on a scrap of perfboard, and it along with batteries and a buck converter are stuffed into the case-modded remains of an old KVM switch. Push buttons salvaged from another bit of e-waste act as limit switches, and a little code provides the magic. We like the hacked nature of the controller, but we wonder about the wisdom of using the former KVM’s USB ports to connect the controller to the drivetrain; it’s all fun and games until you plug a real USB device into it. In sum, though, a nice build with nice results. Check out his other videos for more on the mechanicals.

Camera slider rigs aplenty have graced our pages, including one made mostly of wood and one controlled by a fancy iPad app.

Continue reading “Camera Slider Helps Get The Shots With E-Waste Controller”

DC Gearmotor Teardown

dcmotor

The RepRap project has made heavy use of the Solarbotics GM3 Gearmotor as part of their extruders. Unfortunately they’ve proven to be underpowered for the task and the plastic gears could cause future problems. [Zach] decided to investigate some other options. He bought a pile of motors from Kysan to try out. He posted a teardown of one of the motors on Flickr. He found it not only easy to disassemble, but the metal gears were also easy to put back together. Next up is testing it on the machine.