FPGA Breakout Board For DIP Package Shenanigans

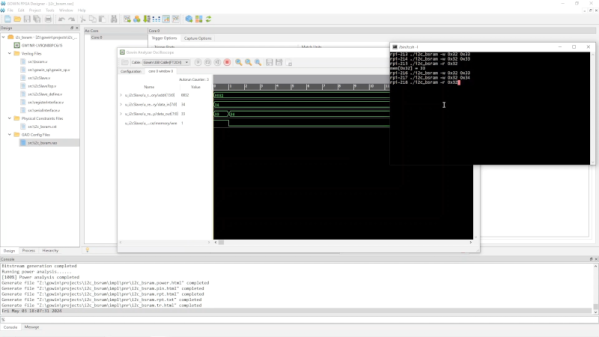
FPGAs are supremely flexible and powerful devices. However, they usually come in QFP or BGA packages that are altogether difficult for hobbyists to play with. The DIP-FPGA breakout board aims to solve that problem by using a carrier PCB to put an advanced chip in a friendlier form factor.

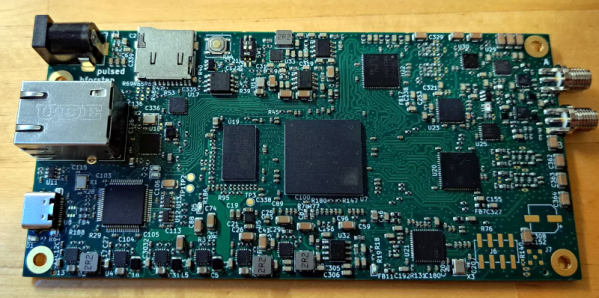
The board itself fits a DIP-20 form factor when soldered up with regular-pitch pin headers. It features a  MachXO2-1200HC FPGA from Lattice Semiconductor. That’s the same chip as used on similar the TinyFPGA A2. With 18 GPIO, a DIP-20 layout is just about enough pins to take care of business. It’s intended specifically for use on breadboards or via regular IC sockets. There’s also a six-pin programming port laid out on the board that you can use with pogo pins or header connectors as you desire.

If you want to do some fancy signal stuff in an easy-to-prototype form factor, this could be the setup for you. If you want to buy one ready-made, they’re available on Tindie for the curious. In the meantime, consider whether this beefy FPGA Arduino concept could also propel your next project to greater heights.

Creating Lithography-Free Photonic Reprogrammable Circuits

The field of photonics has seen significant advances during the past decades, to the point where it is now an integral part of high-speed, international communications. For general processing photonics is currently less common, but is the subject of significant research. Unlike most photonic circuits which are formed using patterns etched into semiconductor mask using lithography, purely light-based circuits are a tantalizing possibility. This is the focus of a recent paper (press release, ResearchGate) in Nature Photonics by [Tianwei Wu] and colleagues at the University of Pennsylvania.

What is somewhat puzzling is that despite the lofty claims of this being ‘the first time’ that such an FPGA-like device has been created for photonics, this is far from the case, as evidenced by e.g. a 2017 paper by [Kaichen Dong] and colleagues (full  article PDF) in Advanced Materials. Here the researchers used a slab of vanadium dioxide (VO2) with a laser to heat sections to above 68 °C where the material transitions from an insulating to a metallic phase and remains that way until the temperature is lowered again. The μm-sized features that can be created in this manner allow for a wide range of photonic devices to be created.

A rewritable metacanvas. a) Schematic of laser writing different photonic operator patterns on a metacanvas. b) Temperature-dependentresistance of a VO2 film. c) Optical images from writing and erasing process on the metacanvas. . d) Diagram showing the mathematical matrix (F) is compiled onto a metacanvas in the form of a photonic operator for manipulation of light waveform (I ). e) Schematic of a metacanvas programmed as a beam steerer with a steering angle ϕ. (Credit: Dong et al., 2018)
A rewritable metacanvas. a) Schematic of laser writing different photonic operator patterns on a metacanvas. b) Temperature-dependent resistance of a VO2 film. c) Optical images from writing and erasing process on the metacanvas. . d) Diagram showing the mathematical matrix (F) is compiled onto a metacanvas in the form of a photonic operator for manipulation of light waveform. e) Schematic of a metacanvas programmed as a beam steerer with a steering angle ϕ. (Credit: Dong et al., 2018)

What does appear to be different with the photonic system presented by [Wu] et al. is that it uses a more traditional 2D approach, with a slab of InGaAsP on which the laser pattern is projected. Whether it is more versatile than other approaches remains to be seen, with the use of fully photonic processors in our computers still a long while off, never mind photonics-accelerated machine learning applications.

Bringing The PIO To The FPGA

We’ve seen some pretty incredible hacks using the Raspberry Pi 2040. However, one of the most exciting bits of hardware onboard is the Programmable I/O (PIO). Not content with it just being a part of RP2040-based projects, [Lawrie Griffiths] has been porting the PIO to Verilog so anyone can enjoy it.

This particular implementation is based only on the spec that Raspberry Pi provides. For assembling PIO code, [Lawrie] uses Adafruit’s pioasm assembler they use for their MicroPython framework. There’s a simulator to test different programs, and the project targets the Blackice MX and the Ulx3s. A few example programs are included in the repo, such as outputting a pleasant guitar note over I2S and driving a chain of WS2812s.

The project is still incomplete but slowly making progress. It’s an incredible feat of reverse engineering. While the simulator can be used to debug programs, step through instructions, and inspect waveforms, the ultimate value of bringing the PIO to other systems is that now we can re-use the code. Things like the can2040, an implementation of the CAN bus protocol using the PIO. Or even a PIO-based USB host.

Interlaken Want To Connect All The Chips

One of the problems with designing things on a chip is finding a good way to talk to the outside world. You may not design chips yourself, but you care because you want to connect your circuits — including other chips — to the chips in question. While I2C and SPI are common solutions, today’s circuits are looking for more bandwidth and higher speeds, and that’s where Interlaken comes in. [Comcores] has an interesting post on the technology that blends the best of SPI 4.2 and XAUI.

The interface is serial, as you might expect. It can provide both high-bandwidth and low-latency multi-channel communications. Interlaken was developed by Cisco and Cortina Systems in 2006 and has since been adopted by other industry-leading companies. Its latest generation supports speeds as high as 1.2 Tbps.

Continue reading “Interlaken Want To Connect All The Chips”

An Open Hardware Eurorack Compatible Audio FPGA Front End

[Sebastian Holzapfel] has designed an audio frontend (eurorack-pmod) for FPGA-based audio applications, which is designed to fit into a standard Eurorack enclosure. The project, released under CERN Open-Hardware License V2, is designed in KiCAD using the AK4619VN four-channel audio codec by Asahi Kasei microdevices. (And guess what folks, there’s plenty of those in stock!) Continue reading “An Open Hardware Eurorack Compatible Audio FPGA Front End”

Arduino Does SDI Video With FPGA Help

If you are running video around your home theater, you probably use HDMI. If you are running it in a professional studio, however, you are probably using SDI, Serial Digital Interface. [Chris Brown] looks at SDI and shows a cheap SDI signal generator for an Arduino.

On the face of it, SDI isn’t that hard. In fact, [Chris] calls it “dead simple.” The problem is the bit rate which can be as high as 1.485 Gbps for the HD-SDI standard. Even for a super fast processor, this is a bit much, so [Chris] turned to the Arduino MKR Vidor 4000. Why? Because it has an FPGA onboard. Alas, the FPGA can’t do more than about 200 MHz, but that’s fast enough to drive an external Semtech GS296t2 serializer which is made to drive SDI signals.

The resulting project contains the Arduino, the serializer, a custom PCB, and both FPGA and microcontroller code. While the total cost of the project was a little under $200, that’s still better than the $350 to $2000 for a commercial SDI signal generator.

If you want to play along, the files are out on GitHub. We used the Vidor back in 2018 when it first came out. If you need a quick start on FPGAs, there’s always our boot camp.

Fixing An HP 54542C With An FPGA And VGA Display

Although the HP 54542C oscilloscope and its siblings are getting on in years, they’re still very useful today. Unfortunately, as some of the first oscilloscopes to switch from a CRT display to an LCD they are starting to suffer from degradation. This has led to otherwise perfectly functional examples being discarded or sold for cheap, when all they need is just an LCD swap. This is what happened to [Alexander Huemer] with an eBay-bought 54542C.

Although this was supposed to be a fully working unit, upon receiving it, the display just showed a bright white instead of the more oscilloscope-like picture. A short while later [Alexander] was left with a refund, an apology from the seller and an HP 54542C scope with a very dead LCD. This was when he stumbled over a similar repair by [Adil Malik], right here on Hackaday. The fix? Replace the LCD with an FPGA and VGA-input capable LCD.

While this may seem counter intuitive, the problem with LCD replacements is the lack of standardization. Finding an 8″, 640×480, 60 Hz color LCD with a compatible interface as the one found in this HP scope usually gets you salvaged LCDs from HP scopes, which as [Alexander] discovered can run up to $350 and beyond for second-hand ones. But it turns out that similar 8″ LCDs are found everywhere for use as portable displays, all they need is a VGA input.

Taking [Adil]’s project as the inspiration, [Alexander] used an UPduino v3.1 with ICE40UP5K FPGA as the core LCD-to-VGA translation component, creating a custom PCB for the voltage level translations and connectors. One cool aspect of the whole system is that it is fully reversible, with all of the original wiring on the scope and new LCD side left intact. One niggle was that the scope’s image was upside-down, but this was fixed by putting the new LCD upside-down as well.

After swapping the original cooling fan with a better one, this old HP 545452C is now [Alexander]’s daily scope.