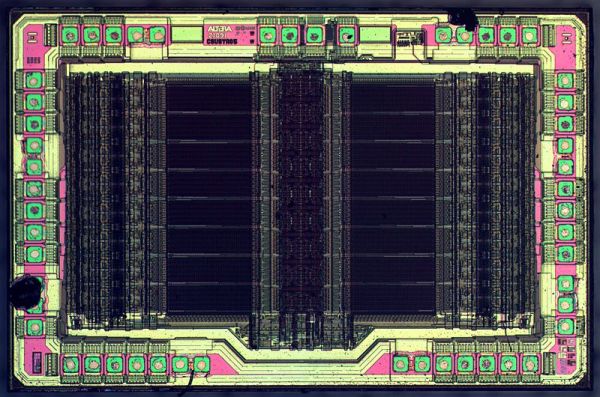
Die of an Altera EPM7032 EEPROM-based Complex Programmable Logic Device (CPLD). (Credit: ZeptoBars, Wikipedia)

Using EPROMS And EEPROMs As Programmable Logic With Lisp

That EPROMs, EEPROMs and kin can be used as programmable logic should probably not come as a major surprise, but [Jimmy] has created a Lisp-based project that makes using these chips as a logic array very straightforward. All it takes is importing the package into one’s Lisp project and defining the logic, before the truth function generates the binary file that can be written to the target chip.

Suggested is the one-time-programmable AT27C512R EPROM (64k x8), but any 8-bit parallel interface (E)EPROM should work, with non-OTP chips being nice unless the chip has to go into a production device. A possible future improvement is the addition of 16-bit (E)EPROM support.

The use of EEPROMs is common with PLA-replacements, as with, for example, the Commodore 64, where the official PLA IC tends to go bad over time. Due to the complexity of the logic in these PLA ICs, here CPLDs are used, which internally are still EEPROM-based, but feature many more programmable elements to allow for more complex logic. If all you need is a bit of glue logic and you are looking for something in between a stack of 74-logic ICs and a CPLD, an EEPROM may be just be the solution, regardless of whether you prefer to create the binary image with Lisp or C.

Continue reading “Using EPROMS And EEPROMs As Programmable Logic With Lisp”

EcoEDA Integrates Your Junk Bin Into Your Designs

If you’re like us, there’s a creeping feeling that comes over you when you’re placing an order for parts for your latest project: Don’t I already have most of this stuff? With the well-stocked junk bins most of us sport and the stacks of defunct electronics that are almost always within arm’s length, chances are pretty good you do. And yet, we always seem to just click the button and place a new order anyway; it’s just easier.

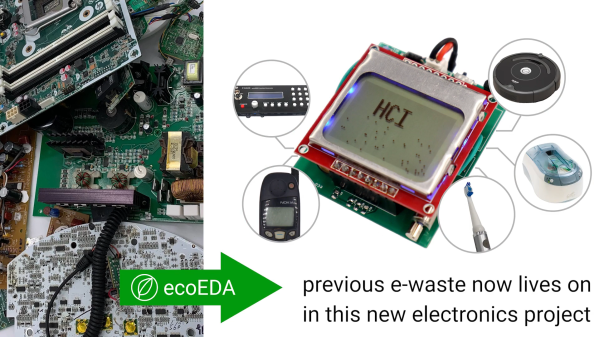
But what if mining the treasure in your junk bin was easier? If you knew right at design time that you had something in your stash you could slot into your build, that would be something, right? That’s the idea behind ecoEDA, a Python-based KiCAD plugin by [Jasmine Lu], [Beza Desta], and [Joyce Passananti]. The tool integrates right into the schematic editor of KiCAD and makes suggestions for substitutions as you work. The substitutions are based on a custom library of components you have on hand, either from salvaged gear or from previous projects. The plug-in can make pin-for-pin substitutions, suggest replacements with similar specs but different pinouts, or even build up the equivalent of an integrated circuit from available discrete components. The video below gives an overview of the tool and how it integrates into the design workflow; there’s also a paper (PDF) with much more detail.

This seems like an absolutely fantastic idea. Granted, developing the library of parts inside all the stuff in a typical junk bin is likely the biggest barrier to entry for something like this, and may be too daunting for some of us. But there’s gold in all that junk, both literally and figuratively, and putting it to use instead of dumping it in a landfill just makes good financial and environmental sense. We’re already awash in e-waste, and anything we can do to make that even just a little bit better is probably worth a little extra effort. Continue reading “EcoEDA Integrates Your Junk Bin Into Your Designs”

“Cheap Yellow Display” Builds Community Through Hardware

For the most part, Hackaday is all about hardware hacking projects. Sometimes, though, the real hack in a project isn’t building hardware, but rather building a community around the hardware.

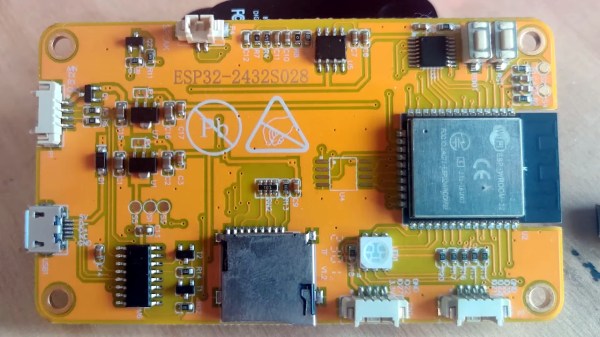
Case in point: [Brian Lough]’s latest project, which he dubs “CYD,” for the “cheap yellow display” that it’s based on; which is a lot easier to remember than its official designation, ESP32-2432S028R. Whatever you call it, this board is better than it sounds, with an ESP32 with WiFi, Bluetooth, a 320×480 resistive touch screen, and niceties like USB and an SD card socket — all on aforementioned yellow PCB. The good news is that you can get this thing for about $15 on Ali Express. The bad news is that, as is often the case with hardware from the Big Rock Candy Mountain, the only documentation available comes from a website we wouldn’t touch with a ten-foot pole.

To fix this problem, [Brian] started what he hopes will be a collaborative effort to build a knowledge base for the CYD, to encourage people to put these little gems to work. He has already kick-started that with a ton of quality documentation, including setup and configuration instructions, tips and gotchas, and some sample projects that put the CYD’s capabilities to the test. It’s all on GitHub and there’s already at least one pull request; hopefully that’ll grow once the word gets out.

Honestly, these look like fantastic little boards that are a heck of a bargain. We’re thinking about picking up a few of these while they last, and maybe even getting in on the action in this nascent community. And hats off to [Brian] for getting this effort going.

Continue reading ““Cheap Yellow Display” Builds Community Through Hardware”

Brick-Laying Machine Builds Without Mortar

Move over, 3D printed houses. There’s a new game in town, and it is able to use standard concrete blocks to build the walls of a house in just one day.

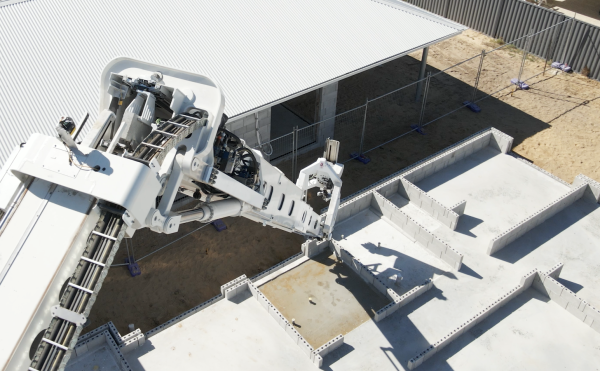
Australian company FBR’s Hadrian X is a tablet-controlled system that follows CAD models to lay the blocks one by one. As you can see in the video after the break, the blocks are laid so quickly that there’s no time for mortar, so they dip the bottom of each block in construction adhesive instead. In the second video after the break, you can watch Hadrian-X build a curved wall.

There are several things to consider when it comes to outdoor robots, such as wind and unwanted vibration. In order to correct for these nuisances, FBR came up with Dynamic Stabilisation Technology (DST). While we don’t have a lot of details on DST, the company calls it “a highly accurate system that continuously adjusts the position of a robot’s end effector to ensure it is always held with stability at the correct point in 3D space.”

Curious about printed housing? Here’s the current-ish state of affairs.

Continue reading “Brick-Laying Machine Builds Without Mortar”

Open Source Key Programmer For HiTag2 Keys

Hitag transponders have been used in a wide variety of car keys as a protective measure against hot-wiring and theft. They’re also a reason why it’s a lot more expensive to get car keys duplicated these days for many models that use this technology. However, there is now an open source programmer that works with these transponder keys, thanks to [Janne Kivijakola].

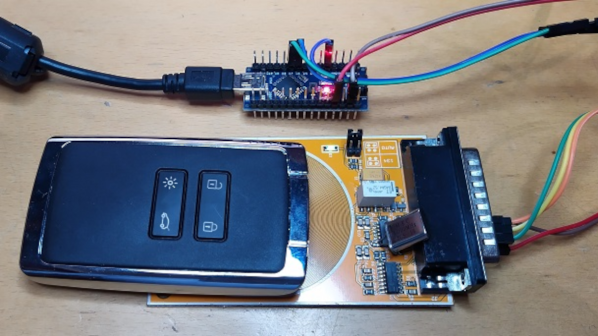
The hack uses an old reader device salvaged from a Renault in a scrapyard, hooked up to an Arduino Mega 2560 or Arduino Nano. With this setup, key transponders can be programmed via a tool called AESHitager, which runs on Windows. It’s compatible with a variety of Hitag transponders, including Hitag2, Hitag3, and Hitag AES, along with the VVDI Super Chip and certain types of BMW keys.

If you’ve been having issues with coded keys, this project might just be what you need to sort your car out. Everything you need is available on GitHub for those wishing to try this at home. We’ve seen some interesting hacks in this space before, too. Video after the break.

Continue reading “Open Source Key Programmer For HiTag2 Keys”

Impostor Syndrome: It’s Not Your Fault!

[Crispernaki] and I have something in common. We both saw this awesome project that made a scroll wheel out of a VHS head back in 2010, and wanted to make one. We both wanted to put our own spin on the gadget, (tee-hee), discovered that it was harder than either of us wanted to commit to, and gave up.

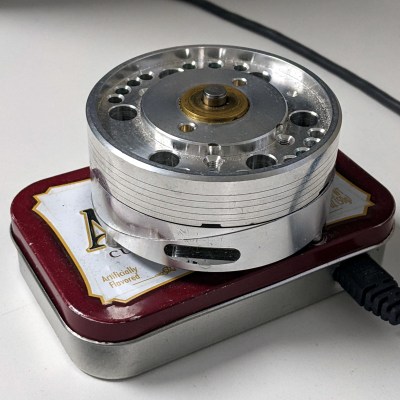
Flash forward about a million Internet years, and [crispernaki] finally made his and wrote it up. The only problem is that it was too easy. In 2010, making USB gadgets was a lot more involved than it is today. (Back then, we had to chisel device descriptors on stone tablets.) Nowadays, the firmware is just a matter of importing the right library, and the hardware is a magnetic rotation sensor breakout board, a magnet, and super glue. Cheap, and easy.

All of this led our hero to feeling insecure. After all, a hack that beat him a dozen years ago turned out to be dead easy today. Maybe it was too easy? Maybe he wasn’t a “real” hacker? These are the signs of impostor syndrome – that feeling that just because you aren’t the world’s best, or climbing the highest mountain, or hacking the hardest project, you’re not worthy.

Well, listen up. Impostors don’t finish projects, and impostors don’t write them up to share with all the rest of us. By actually doing the thing – hacking the hack – all chances of being a fake are ruled out. The proof is sitting there on your desk, in all its Altoids-tin glory.

And it’s not your fault that it was too easy this time around. You can’t do anything to turn back the hands of time, to make the project any harder these days, or to undo the decade of hacker technical progress on the software side, much less change the global economy to make a magnetic sensor unobtainable again. The world improved, you got your hack done, and that’s that. Congratulations! (Now where do I buy some of those on-axis magnets?)

Plasma Cutting And 3D Printing Team Up To Make Bending Thick Sheet Steel Easier

Metalworking has always been very much a “mixed method” art. Forging, welding, milling, grinding; anything to remove metal or push it around from one place to another is fair game when you’ve got to make something fast. Adding in fancy new tools like CNC plasma cutting and computer-aided drafting doesn’t change that much, although new methods often do call for a little improvisation.

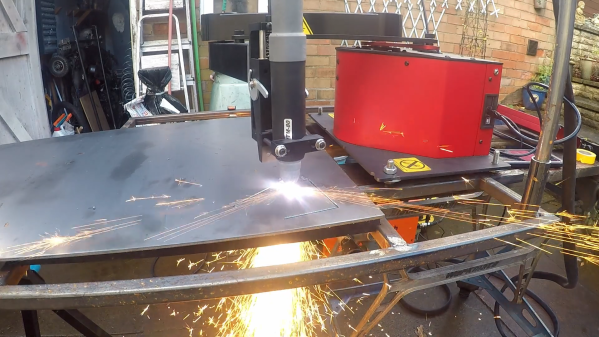
Getting several methodologies to work and play well together is what [tonygoacher] learned all about while trying to fabricate some brackets for an electric trike for next year’s EMF Camp. The parts would have been perfect for fabrication in a press brake except for the 4 mm thickness of the plate steel, which was a little much for his smallish brake. To make the bending a little easier, [tony] made a partial-thickness groove across the plasma-cut blank, by using a reduced power setting on the cutter. This worked perfectly to guide the brake’s tooling, but [tony] ran into trouble with more complicated bends that would require grooves on both sides of the steel plate.

His solution was to 3D print a couple of sacrificial guide blocks to fit the bed of the press brake. Each guide had a ridge to match up with a guide groove, this allowed him to cut his partial grooves for both bends on the same side of the plate but still align it in the press brake. Yes, the blocks were destroyed in the process, but they only took a few minutes to print, so no big deal. And it’s true that the steel tore a little bit when the groove ended up on the outside radius of the bend, but that’s nothing a bead of weld can’t fix. Good enough for EMF is good enough, after all.

The brief video below shows the whole process, including [tony]’s interesting SCARA-like CNC plasma cutter, which we’re a little in love with now. This isn’t the first time we’ve seen 3D prints used as tools in metalworking, of course, but we picked up some great tips from this one. Continue reading “Plasma Cutting And 3D Printing Team Up To Make Bending Thick Sheet Steel Easier”