How To Find WiFi: Carry A Big Stick And Use Long Exposures

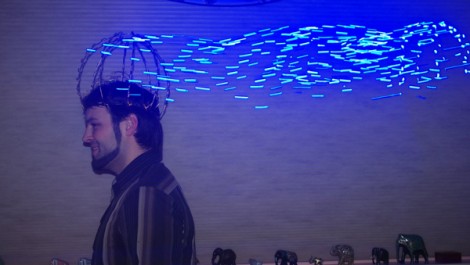
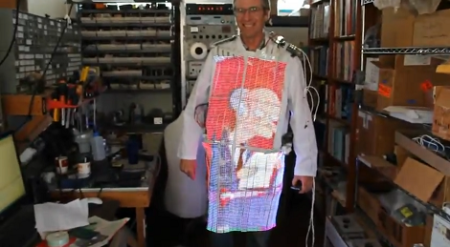
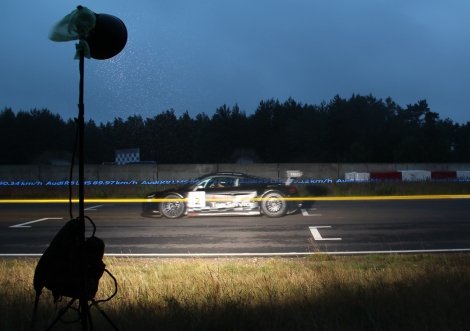
Here’s an artsy way to map out WiFi networks around you; use a big light pole and long exposures to graph them on top of photographs. This capture method is often called light painting, and uses the relative brightness of LEDs to stretch out a still image – moving the stick quickly while the shutter is open.

The four-meter tall rod used in this project plays host to 80 white LEDs. An Arduino along with a WiFi shield detect the relative signal strength of the network surrounding the device. The images that are produced with this method are quite pleasing and you’ll enjoy watching the video after the break. We just wish that there was some kind of Google Street View interface to share this data since someone had to go out pounding the pavement with the rather peculiar looking apparatus in order to gather the data in the first place.

Continue reading “How To Find WiFi: Carry A Big Stick And Use Long Exposures”

mirror_hud

Bathroom Mirror HUD Displays Time And Weather

By and large, the standard household mirror is one item that has not made much real progress over the years. They hang on the wall reflecting light, and that’s about it.

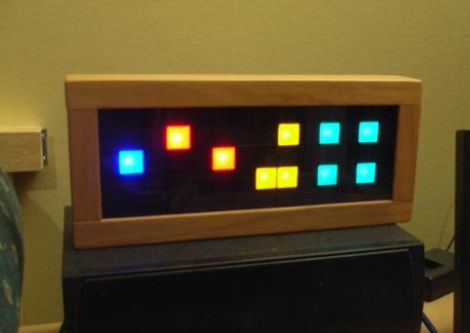
A few years back, some students studying in the Department of Interaction Design at Chalmers University sought to enhance their morning routine with an interactive mirror. Their project was constructed using a two-way mirror with several Arduino-driven LED displays embedded behind the glass. Once a hand is swiped past the pair of embedded light dependent resistors, the display is activated. Subsequent hand swipes trigger the mirror to toggle between the different modes, providing the user with the current time, weather information as well as a toothbrush timer.

The project writeup is quite thorough, including plenty of source code and information on some of the components they used. You can take a look at their work here (PDF).

Check out the interactive mirror we featured that served as inspiration for their project.

[Thanks Emil]

Continue reading “Bathroom Mirror HUD Displays Time And Weather”

Old School LED Light Show

programmable_lightshow

Building LED arrays that can display all sorts of different patterns is pretty easy these days. Hook up an Arduino, do some charlieplexing, and off you go. When [Viktor] was younger he didn’t have all those fancy schmancy microcontrollers and circuit simulation software you kids have these days. In fact, last we heard, he had to walk to school uphill both ways – in the snow.

That didn’t stop him from building this gem of a project back in 1987. His LED chaser/light show does not use any microcontrollers at all, rather it relies on an EPROM to store predefined display programs. A series of switches are installed on the front of the flasher, allowing him to easily switch between the programs, and a pot is mounted to the front of the device to control the speed of the LEDs.

His light show is pretty slick, even for a project built over 20 years ago. Sometimes you just can’t beat a good, old-school hack.

Continue reading for a video demonstration of [Viktor’s] programmable light show.

Continue reading “Old School LED Light Show”

Endless Fun With LED Dominoes

le_dominoux

Toppling dominoes is great fun for about 30 seconds at a time, when you are not busy setting them up for another run. [Randy] thought it was about time they got an electronic makeover to allow for constant, immediate gratification. Armed with a few simple electronic components, he has created Le Dominoux.

These LED-based electronic dominoes are actually quite simple to build. Each basic Le Dominoux is constructed on a small square of protoboard and consists of either a photo cell or phototransistor, a 555 timer, and an LED, all powered by a coin cell battery. The 555 timer, which is configured as a one-shot, is triggered when the photosensitive component on the back side of the domino is exposed to a bright enough light. The LED on the front end of the domino is then illuminated one time. This process is the electronic equivalent of a single domino toppling over.

He has constructed several variants of the Le Dominoux to act as flashing triggers, for outputting sound, as well as for turning tight corners. These variants allow the dominoes to be configured in many different ways, creating self-sustaining light shows. If anyone is looking for a fun project to introduce kids to electronics, this would definitely be it. Stick around to see a video of Le Dominoux in action – we bet you can’t stop watching it.

This is of course [Randy’s] entry in the 555 Design Contest, which ends tonight at midnight EST.

[Thanks Jeri]

Continue reading “Endless Fun With LED Dominoes”

Timed Shot-glass Won’t Let You Stop Drinking

[Drewbagd] was inspired by the 555 timer contest and decided to make this his very first electronics project. It’s an accessory for a drinking game called the Power Hour. The game (if you could call it that) consists of contestants drinking one shot of beer every minute for one hour. [Drewbagd] points out that timing the shots can be an issue and so he decided to augment each shot glass with its own timer.

He added a base that consists of a ring of LEDs surrounding a 555 timer and the cap and resistors. This causes the timer to oscillate from illuminated for a few seconds (drink) to dark for one minute (refill). He calls it the Powered Power Hour. The video after the break shows off the functionality, and it hints at a bright future for [Drewbagd] as an infomercial Emcee.

He’s got a supporting post that detail the electronics and outline some of the prototyping issues. We were happy to hear that when he got stuck he found help over on Hackaday’s forums. Thank you to all who participate in the community by sharing their knowledge.

Continue reading “Timed Shot-glass Won’t Let You Stop Drinking”

Kindle 3 Powers This Diy LED Light

ePaper displays are easy on the eyes because there’s no flickering backlight to put strain on them. This is great until you’re trying to read in a dim environment. Of course Amazon will sell you a backlight that’s powered from the reader itself if you’re willing to pay. [Txoof] thought the price was a bit too high so he built his own version.

There are two pockets in the top of the Kindle reader for hooks to grab onto. Each has an electrical contact in it and together they provide about 4V of power. To patch into that source [Txoof] cut his own hooks from brass stock and mounted them onto a piece of basswood. He then cut and bent a hood from more of the brass stock to house the LEDs. A series of three of the white diodes draw their power from the hooks and shine onto to the display. As you can see this works just fine, but could benefit from just the right diffuser.

Let There Be Light Inside Picture Frames

[Limpkin] picked up a beautiful painting of Budda while in Bali because he thought it would react well with different colors of lighting. His overall goal was to create a picture frame with built-in LEDs. The major design specification for the project was to provide an indirect light source that would not shine in the viewers eyes. He got down to business designing a frame using SolidWorks for his modelling. The final design has a separate track from the paining with small dividers for each diode.

After about four hours on the CNC machine it was time to get down to soldering. [Limpkin] had 576 RGB LEDs on hand. He’s not looking to drive them individually, just to have independent control of each color. This makes the soldering a bit easier as there will be just three MOSFETs to drive each color. The final product looks great and can display any mix of colored light. Not bad for 50 hours of soldering.